Adobe Creative Cloud (Windows EXE)
Description
This recipe walks through deploying an Adobe Creative Cloud for Windows package, created in the Adobe Admin Console, as a FileWave desktop Fileset.
Adobe's current packaging workflow is in Admin Console > Packages. Creative Cloud Packager is still referenced in some Adobe tools/documentation, but Adobe notes that Creative Cloud Packager is no longer in development and recommends using the package workflows in the Admin Console.
Ingredients
- FileWave Central
- Adobe Admin Console access with permission to create or download packages
- A Windows Adobe package from the Admin Console
Directions
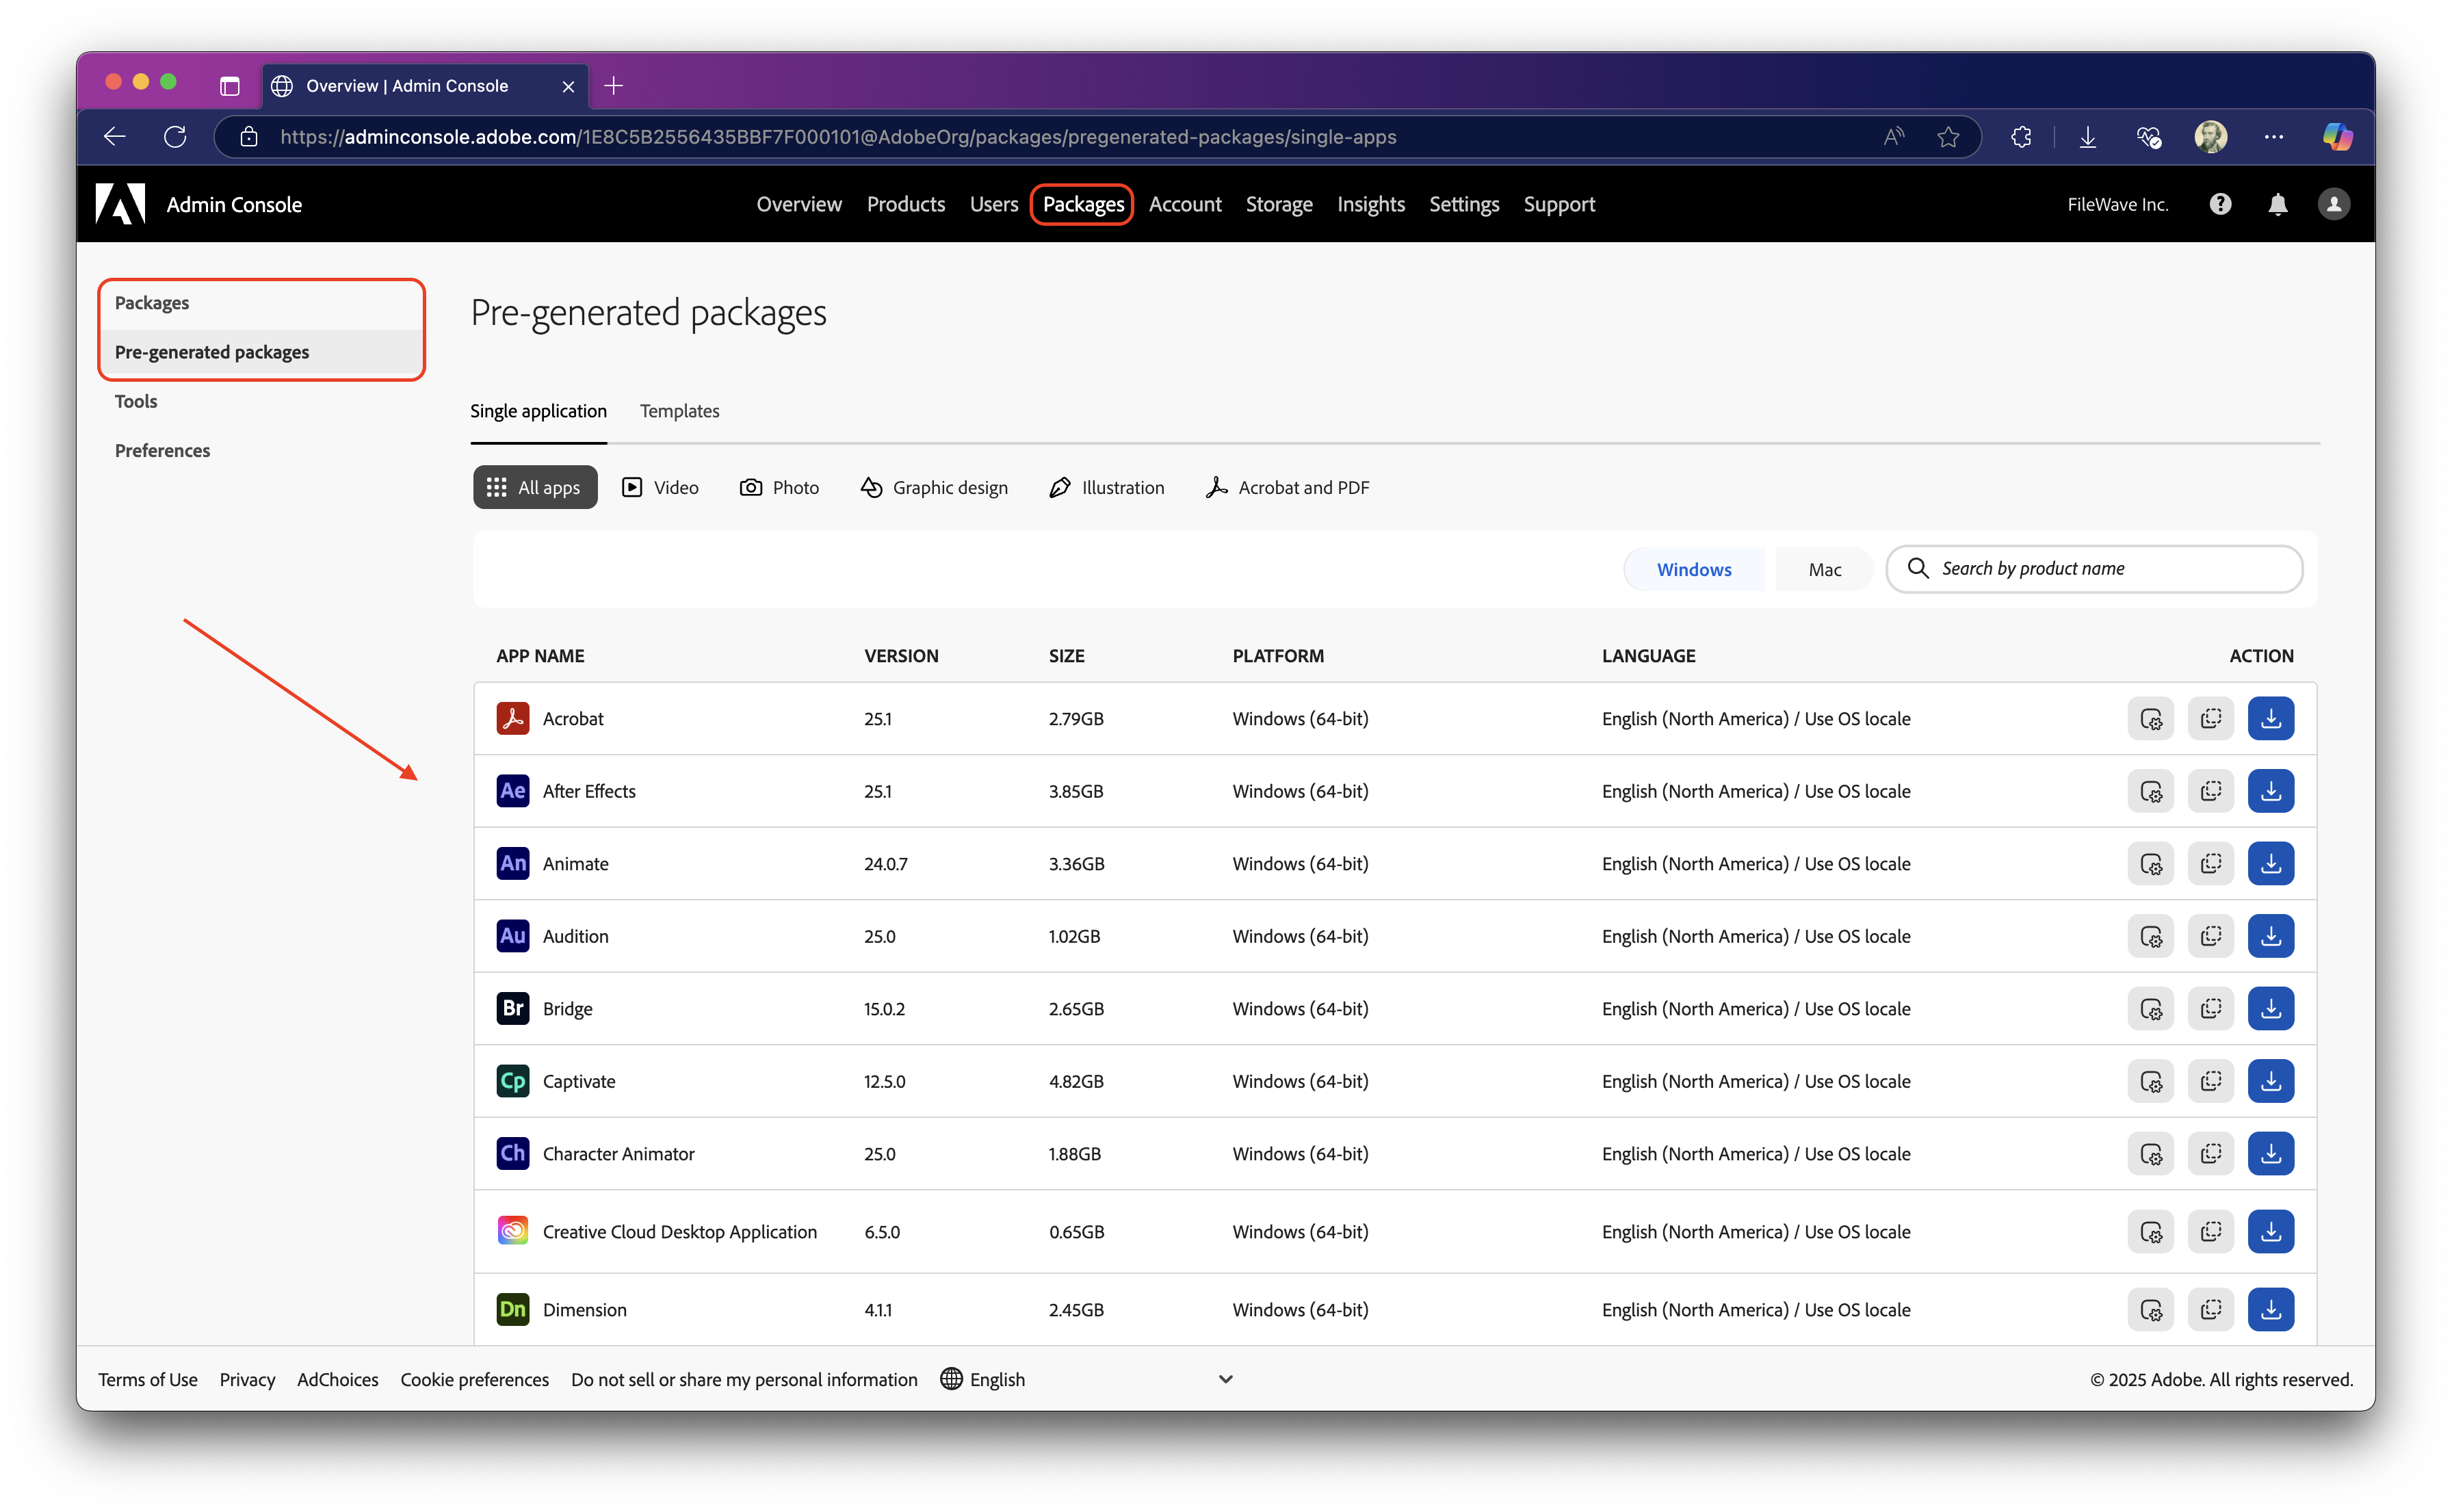
- Log in to the Adobe Admin Console and open Packages. The Admin Console is where Adobe manages packaging, product selection, and deployment settings for Creative Cloud enterprise/teams customers.
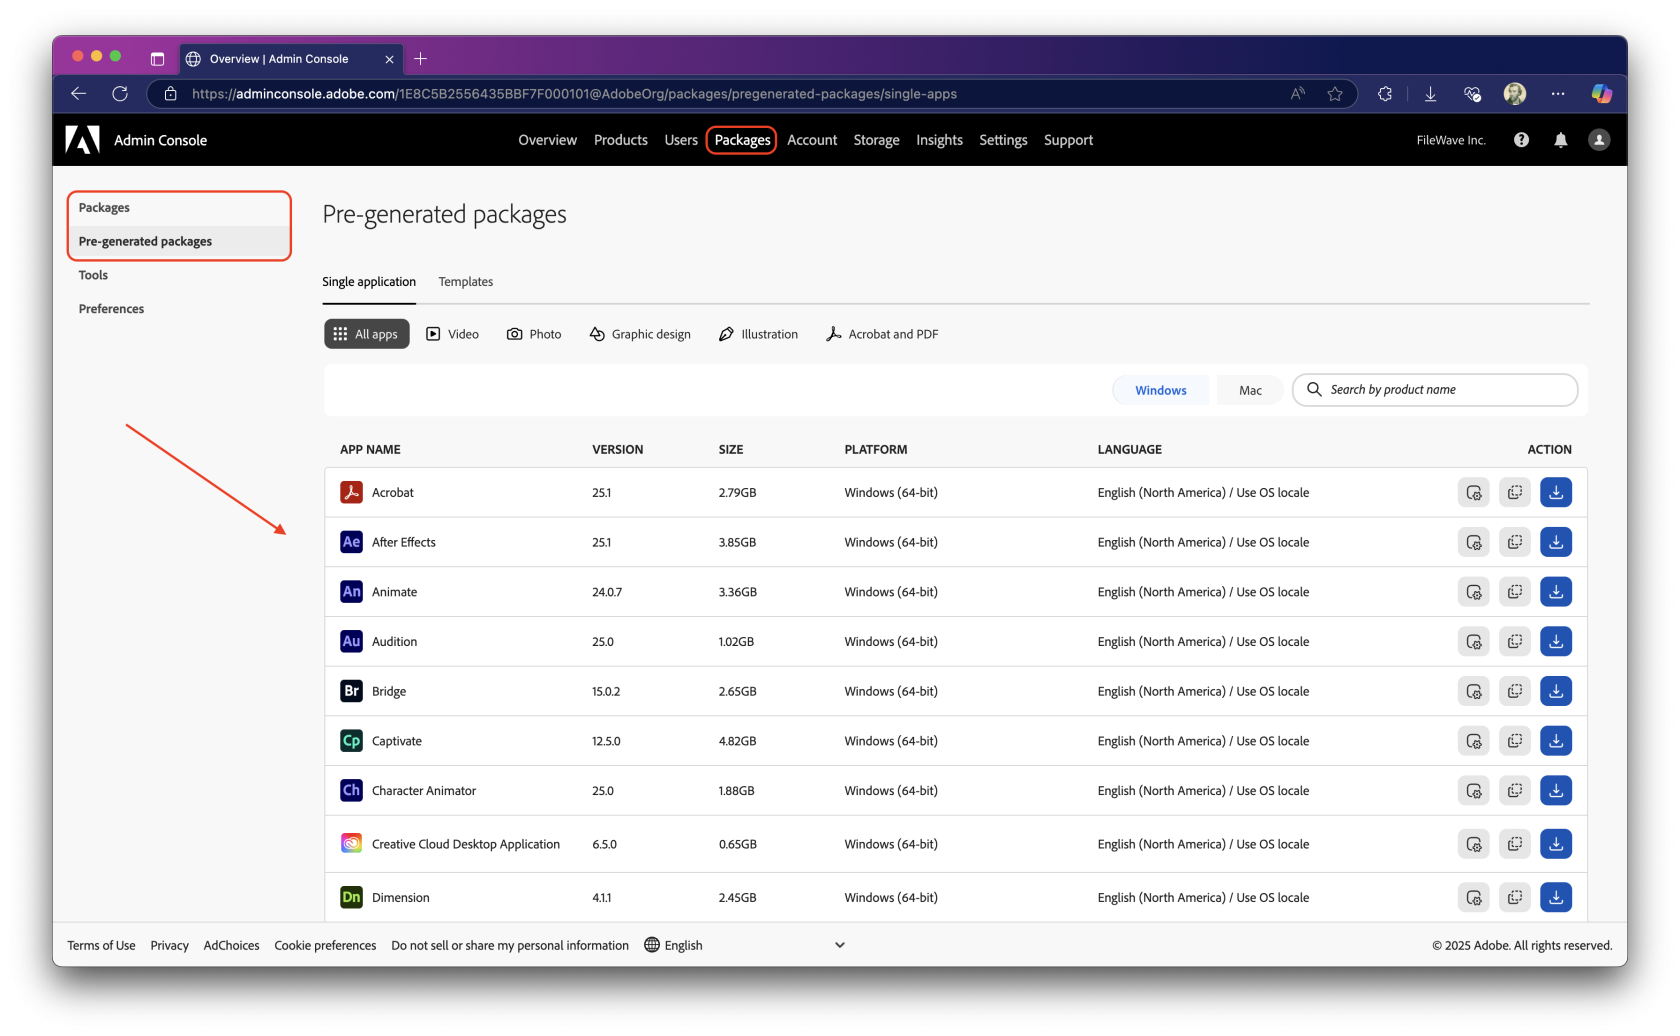
- Create or select the package you want to deploy. Choose Windows as the platform for a Windows deployment.
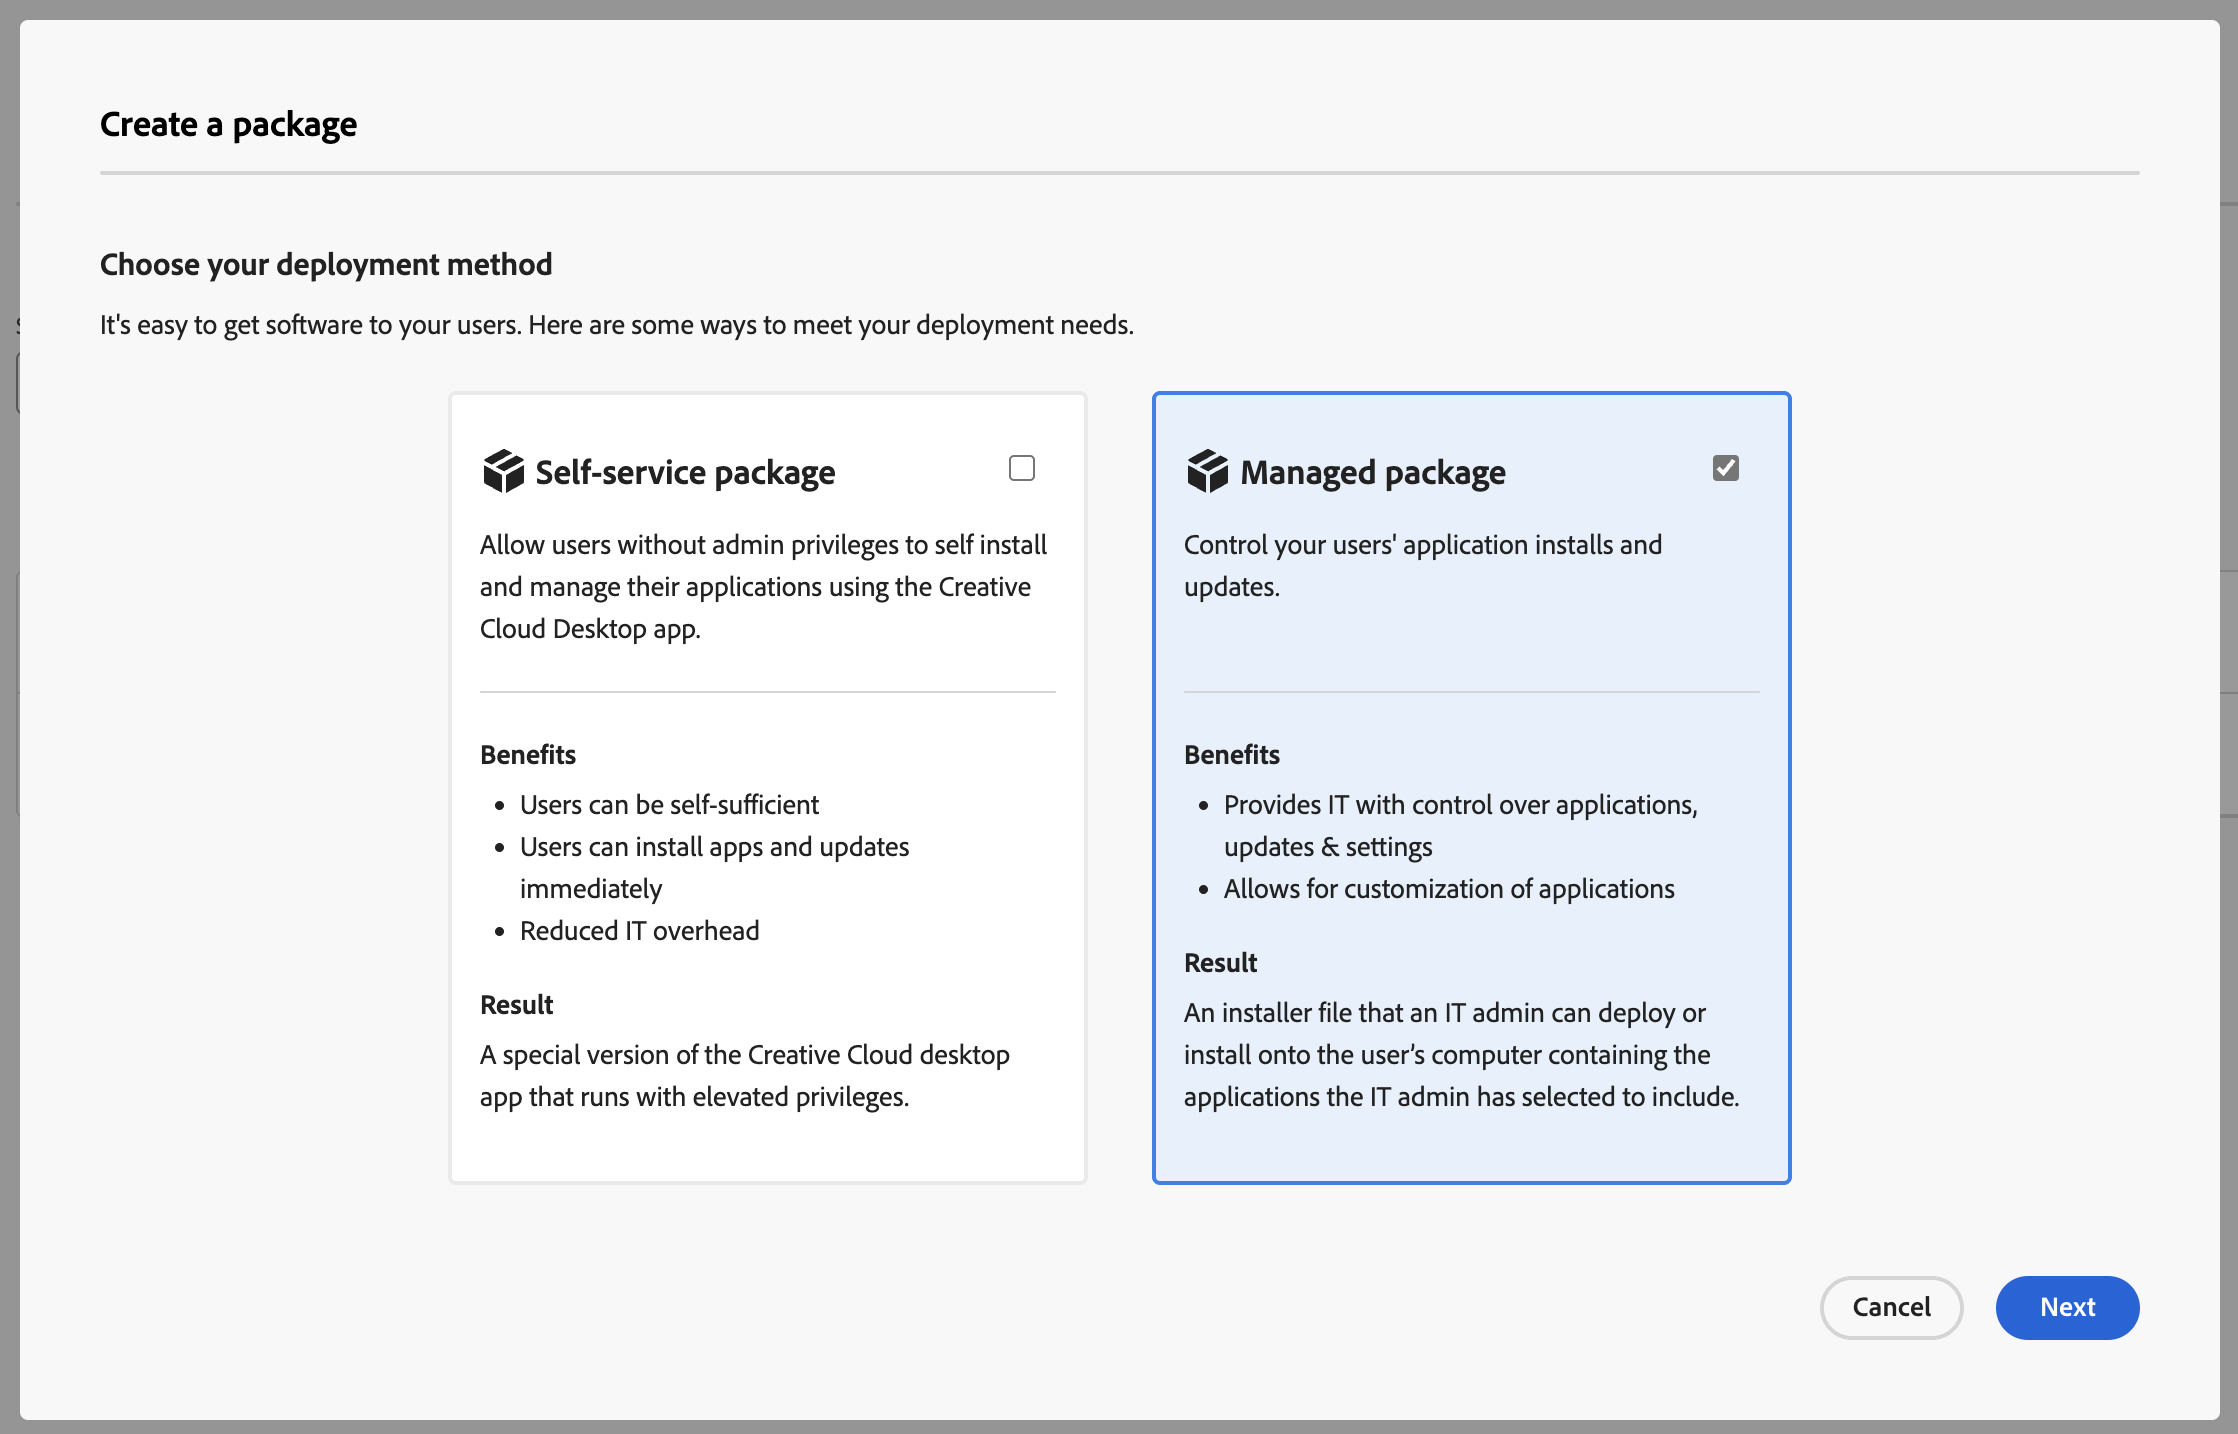
- For a managed deployment, create a Managed package, or use a pre-generated package if it already matches the applications and settings you need.

- Select the Adobe applications and options required for your users. Keep the package focused; smaller, role-specific packages are easier to test and troubleshoot.
- Download the completed package from Adobe.
- In FileWave Central, create a New Desktop Fileset > Empty Fileset, then upload the Adobe package contents while preserving the package folder structure.
- Assign the Fileset to a small Windows test group first.
- Update the model and verify the installation before broad deployment.
For Windows packages, Adobe documents setup.exe inside the package's Build folder. Adobe also notes that deploying a package containing Acrobat by MSI instead of setup.exe can skip Acrobat, so use setup.exe unless you have a verified reason to do otherwise.
Configure the EXE in FileWave
After the Adobe package has been uploaded to the Fileset, configure FileWave to run the Adobe setup.exe installer during activation.
- Open FileWave Admin and navigate to the uploaded Adobe Creative Cloud Fileset.
- Double-click the Fileset to open Fileset Contents.
- If needed, clear Hide unused folders so the package folders are visible.
- Navigate to the Adobe package's
Buildfolder and selectsetup.exe. - Choose Get Info from the menu bar.
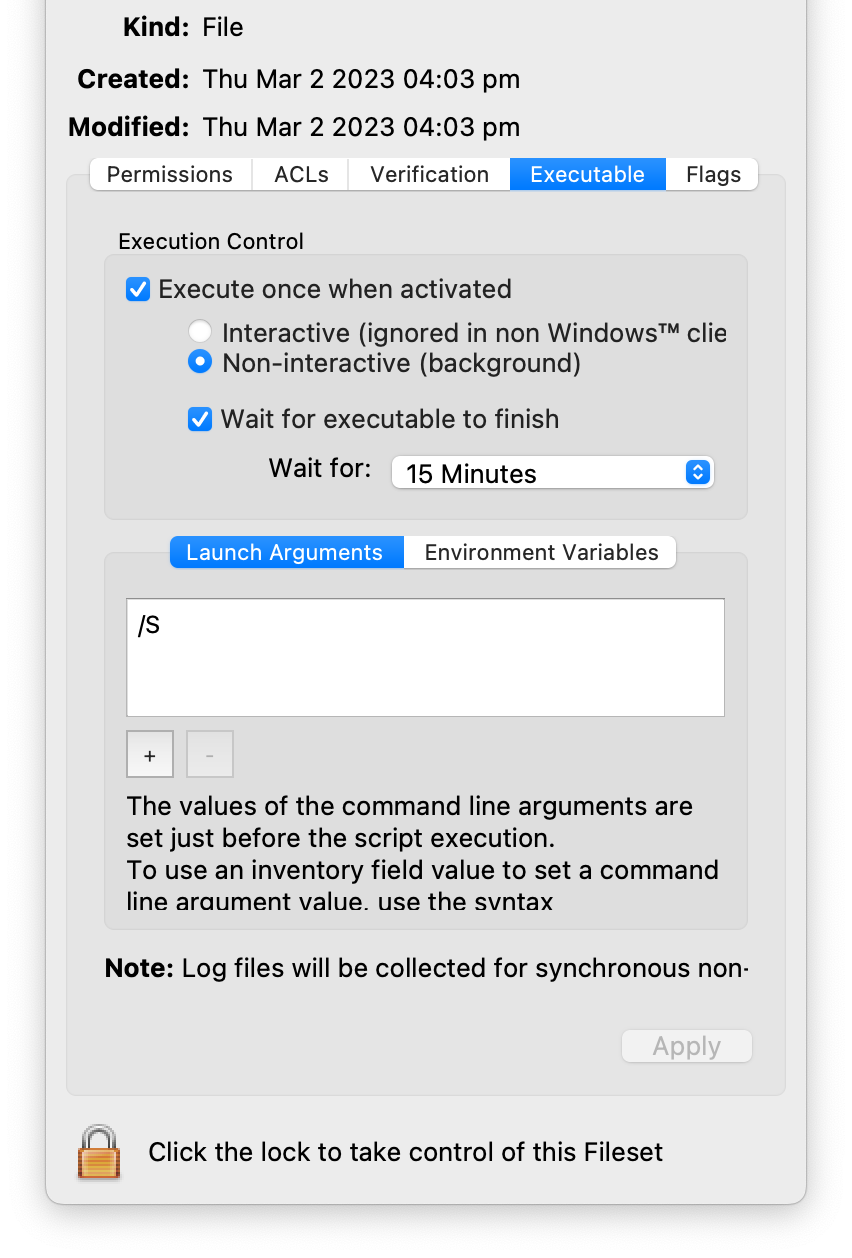
- Open the Executable tab.
- Enable Execute once when activated and Non-interactive (background).
- Enable Wait for executable to finish and set a practical timeout. The existing recipe uses 15 minutes; increase that if your selected Adobe apps routinely take longer in your environment.
- Add launch arguments with the + button if you need silent installation or custom install options.
Syntax:
setup [--silent] [--ADOBEINSTALLDIR=] [--INSTALLLANGUAGE=]

[ADOBEINSTALLDIR] is the installation directory where apps are installed on the client machine.
[INSTALLLANGUAGE] is the locale used for the installed apps.

Syntax example:
setup.exe --silent --ADOBEINSTALLDIR="C:\InstallDir" --INSTALLLANGUAGE=en_US- Click Apply to save the executable settings, then close the Get Info window.
- Close Fileset Contents.
- The Fileset will show as Modified until the model is updated. Update the model when you are ready to save the change.
As always, test deploy the Fileset to a few devices before mass deployment.
No comments to display
No comments to display