Reset root password through Webmin (FileWave Appliances Only)
When you setup a new FileWave instance, you most certainly don't want to leave the password for the root user as filewave. This document walks you through changing the password using the included Webmin interface (on v 12.x and higher virtual appliances only). Note that in 15.5.0 we introduced a forced password change and moved away from logging in as root. On 15.5.0 and newer you'll login as "fwadmin" as the user and "filewave" as the password but it will force you to change the password on first login.
Step-by-step guide
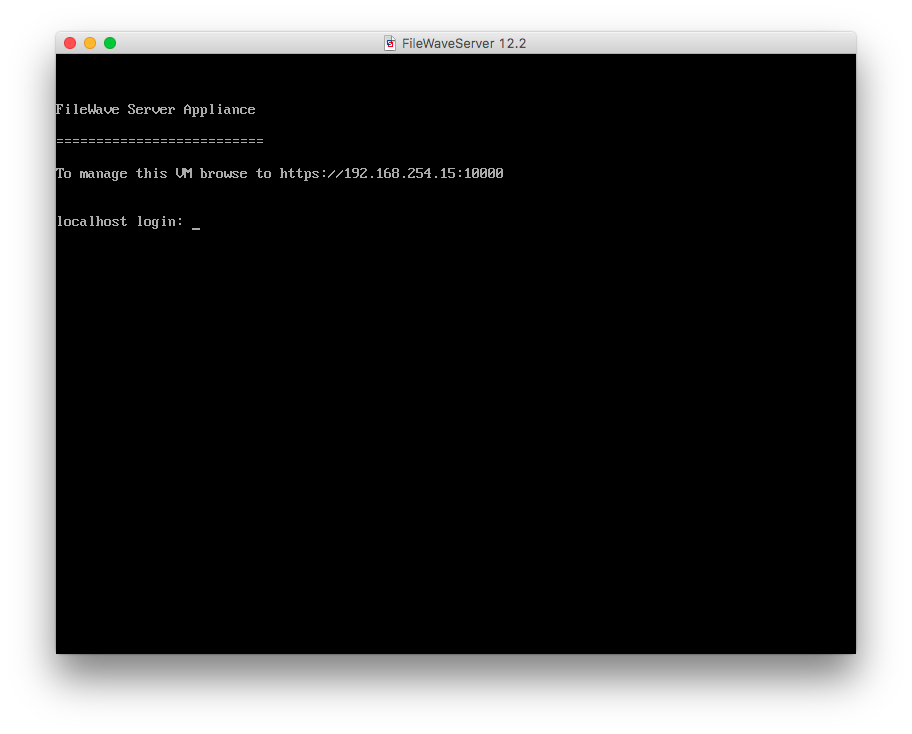
- First, we simply need to login to the Webmin interface through your browser of choice. You'll be able to find the address to use from the VM window itself as shown below:
2. Now, take that address and place it in your browser. Note that you'll get a warning about the certificate...this is simply because it is a self-signed cert. You can ignore that warning and proceed to the site:
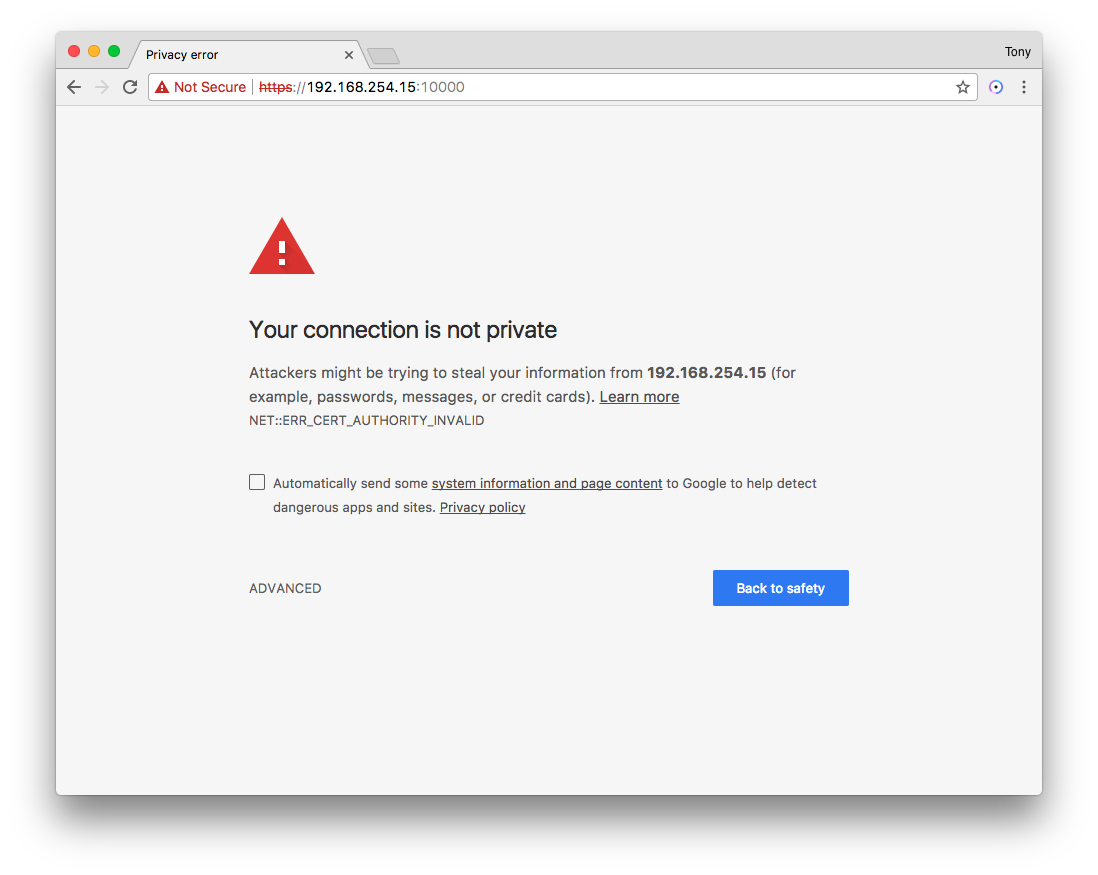
Note that the Webmin interface is on port 10000, so that port will have to be open from your workstation to the server for the website to work correctly.
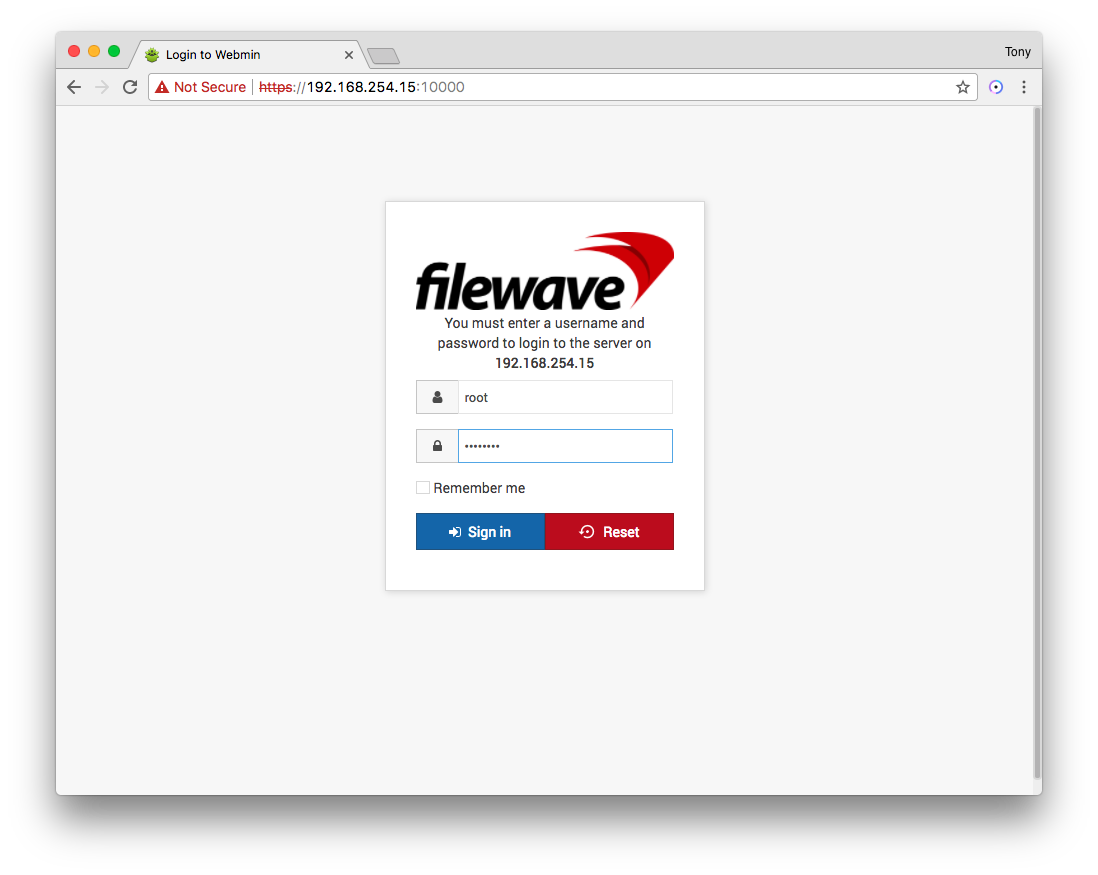
3. When you first get to the site, you'll be presented with a login window. The user will be root, and the password will be filewave as the default (or a password you have already changed it to):
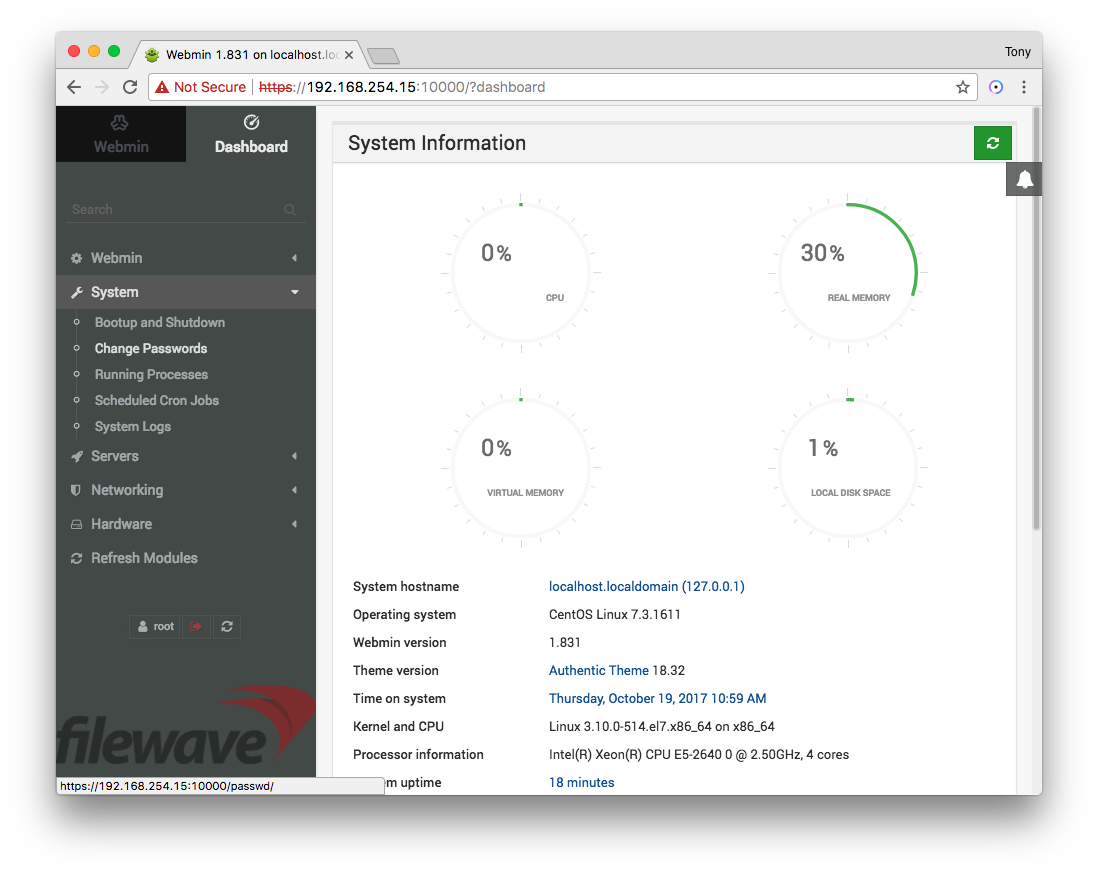
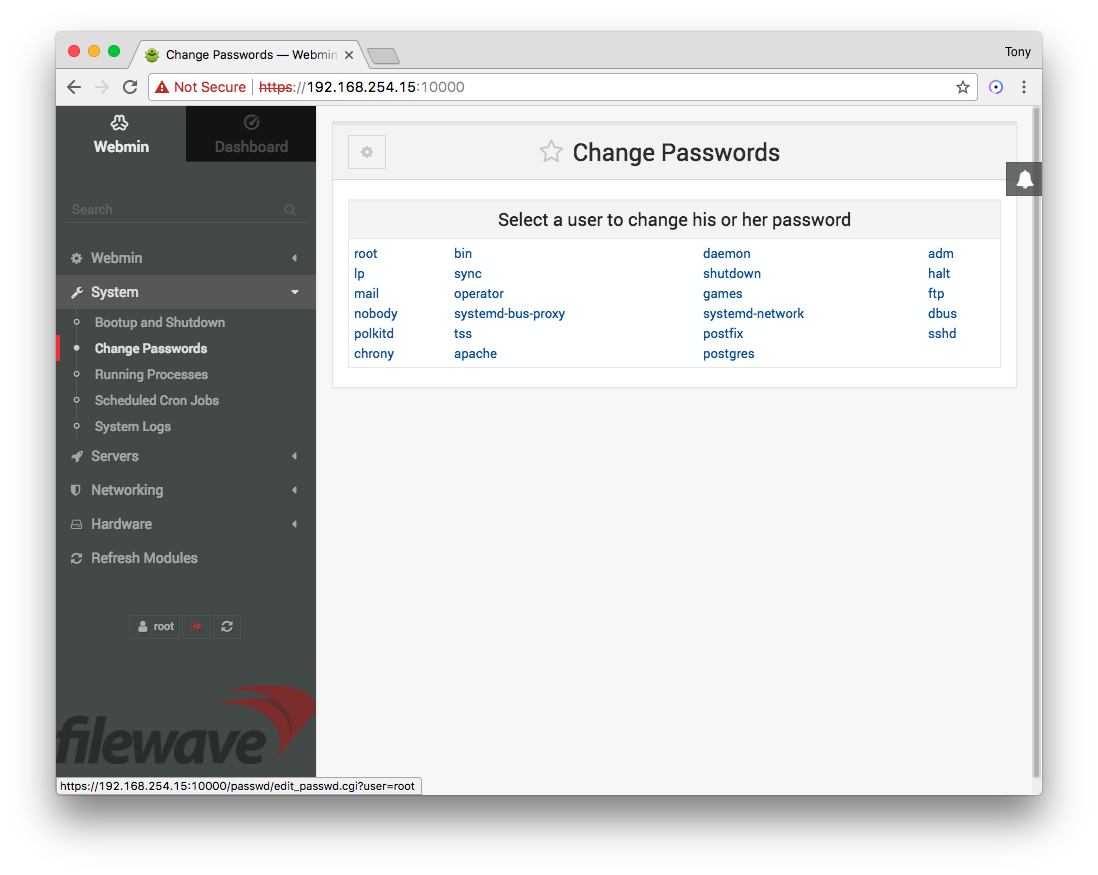
4. Once logged in, we'll go to the System section, and click on the link to Change Passwords:
5. Then, we'll choose the root user:
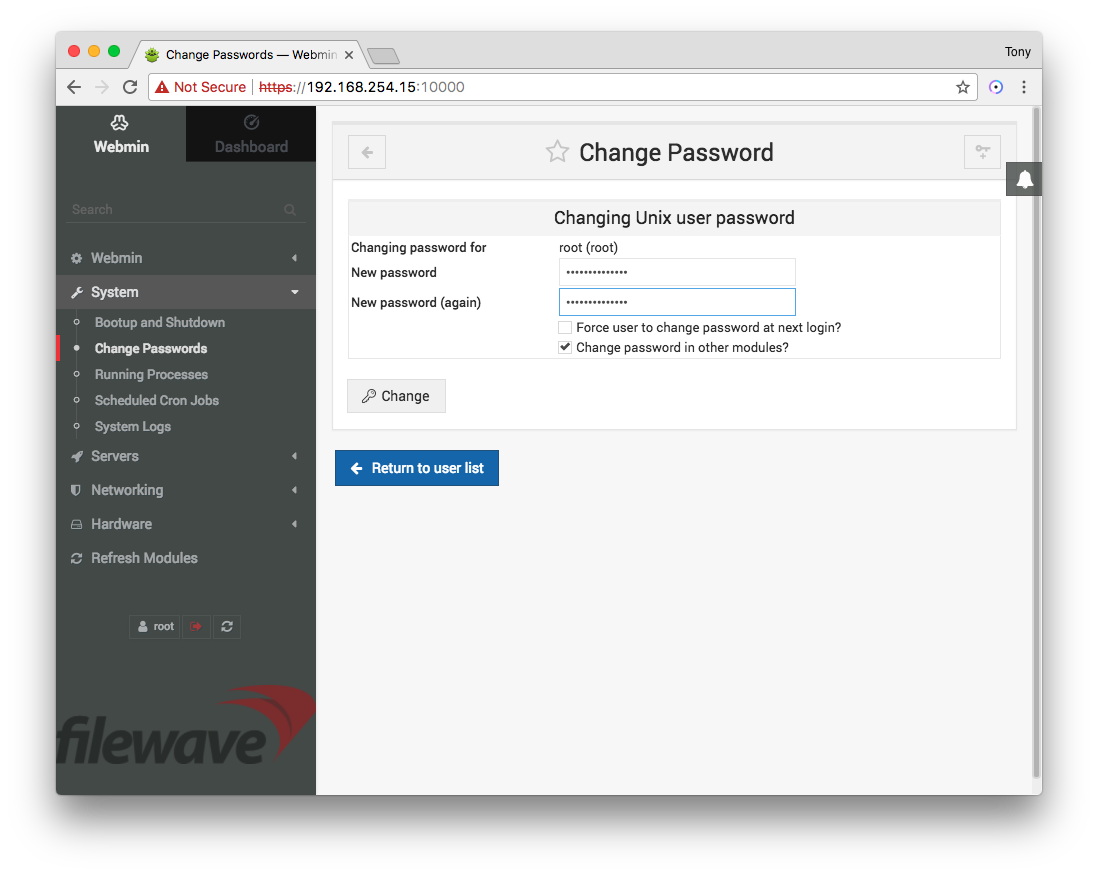
6. Just enter and confirm your new password, then click the Change button:
7. You'll get a confirmation that the password was successfully changed:
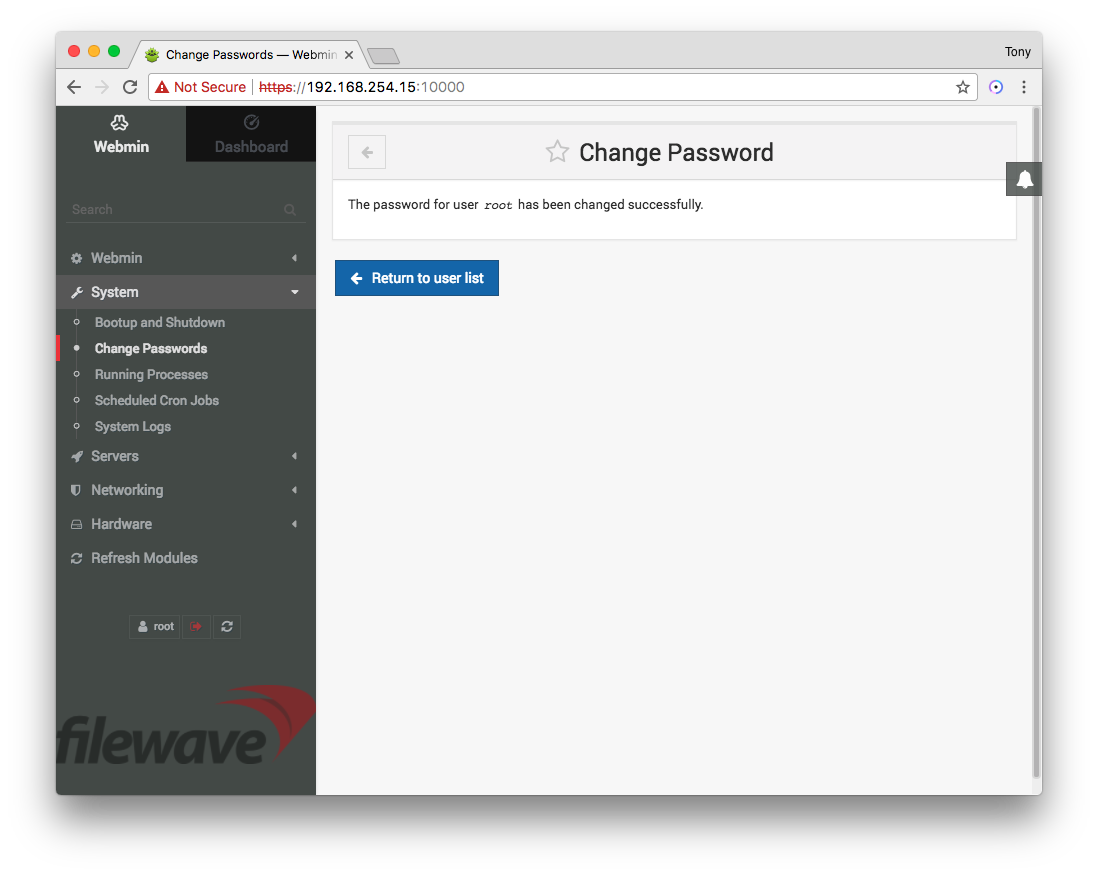
8. That's it! You have successfully reset/changed your FileWave appliance root password.
No comments to display
No comments to display