Lightspeed Smart Agent Deployment (macOS 2023)
Description
Need to deploy Lightspeed Smart Agent along with your configurations. FileWave has got you covered in this step-by-step guide to creating the required Filesets to deploy to your macOS devices. Be sure that you have access to your administrative account on relay.school.com.
If you are using the new method with Lightspeed Certificate Manager please review:
Lightspeed Smart Agent Deployment (macOS v2.3.1+ using Certificate Manager)
Ingredients
-
FileWave Central
-
Lightspeed Smart Agent DMG installer
-
Lightspeed Smart Agent PKG installer
-
Lightspeed mac deploy script
-
Lightspeed install script
-
Lightspeed certificate
Web Content Filter - In creating a Web Content Filter within FileWave Central it changes the UDID and is unsuccessful in deployment. The issue can be resolved by re-creating the Web Content Filter in FileWave Anywhere as a workaround. The issue should be resolved in the next release. See Known Issues
Download Lightspeed Relay Filter Agent
-
Login to your Lightspeed Filter account at relay.school.com
-
Navigate to Settings > Software
-
Choose Lightspeed Filter
-
Select the Mac tab
-
Select the version of the Relay Filter Agent by clicking on the download icon
-
Place the downloaded SmartAgent.dmg into your Downloads Folder
-
Download the macOS deploy script
-
Download the mac_deploy.sh script, found here: mac_deploy.sh
-
Place the downloaded mac_deploy.sh script into your Downloads
-
Unzip the downloaded mac_deploy.sh script
-
Open Terminal to run the script
# enter as root $ sudo -s # nagivate to your Downloads folder $ cd ~/Downloads # run the script to create three files on the Desktop $ ./mac_deploy.sh -
Once the script has been executed, it has created three files on your Desktop; ca.cer, deploymont.zip and SmartAgent.pkg
Note: Be sure both SmartAgent.dmg and mac_deploy.sh are in the same directory, i.e. Downloads folder for the mac_deploy script to successfully create the deployment files and certificate.
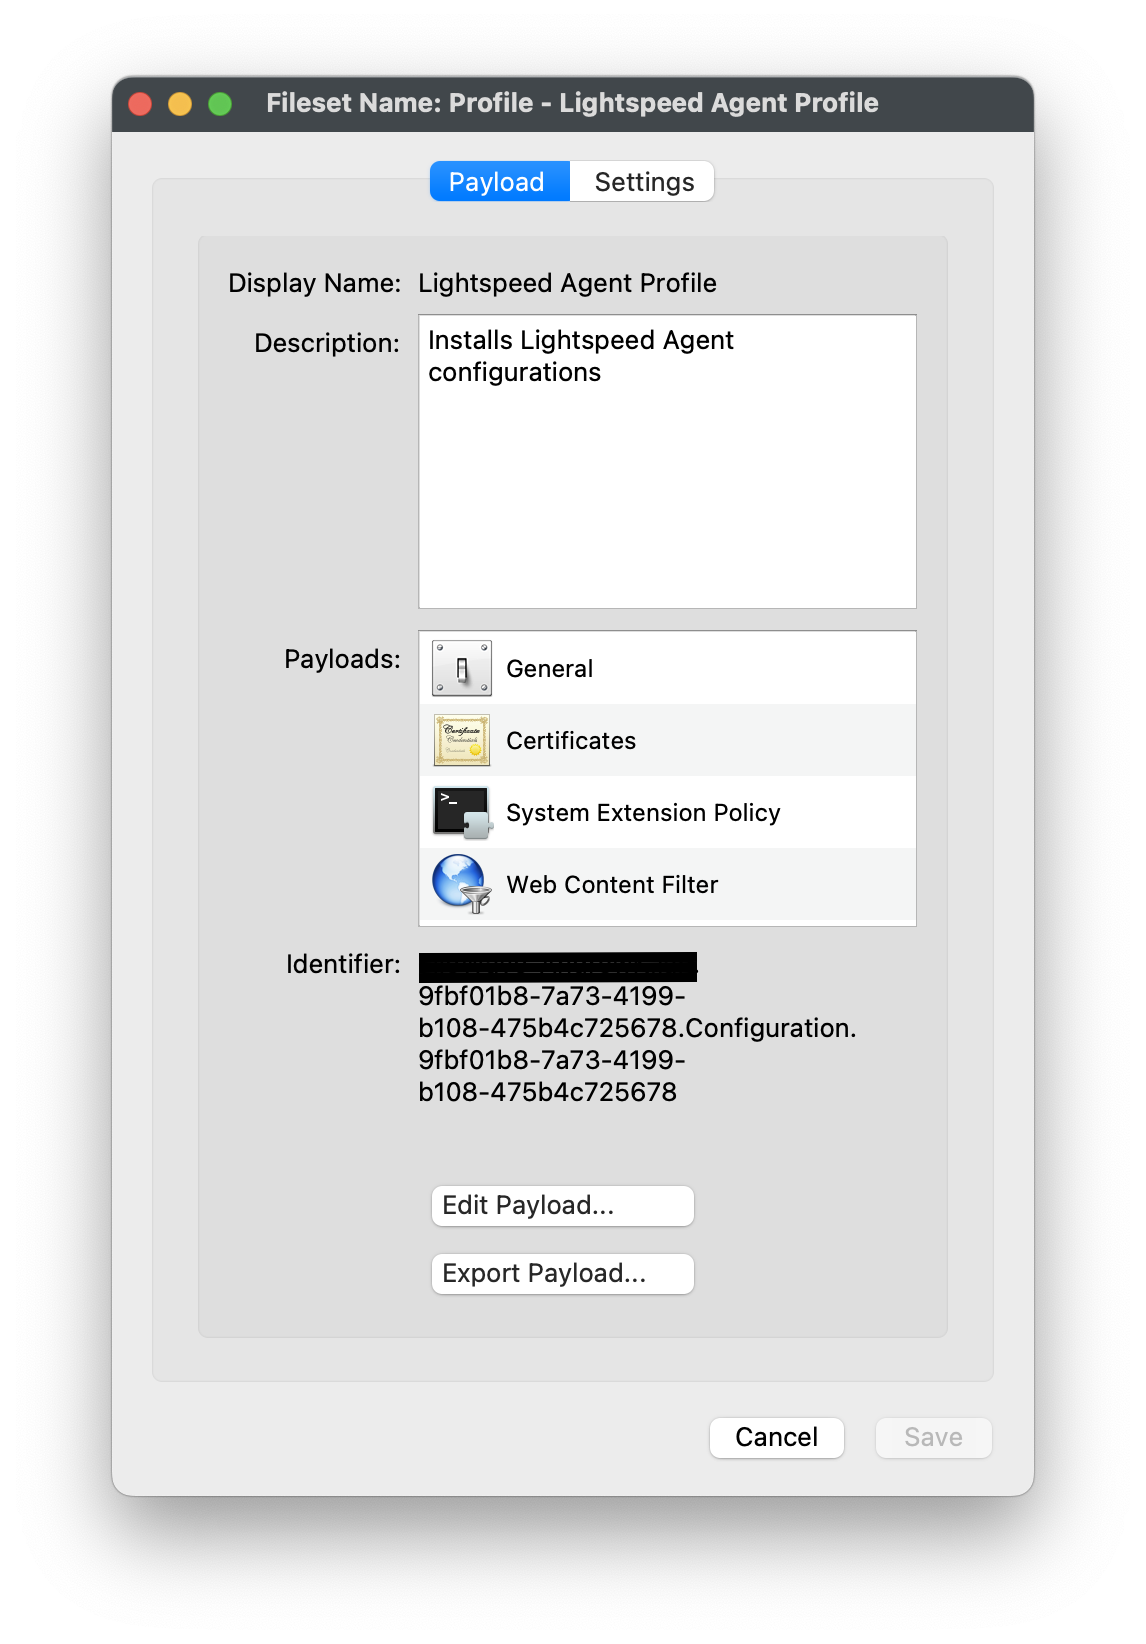
Create the Configuration Profile
-
Open FileWave Central or FileWave Anywhere
-
Navigate to Filesets > Select New Desktop Fileset > Click on Profile
-
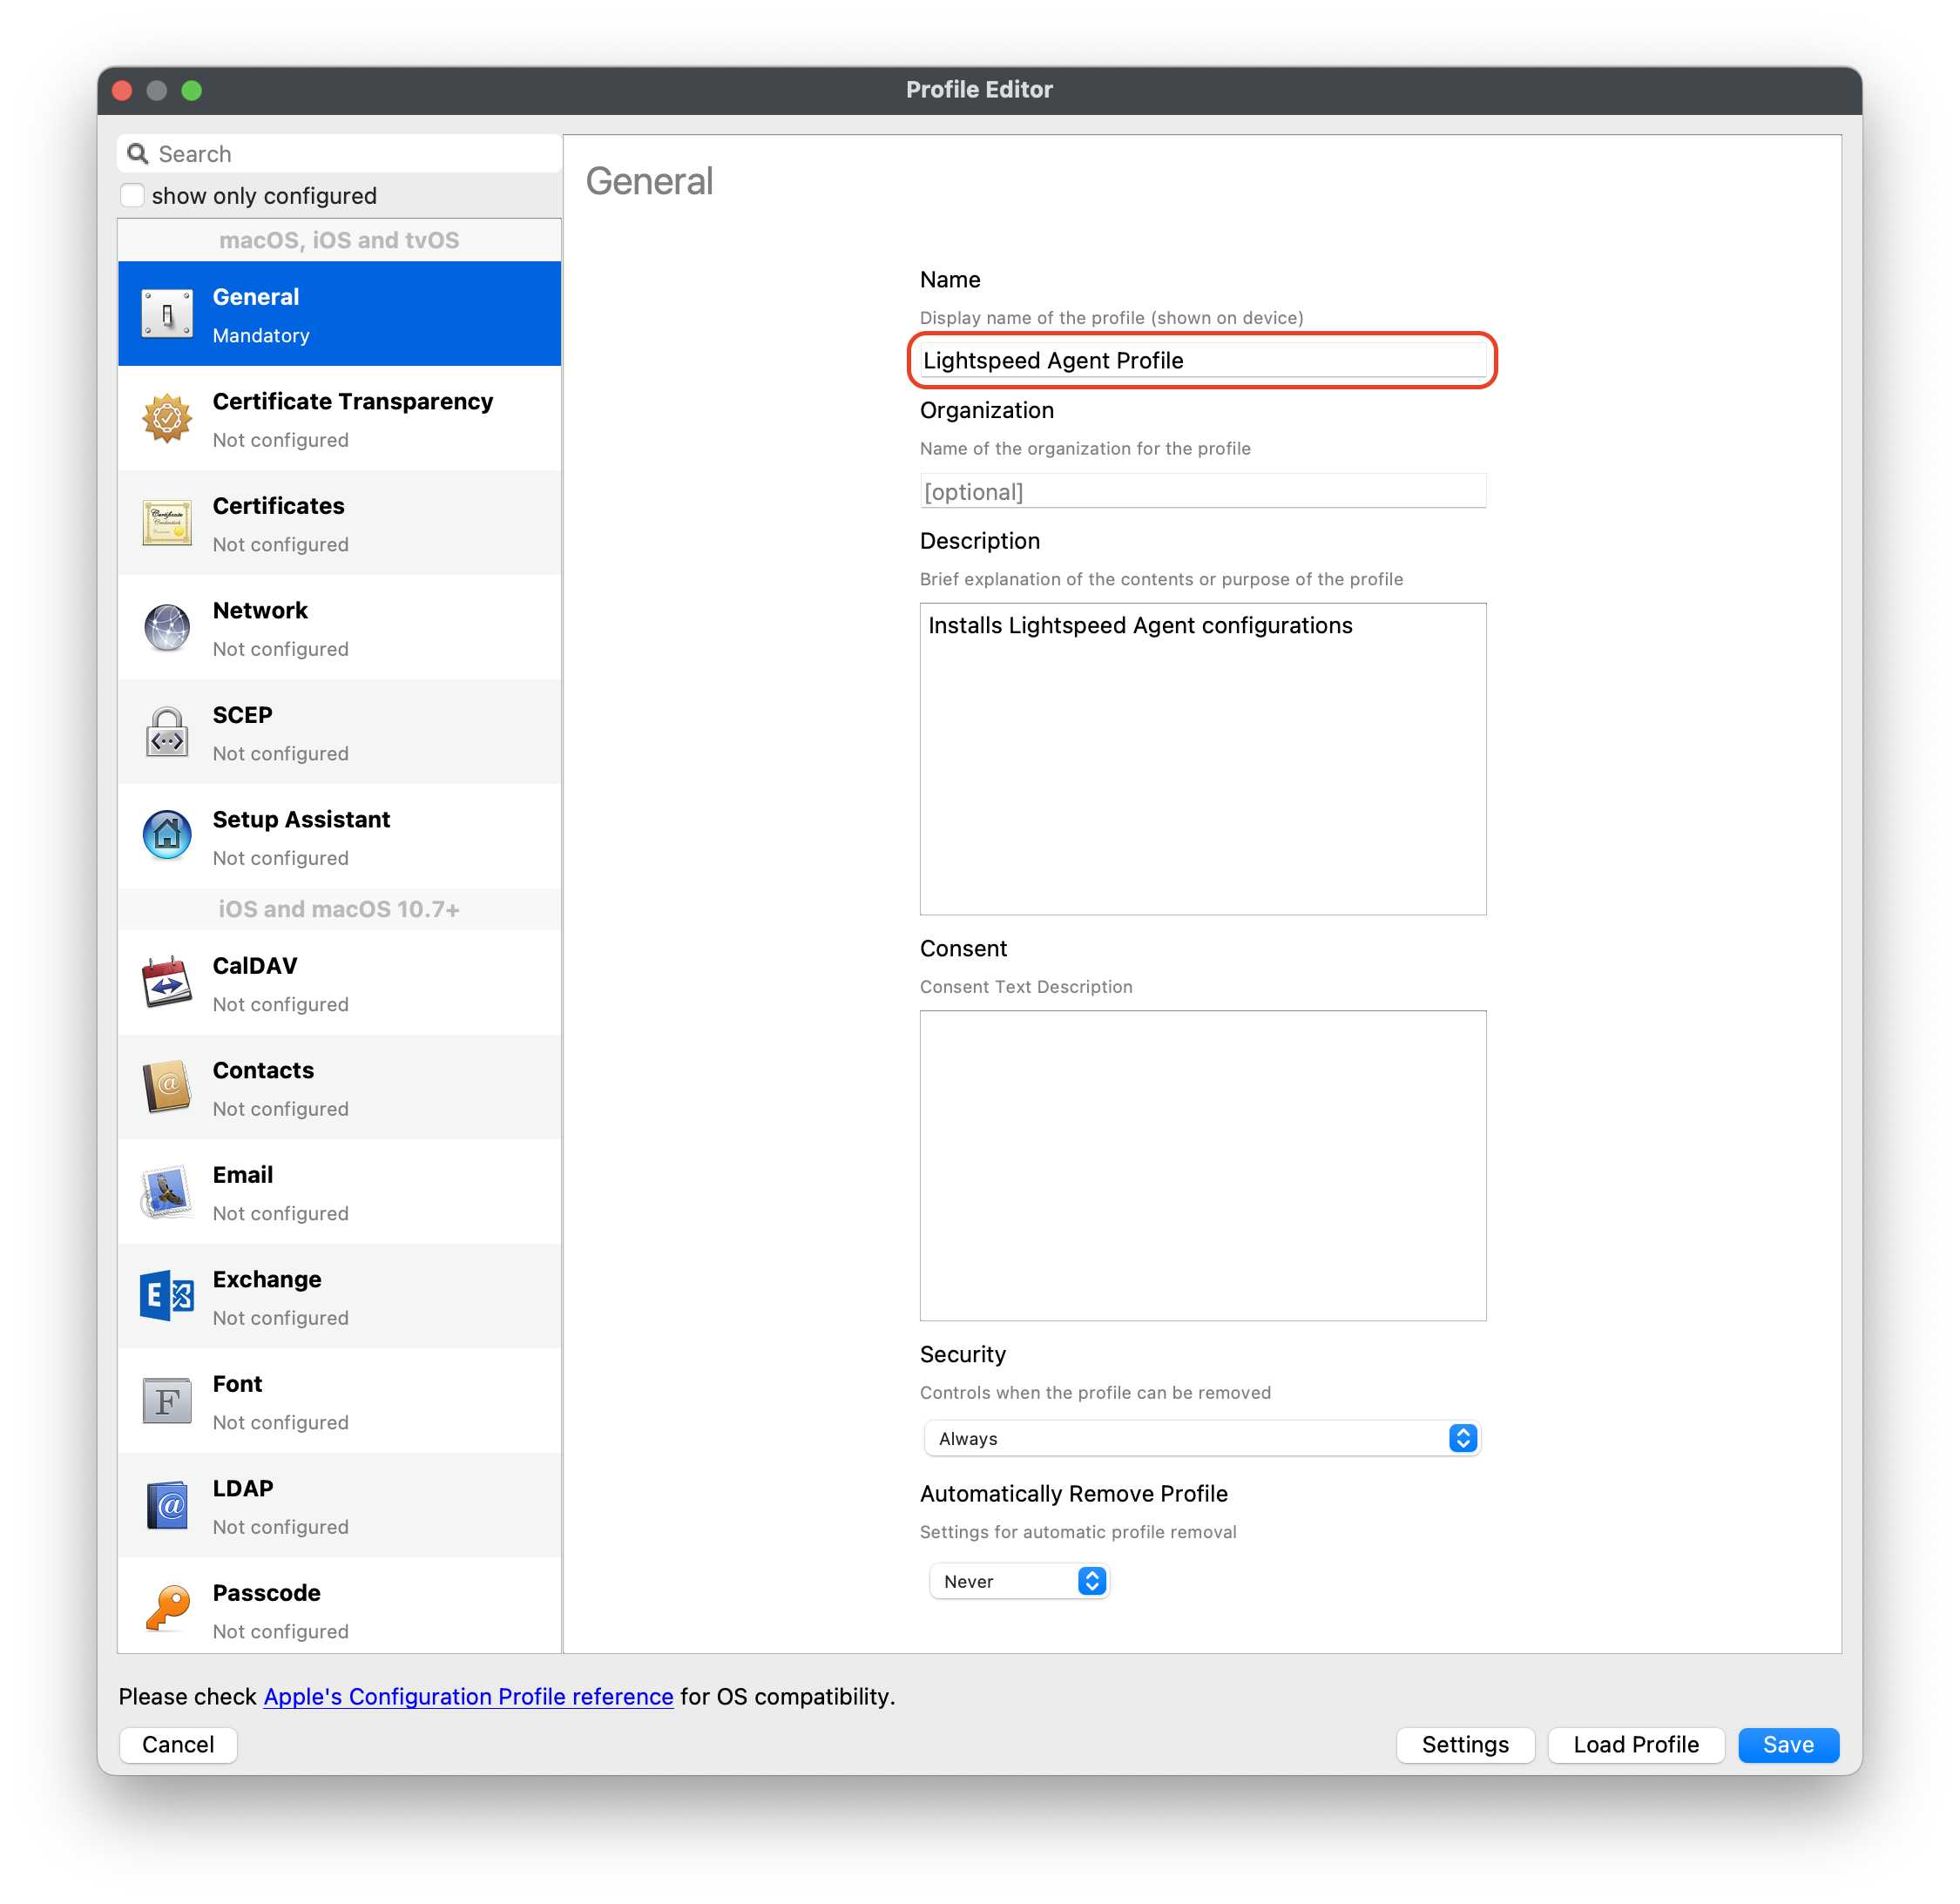
Enter the name of the Profile: General > Name: Lightspeed Agent Profile
-
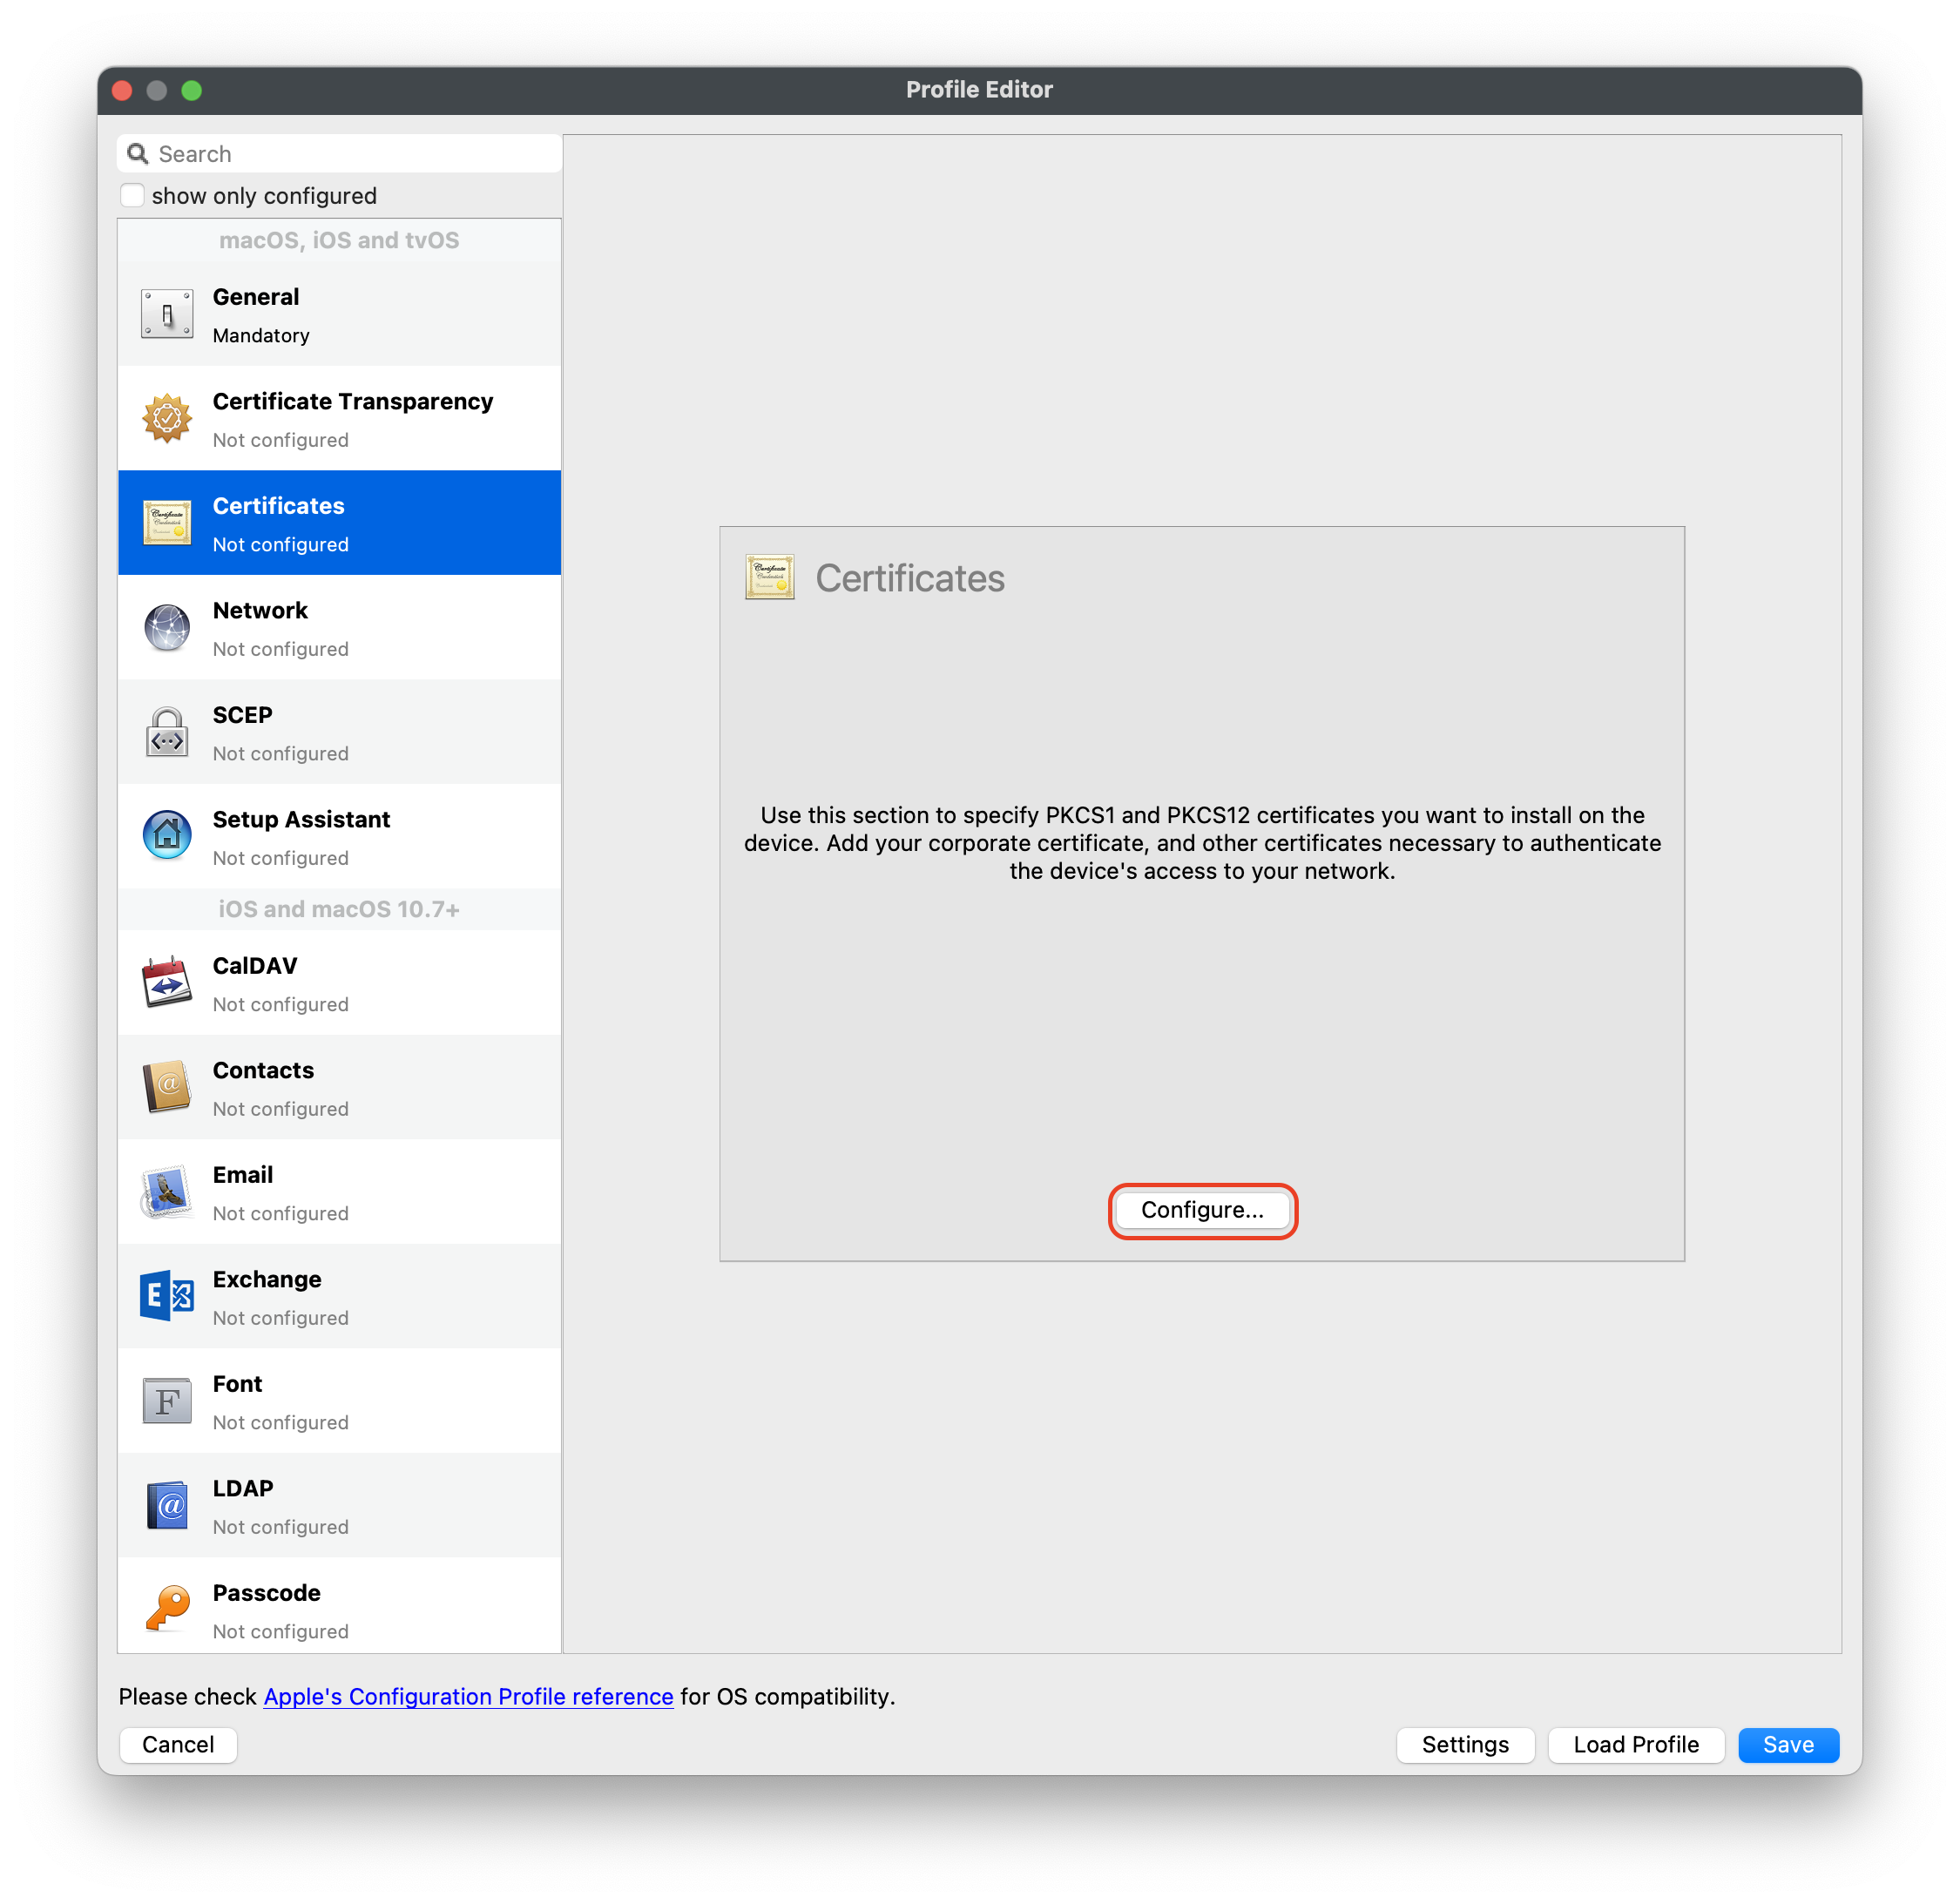
Select Certificates payload to add your ca.cer certificate
-
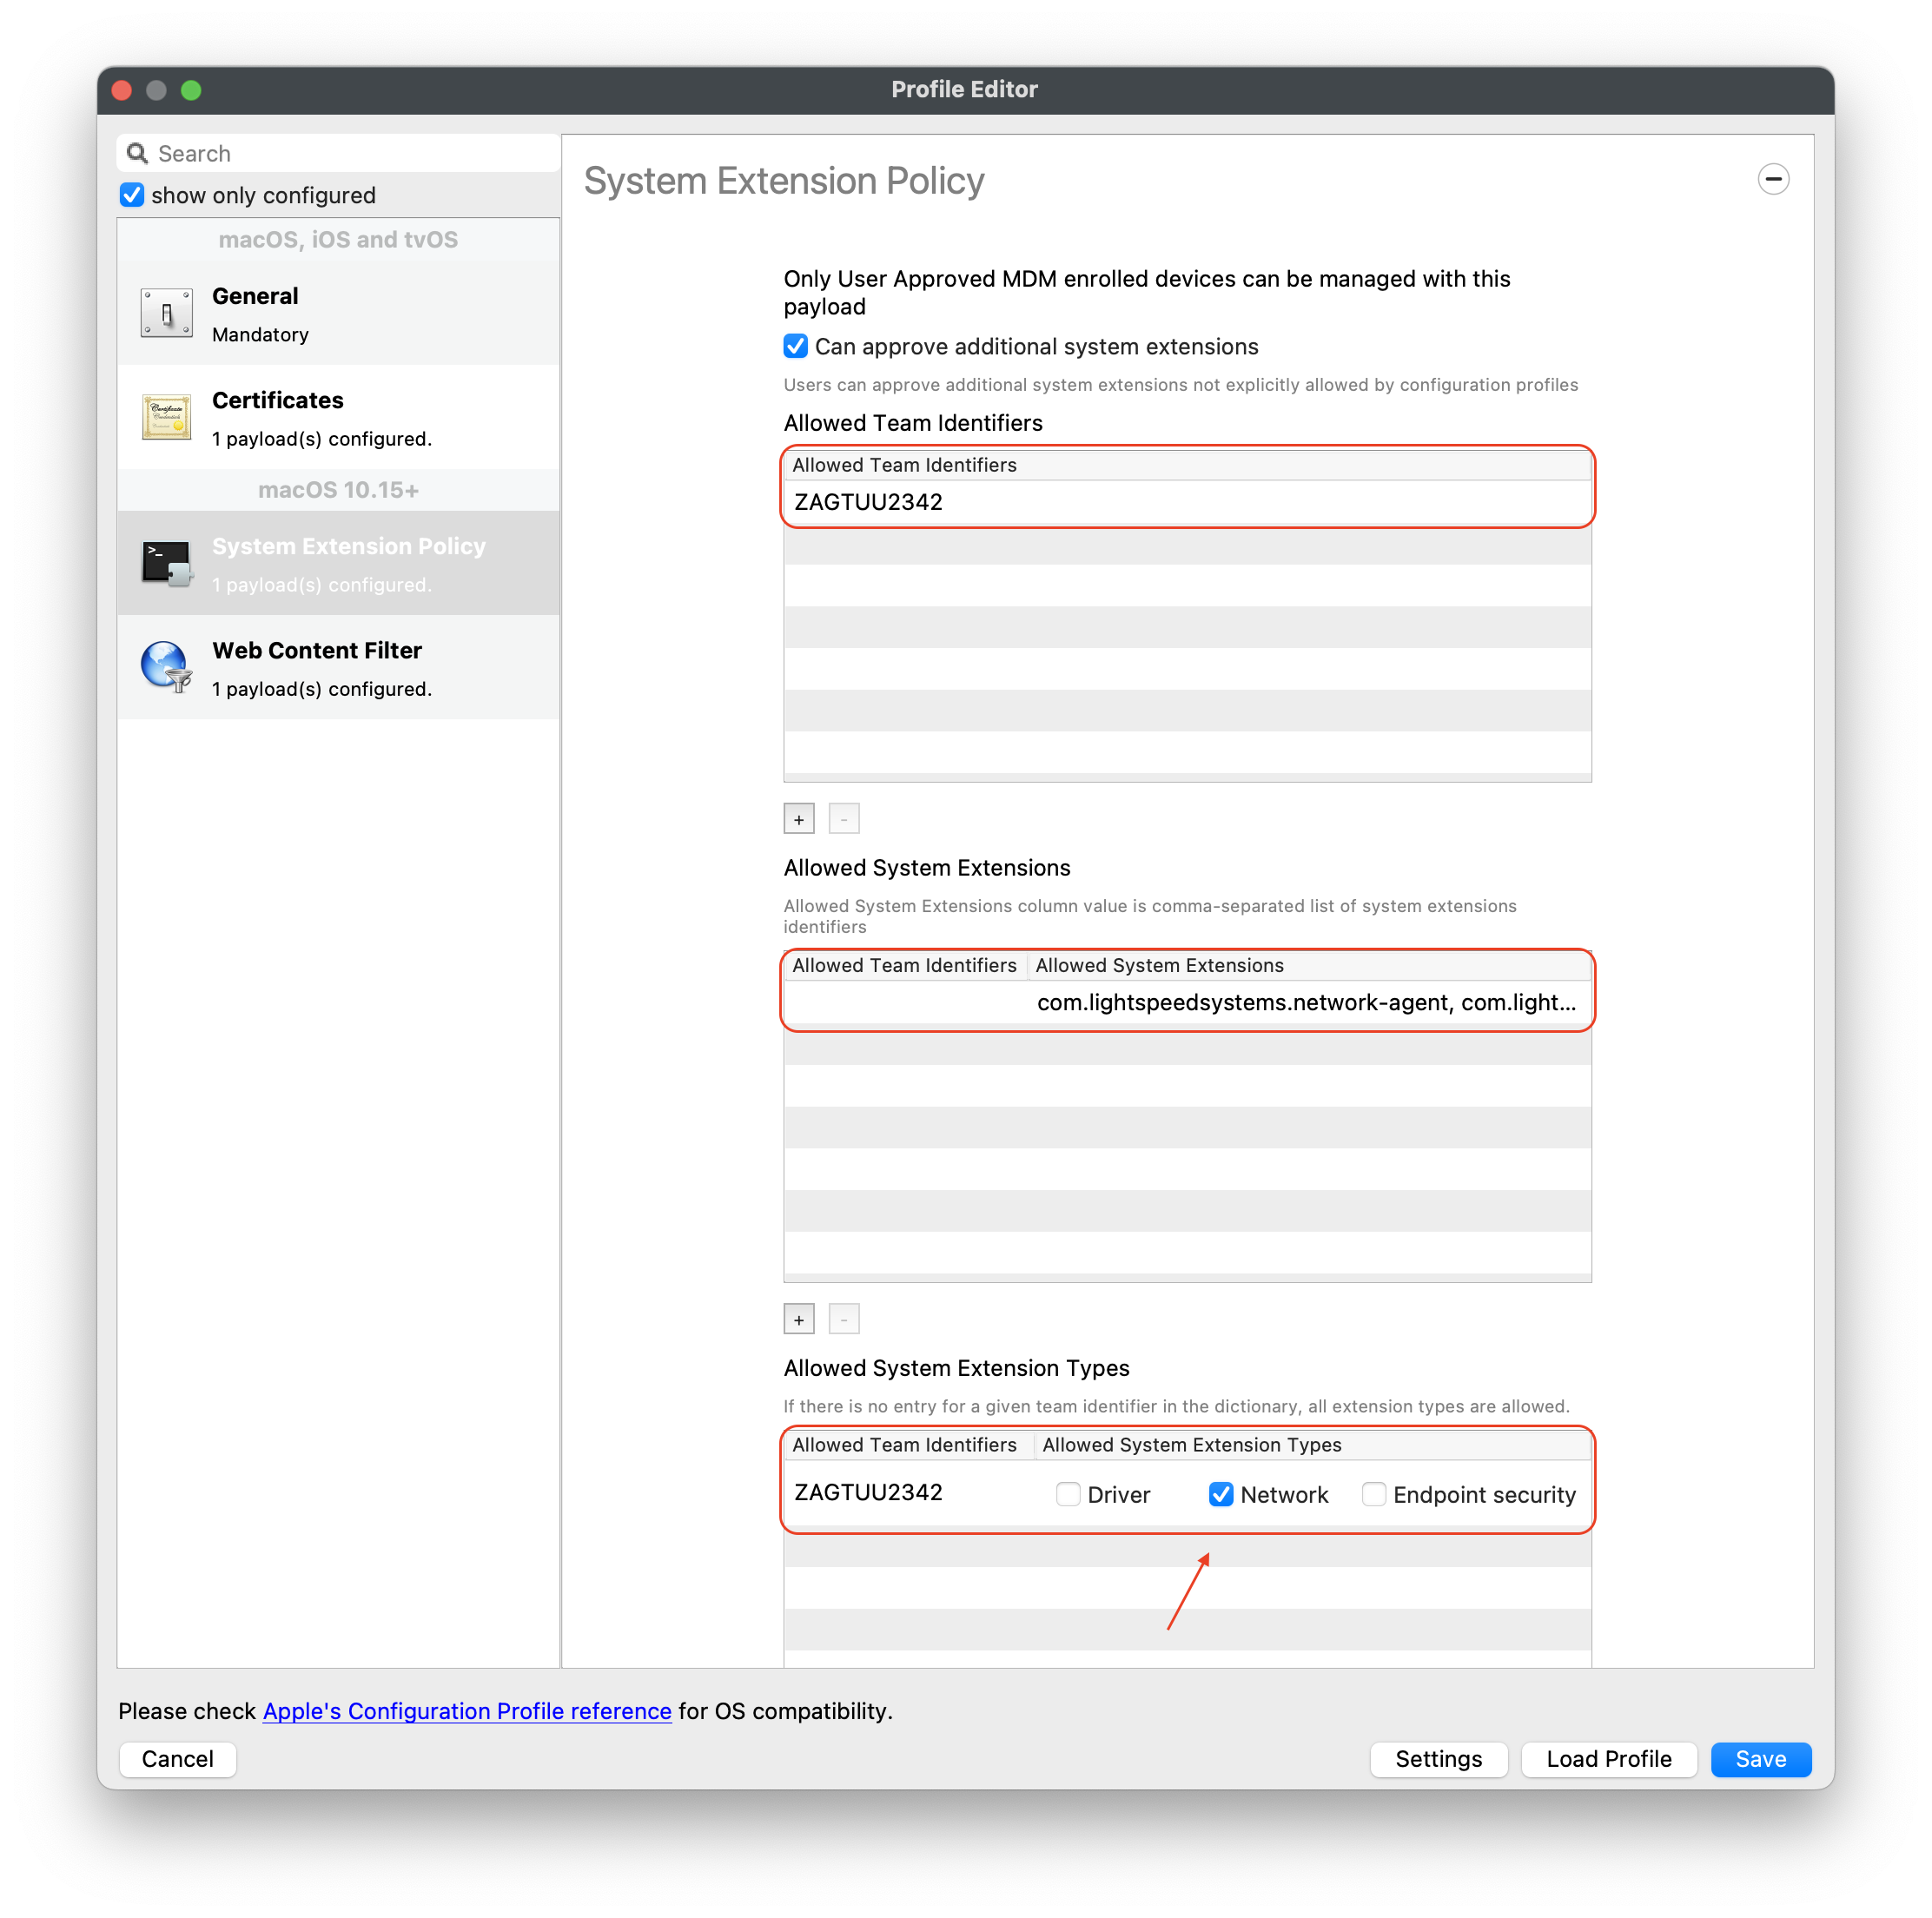
Navigate to System Extension Policy payload, add and enter in the following:
-
Click + to add Allowed Team Identifiers:
Team Identifier: ZAGTUU2342 -
Click + to add Allowed System Extensions:
1st Allowed System Extensions: com.lightspeedsystems.network-agent
Enter add 2nd Allowed System Extensions with comma after 1st Allowed System Extensions
2nd Allowed System Extensions: com.lightspeedsystems.network-agent.network-extension
-
Click + to add Allowed System Extension Types and check box for Network:
Team Identifier: ZAGTUU2342
-
-
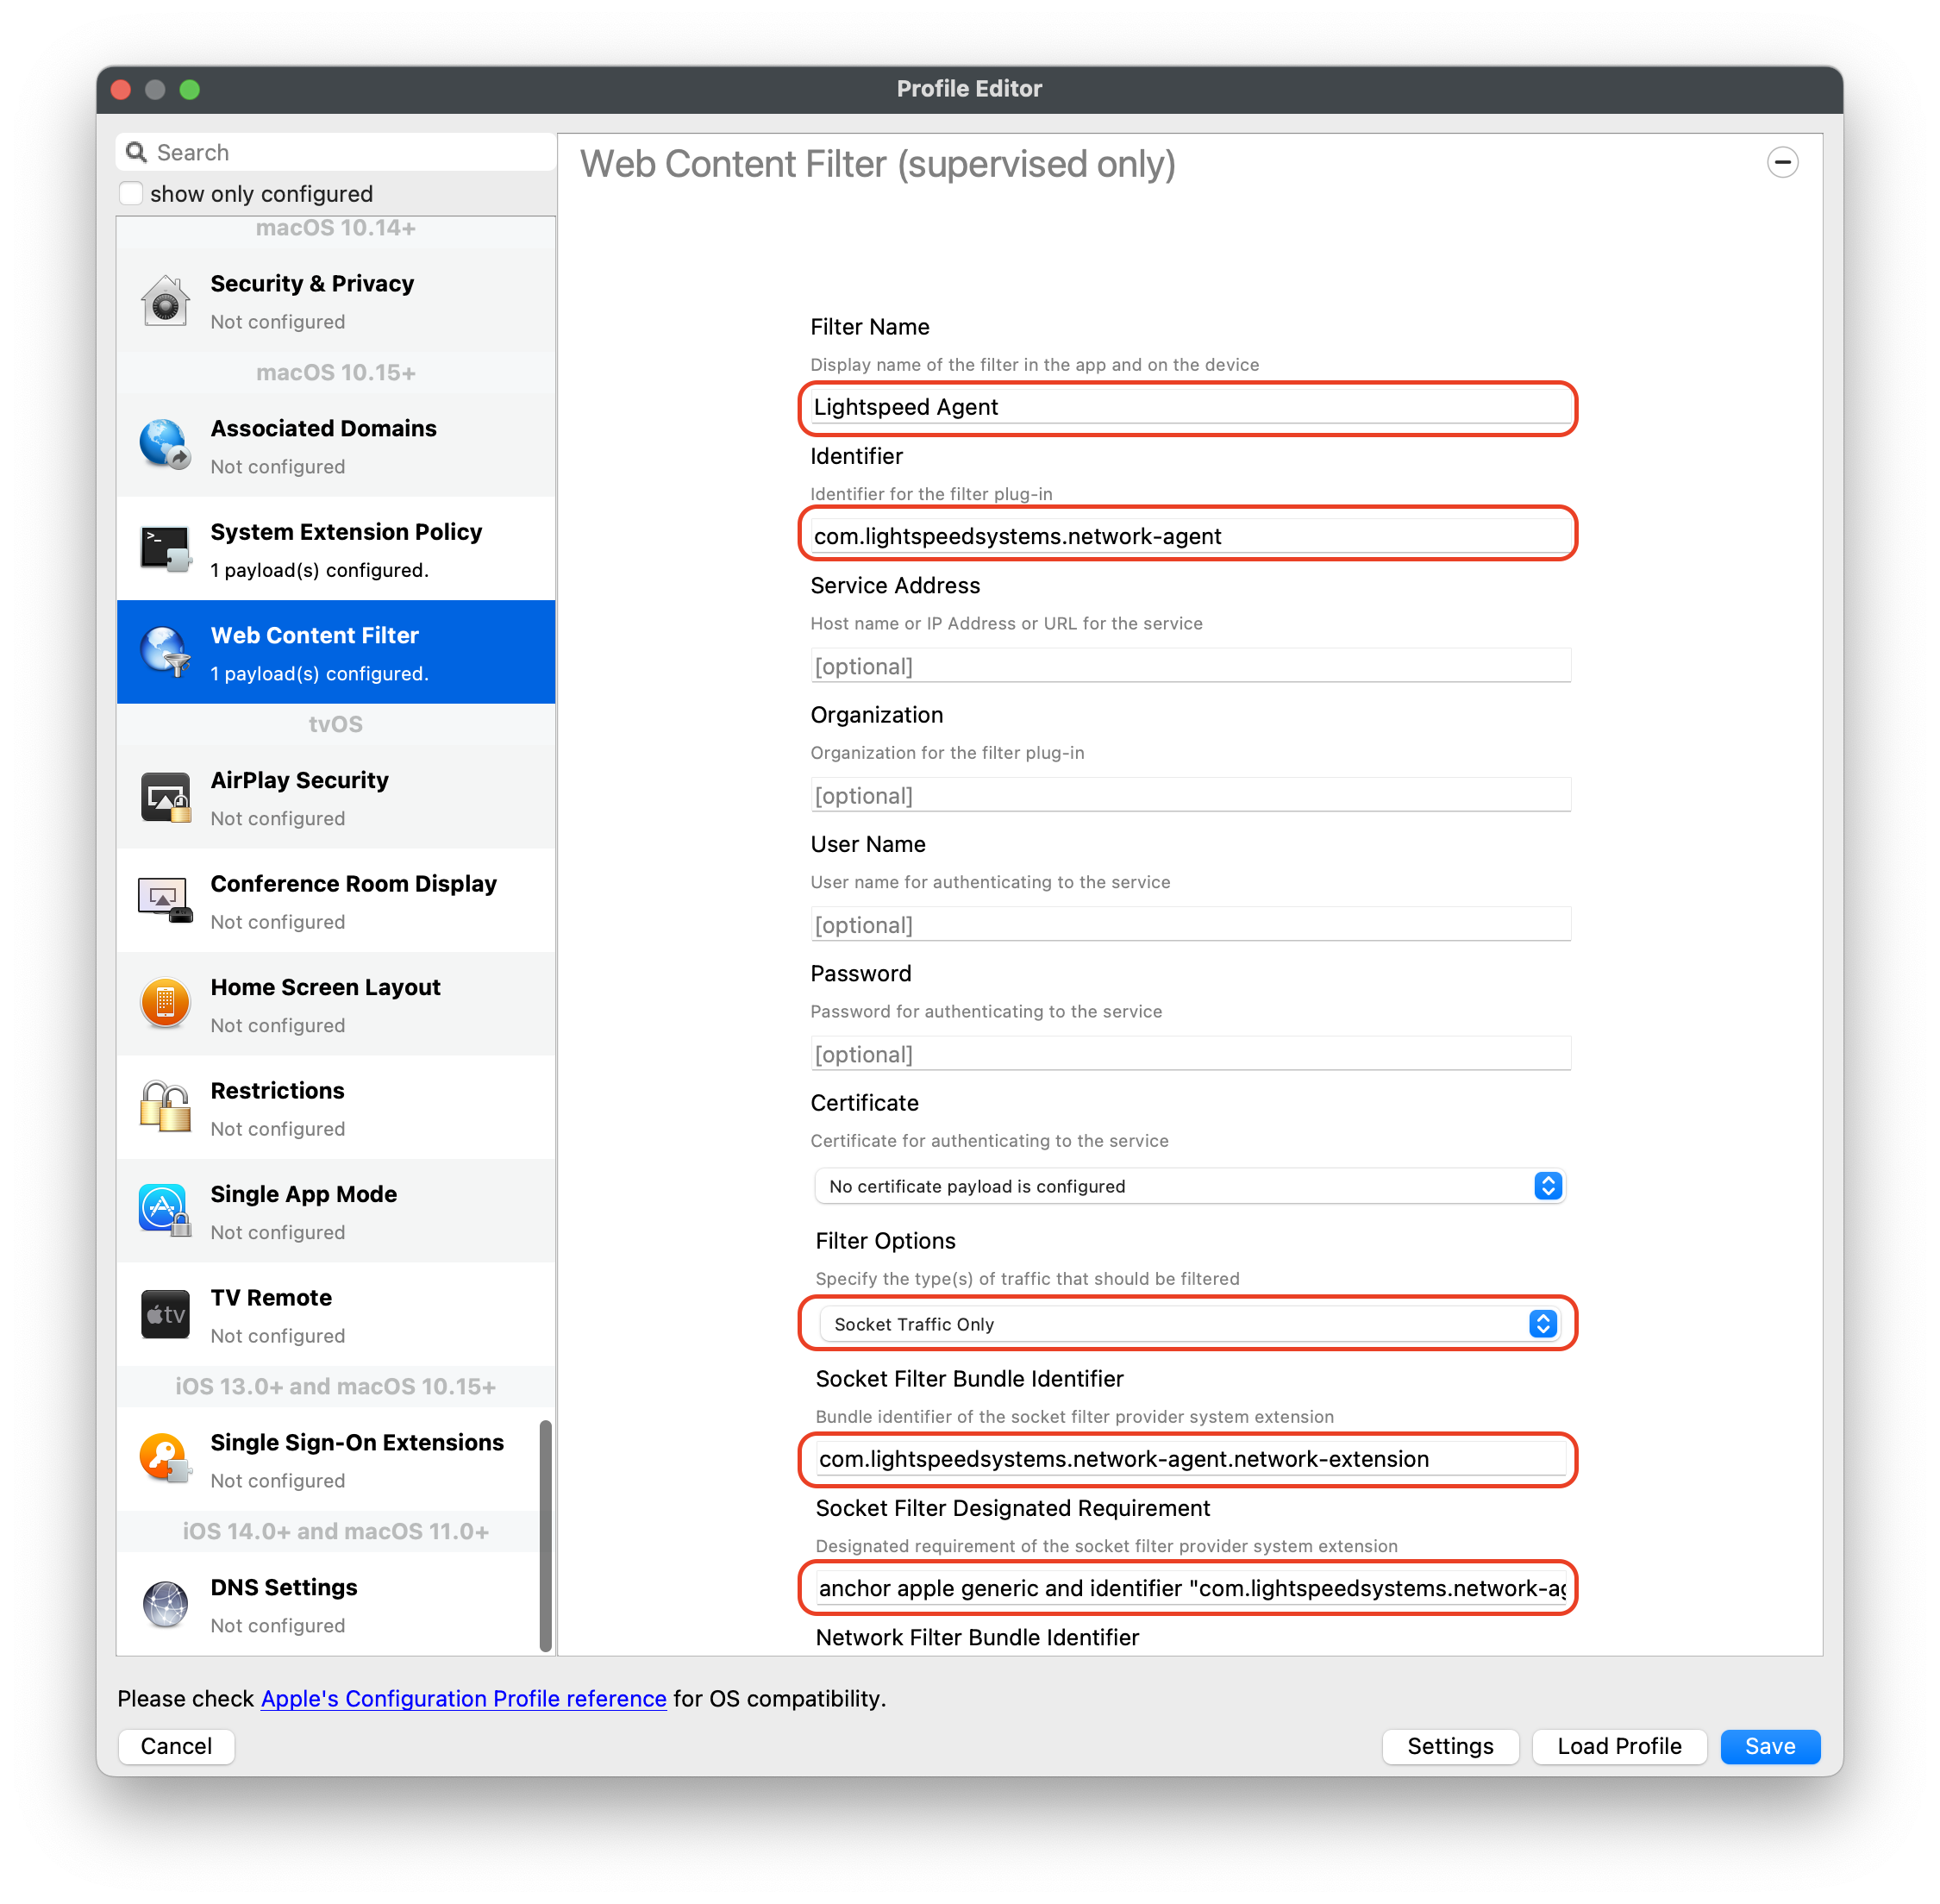
Navigate to Web Content Filter and enter in the following:
-
Filter Name: Lightspeed Agent
-
Identifier: com.lightspeedsystems.network-agent
-
Filter Options: Socket Traffic Only
-
Socket Filter Bundle Identifier: com.lightspeedsystems.network-agent.network-extension
-
Socket Filter Designated Requirement: anchor apple generic and identifier "com.lightspeedsystems.network-agent.network-extension" and (certificate leaf[field.1.2.840.113635.100.6.1.9] /* exists / or certificate 1[field.1.2.840.113635.100.6.2.6] / exists / and certificate leaf[field.1.2.840.113635.100.6.1.13] / exists */ and certificate leaf[subject.OU] = ZAGTUU2342)
-
-
The completed configuration profile will have three payloads; these include: Certificates, System Extension Policy and Web Content Filter
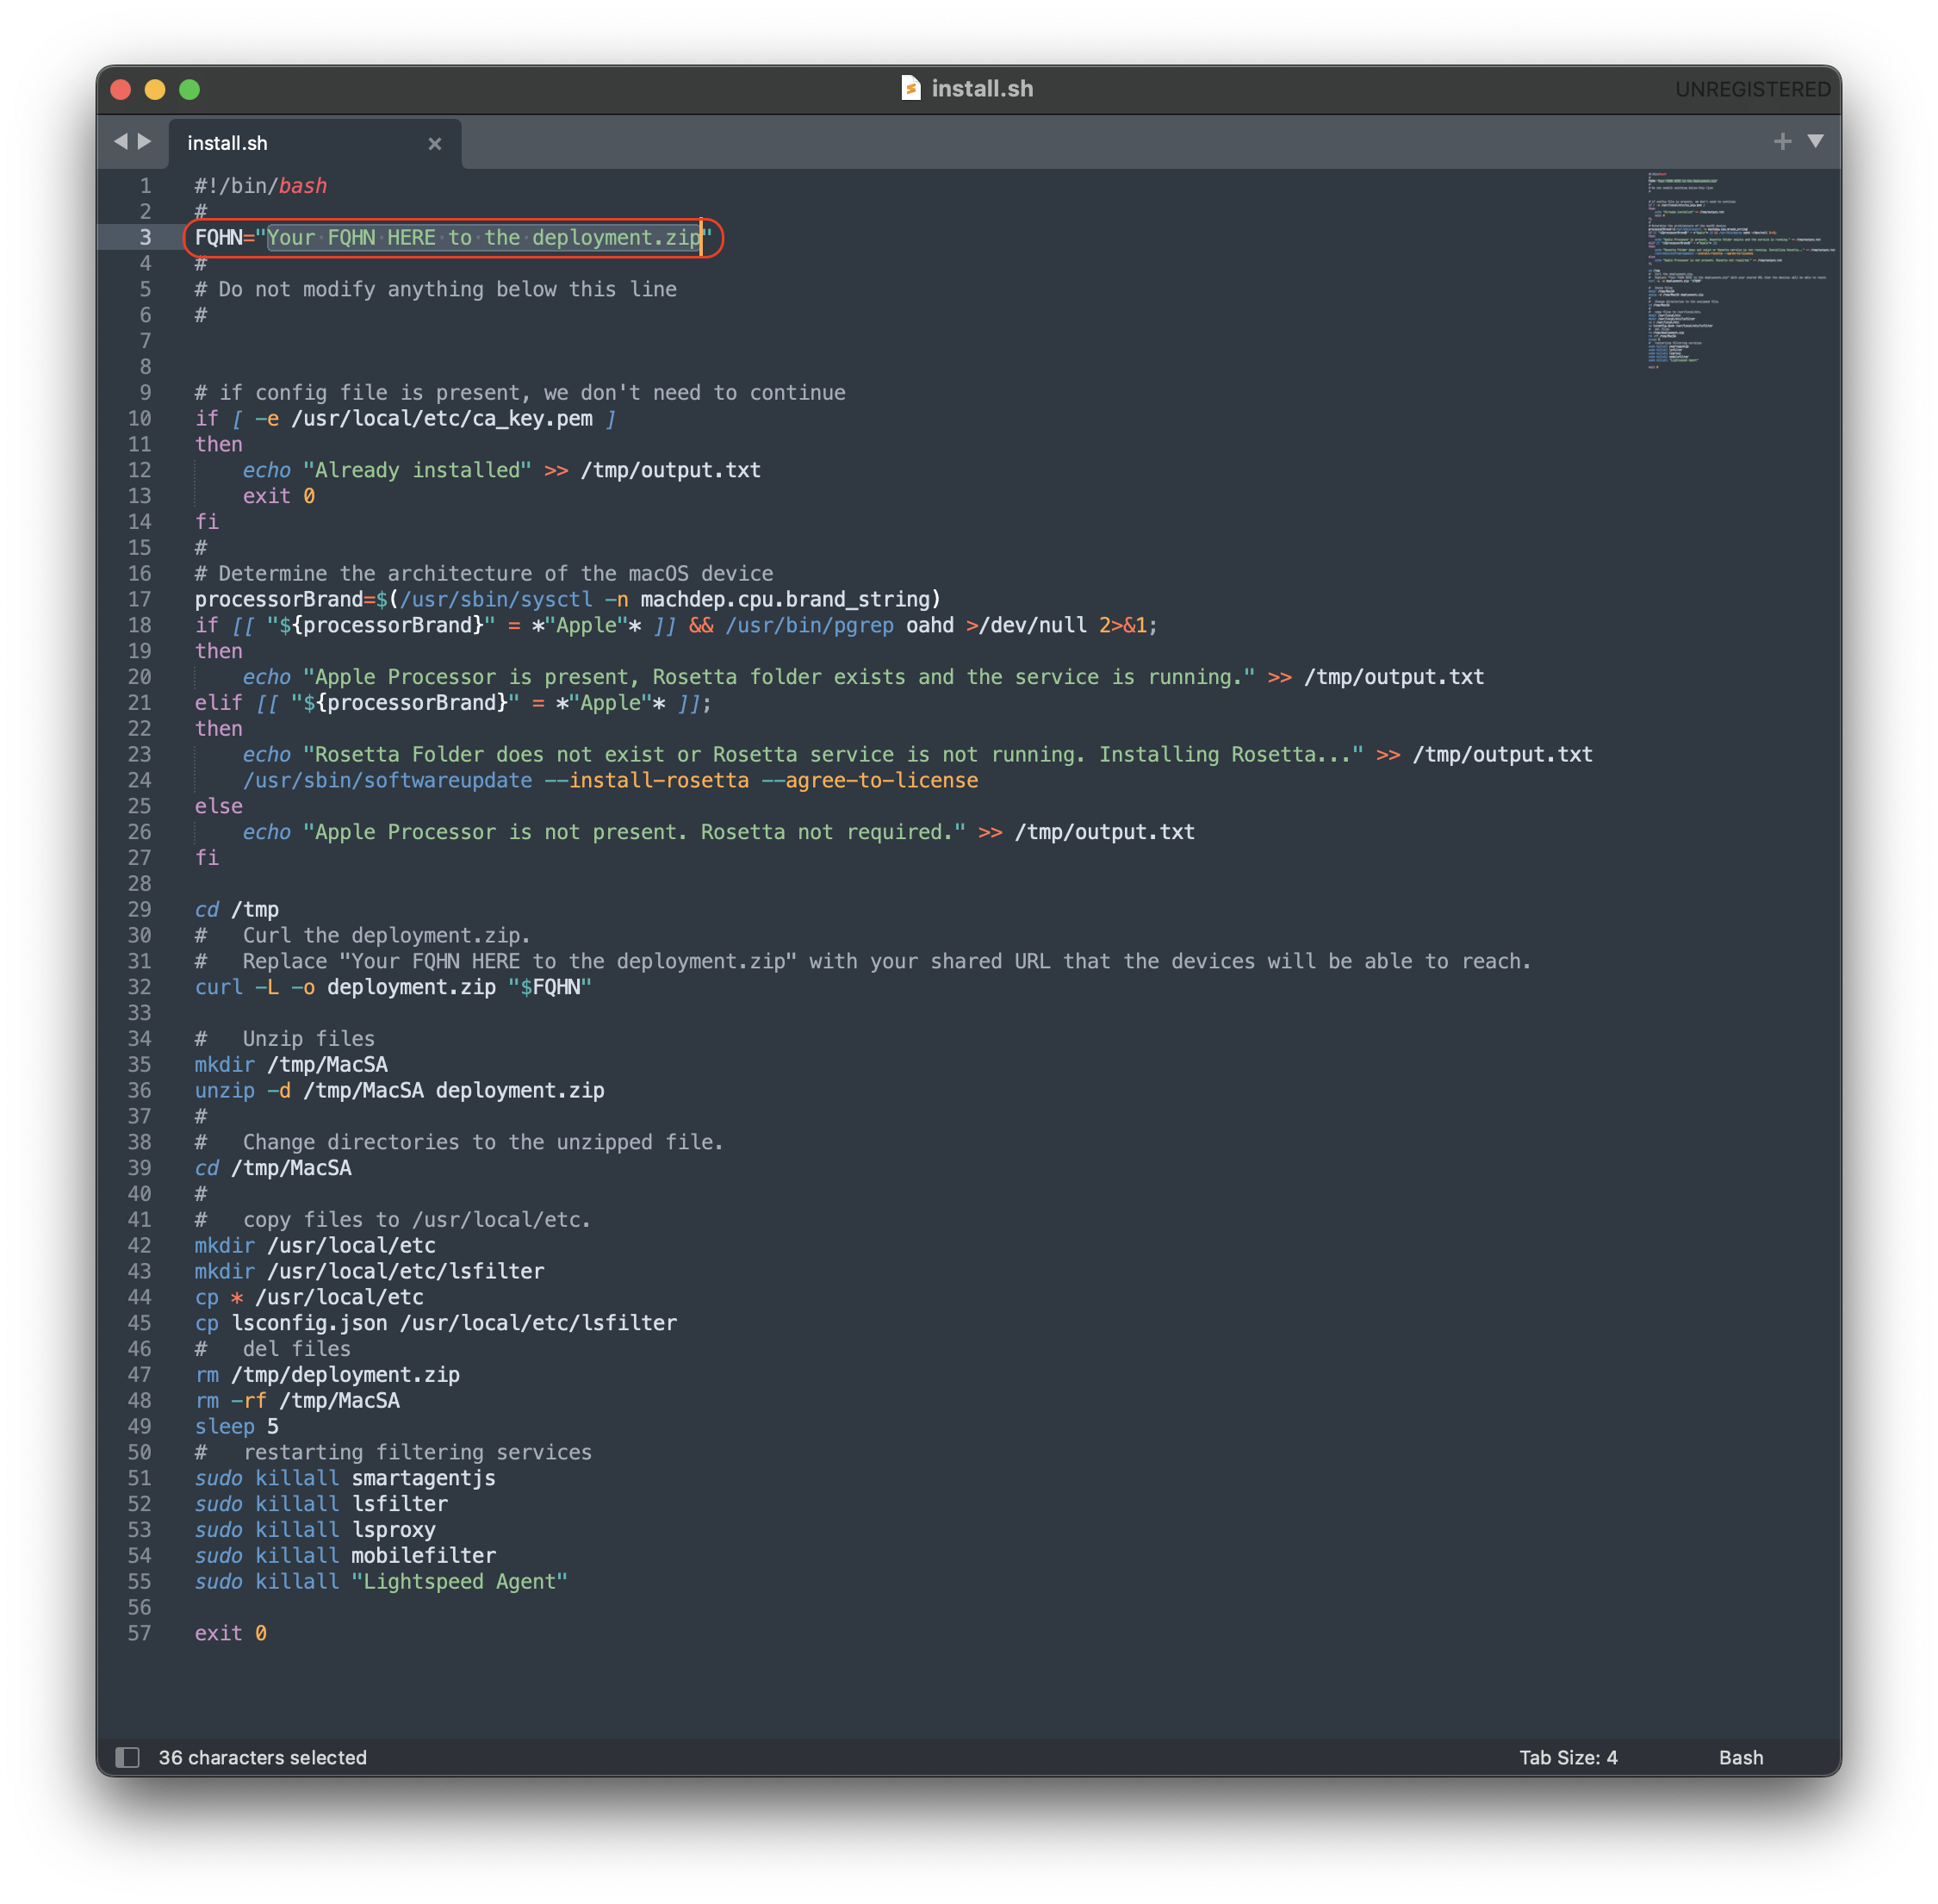
Editing the Install script
-
Download and unzip the Install script, found here: install_lightspeed.sh
-
Open the install.sh in TextEdit or compatible Text Editor, for example Sublime Text
-
Enter in your URL to the hosted file in line 3 of the Install Script; between the quotes, where it says, “Your FQHN HERE to the deployment.zip”
-
Save the changes to the install.sh script
Note: The deployment.zip file created on the desktop must be hosted for the deployment to succeed. (This can be accomplished with Google Drive (may use Google Drive Direct Link Generator), Microsoft OneDrive, Amazon S3, etc.) Be sure the deployment.zip file is accessible for the install.sh script to downloaded successfully, otherwise this will not complete the installation of the Lightspeed Filter.
Import the Smart Agent PKG
-
Navigate to Filesets > Create New Desktop Fileset > Select MSI / PKG
-
Navigate to your downloaded SmartAgent.pkg to upload into the Fileset
-
Please wait a few moments for the PKG installer to upload into your FileWave server
-
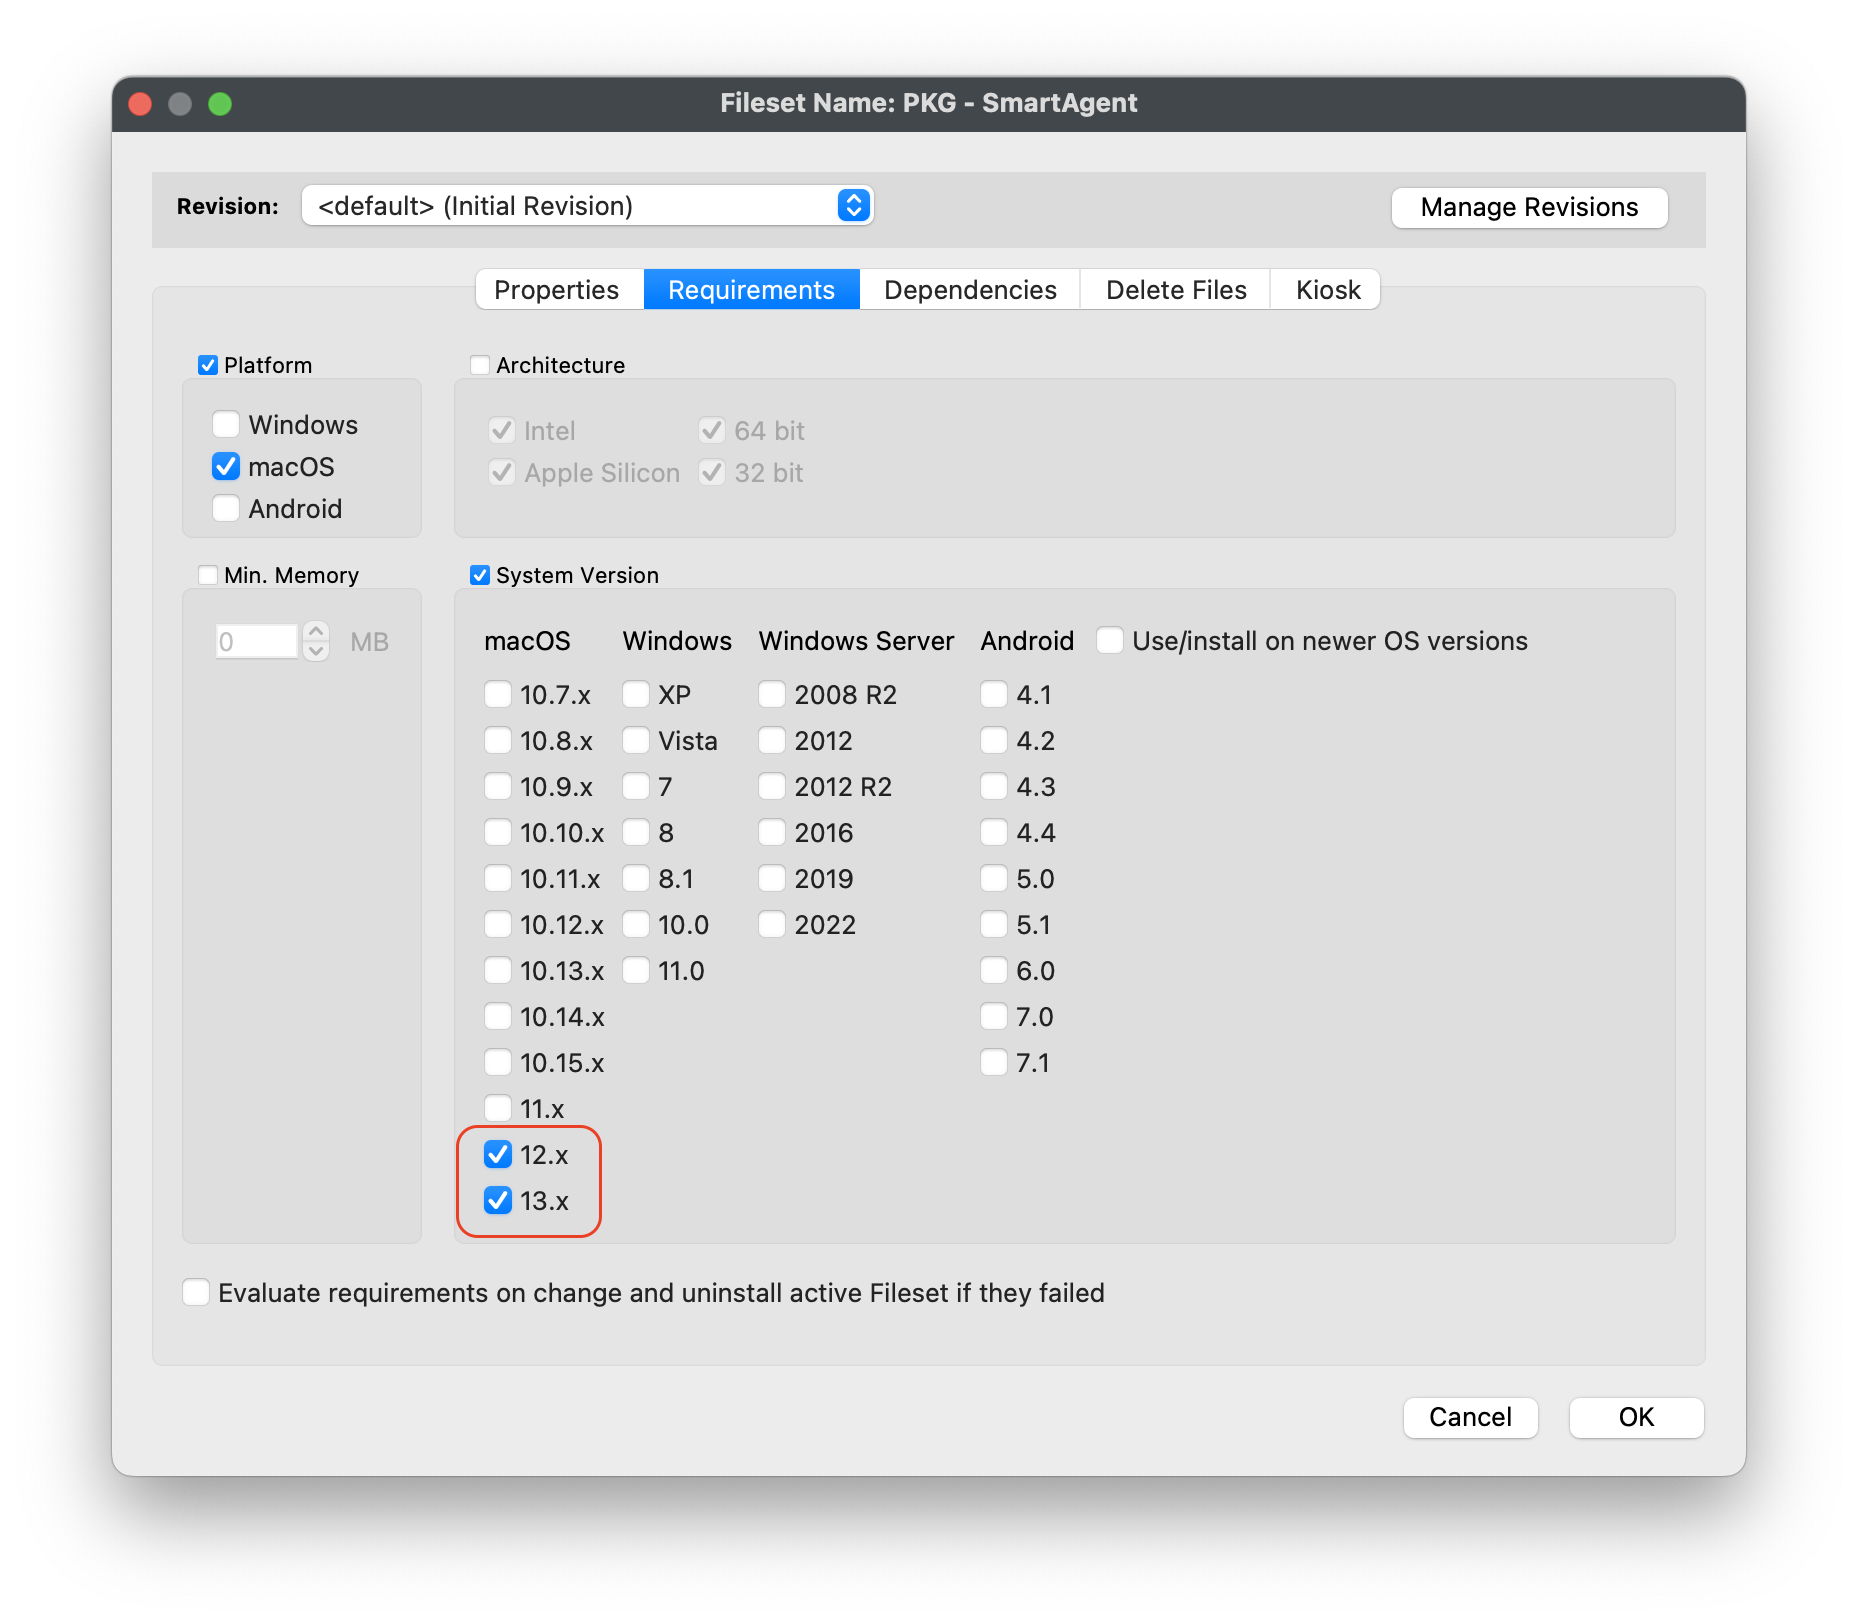
After successfully uploading, highlight the Fileset > Select Properties
-
Under the Requirements tab, check the box Platform and check macOS only, then under System Version and checkboxes only for macOS 12.x and 13.x
-
Click OK to save
Note: If all of your devices are not on macOS 12 or greater, you will want to set the Requirements for the Fileset for macOS 12 and above
Editing the Smart Agent PKG Fileset
- Highlight the newly created Fileset with your Smart Agent PKG
- Click on Script in the menu to open Script dialogue window
- Highlight Requirement Scripts and click on the Create button
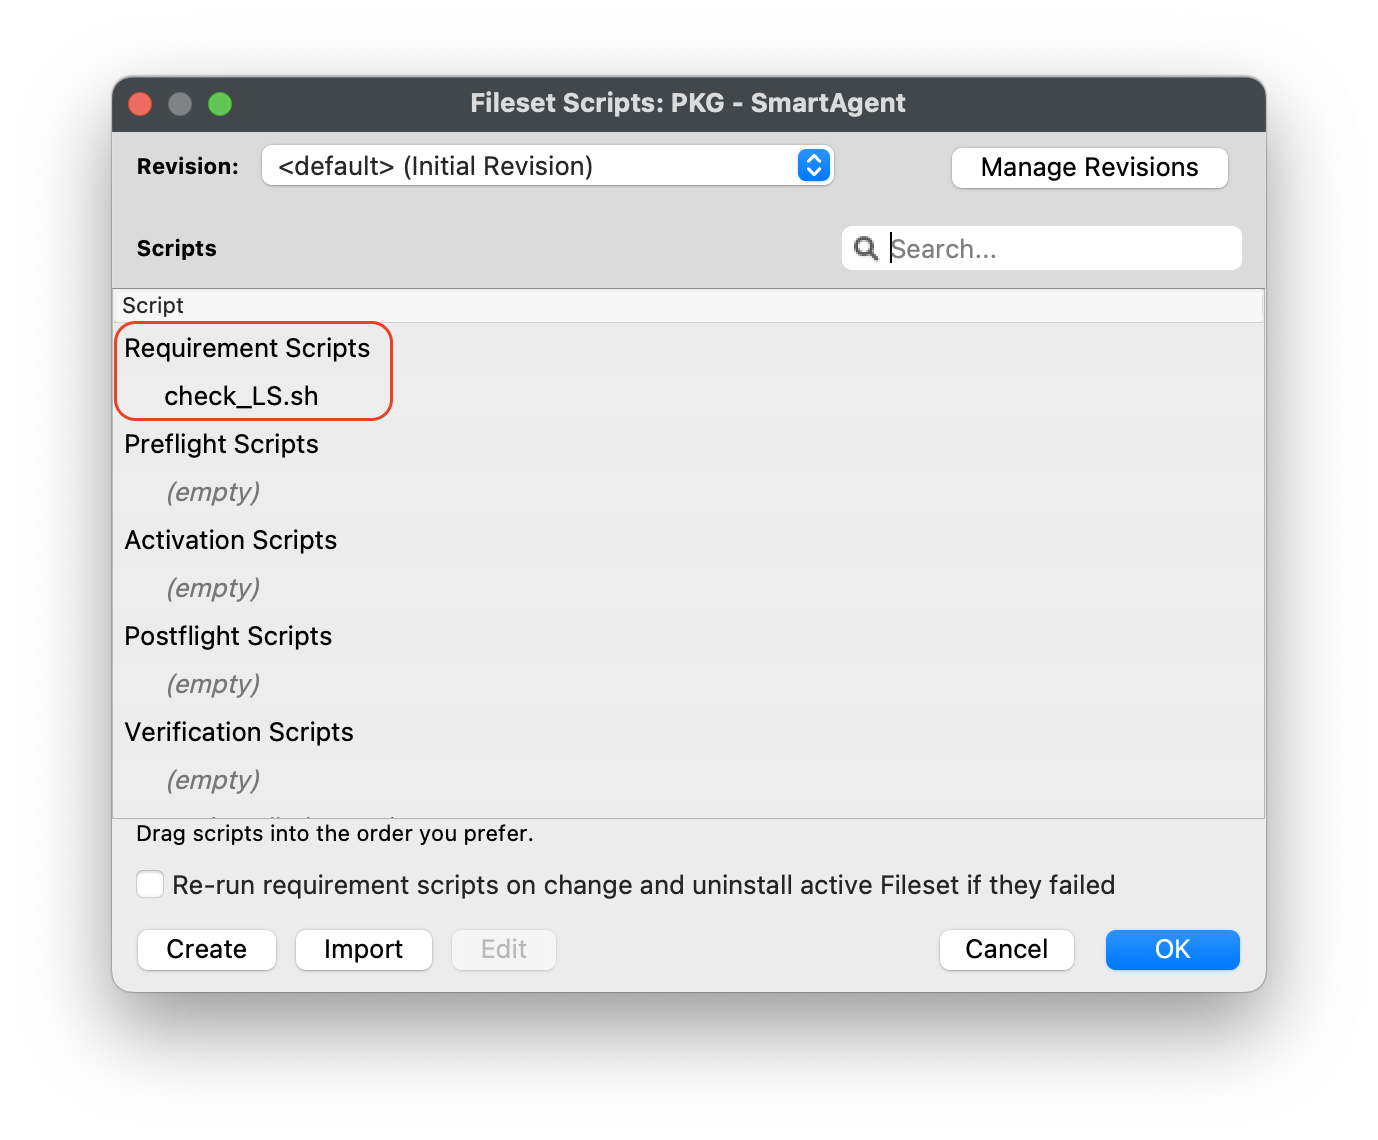
- Label script, check_LS.sh
- Copy and paste the entire check profile script below:
#!/bin/zsh found_profile="" while [ $# -gt 0 ] do found_profile=$(profiles list all | awk -v search=$1 '$0 ~ search {print $NF}') if [ ! -z $found_profile ] then echo "Found installed profile: $found_profile" exit 0 else echo "Did not find $1" fi shift done exit 1 - Click OK to save the script
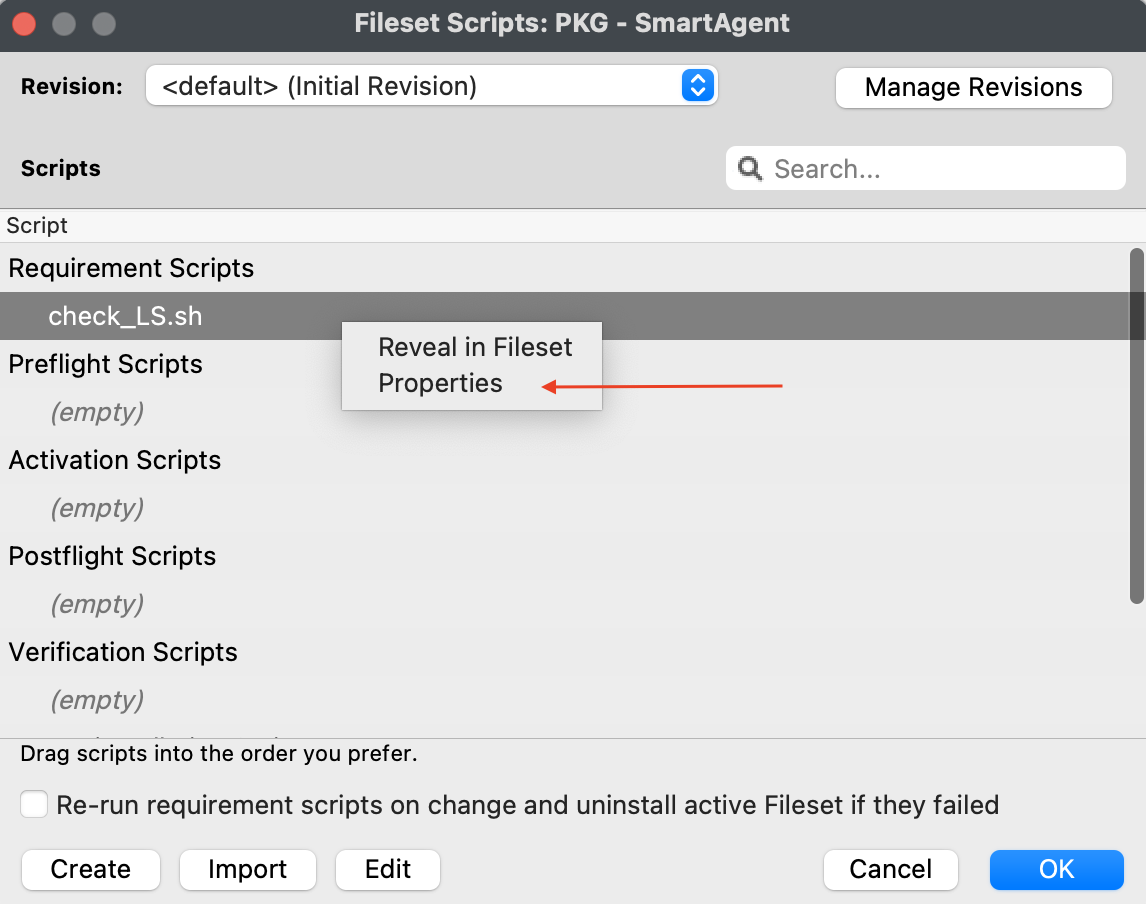
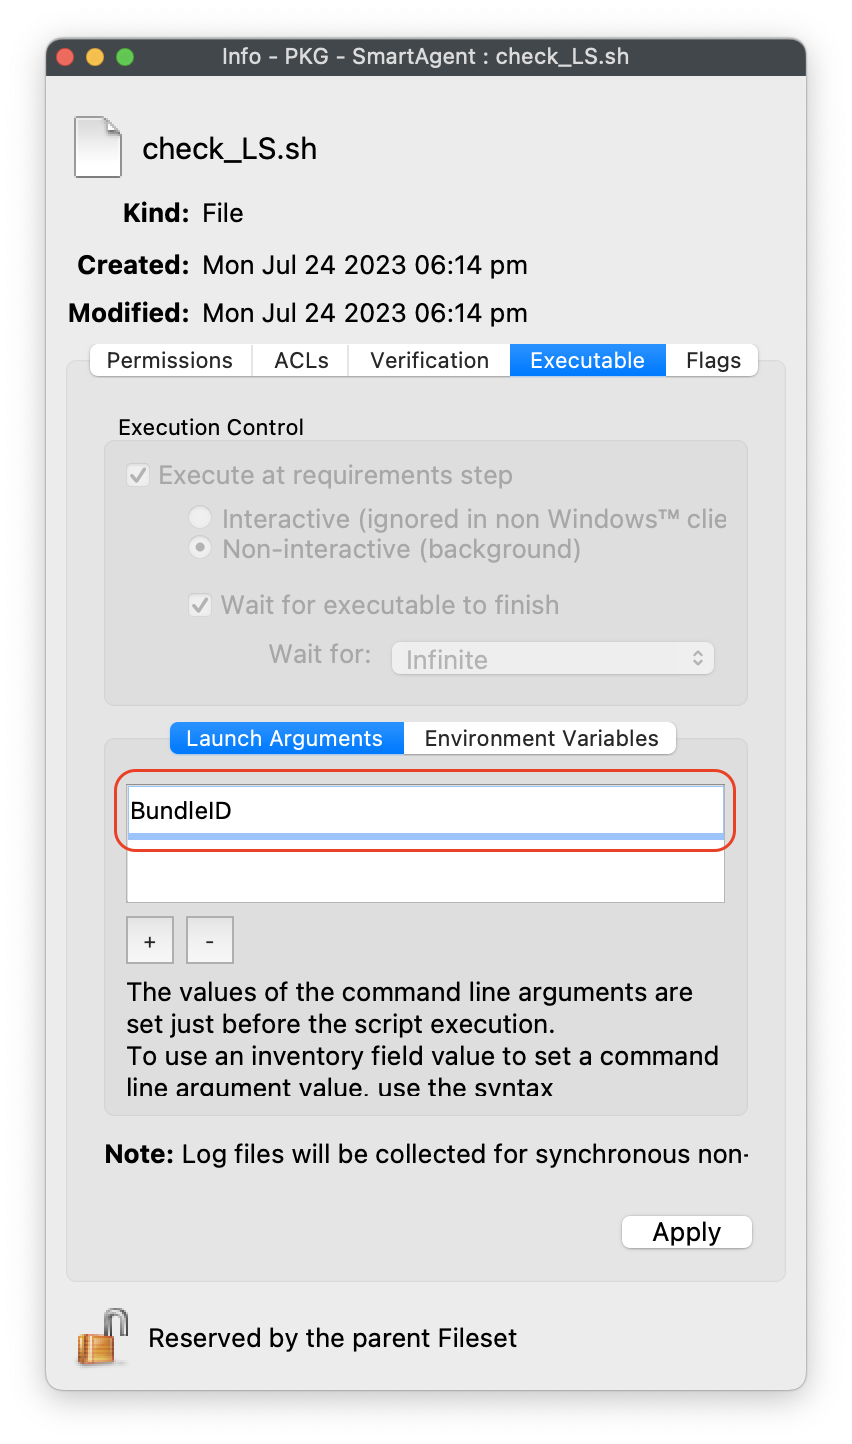
- Highlight the check_LS.sh and right-click to select Properties

- Select the Executable tab, under the Launch Arguments tab, click on the + button to add your Lightspeed Agent Profile’s Identifier (found by double-clicking on your Lightspeed Agent Profile)
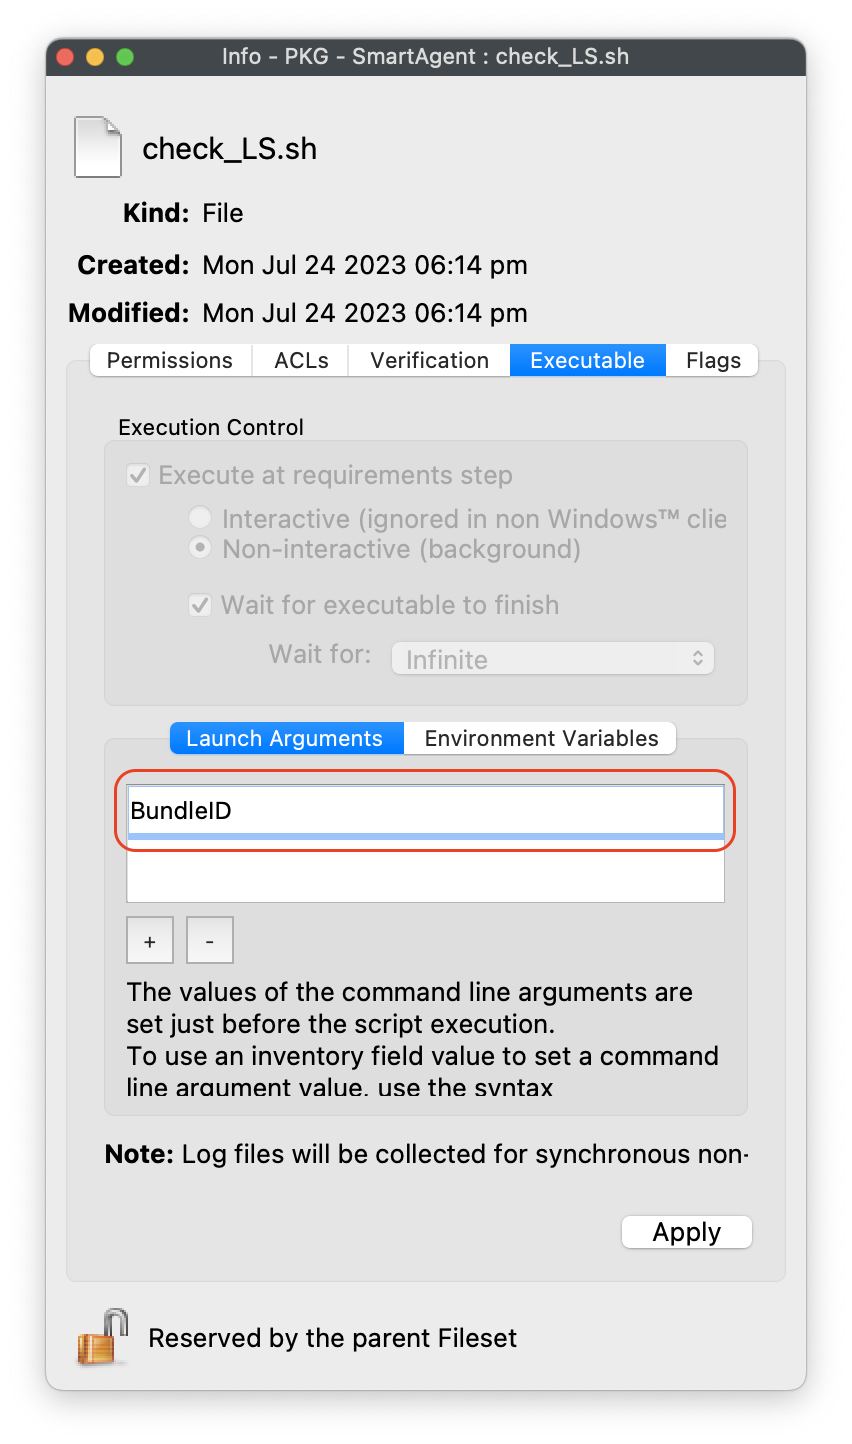
- Click OK to Apply to save changes
- Close out Properties of the Requirement Script
- Click OK to save changes to Smart Agent PKG Fileset
Creating the Installation Fileset
-
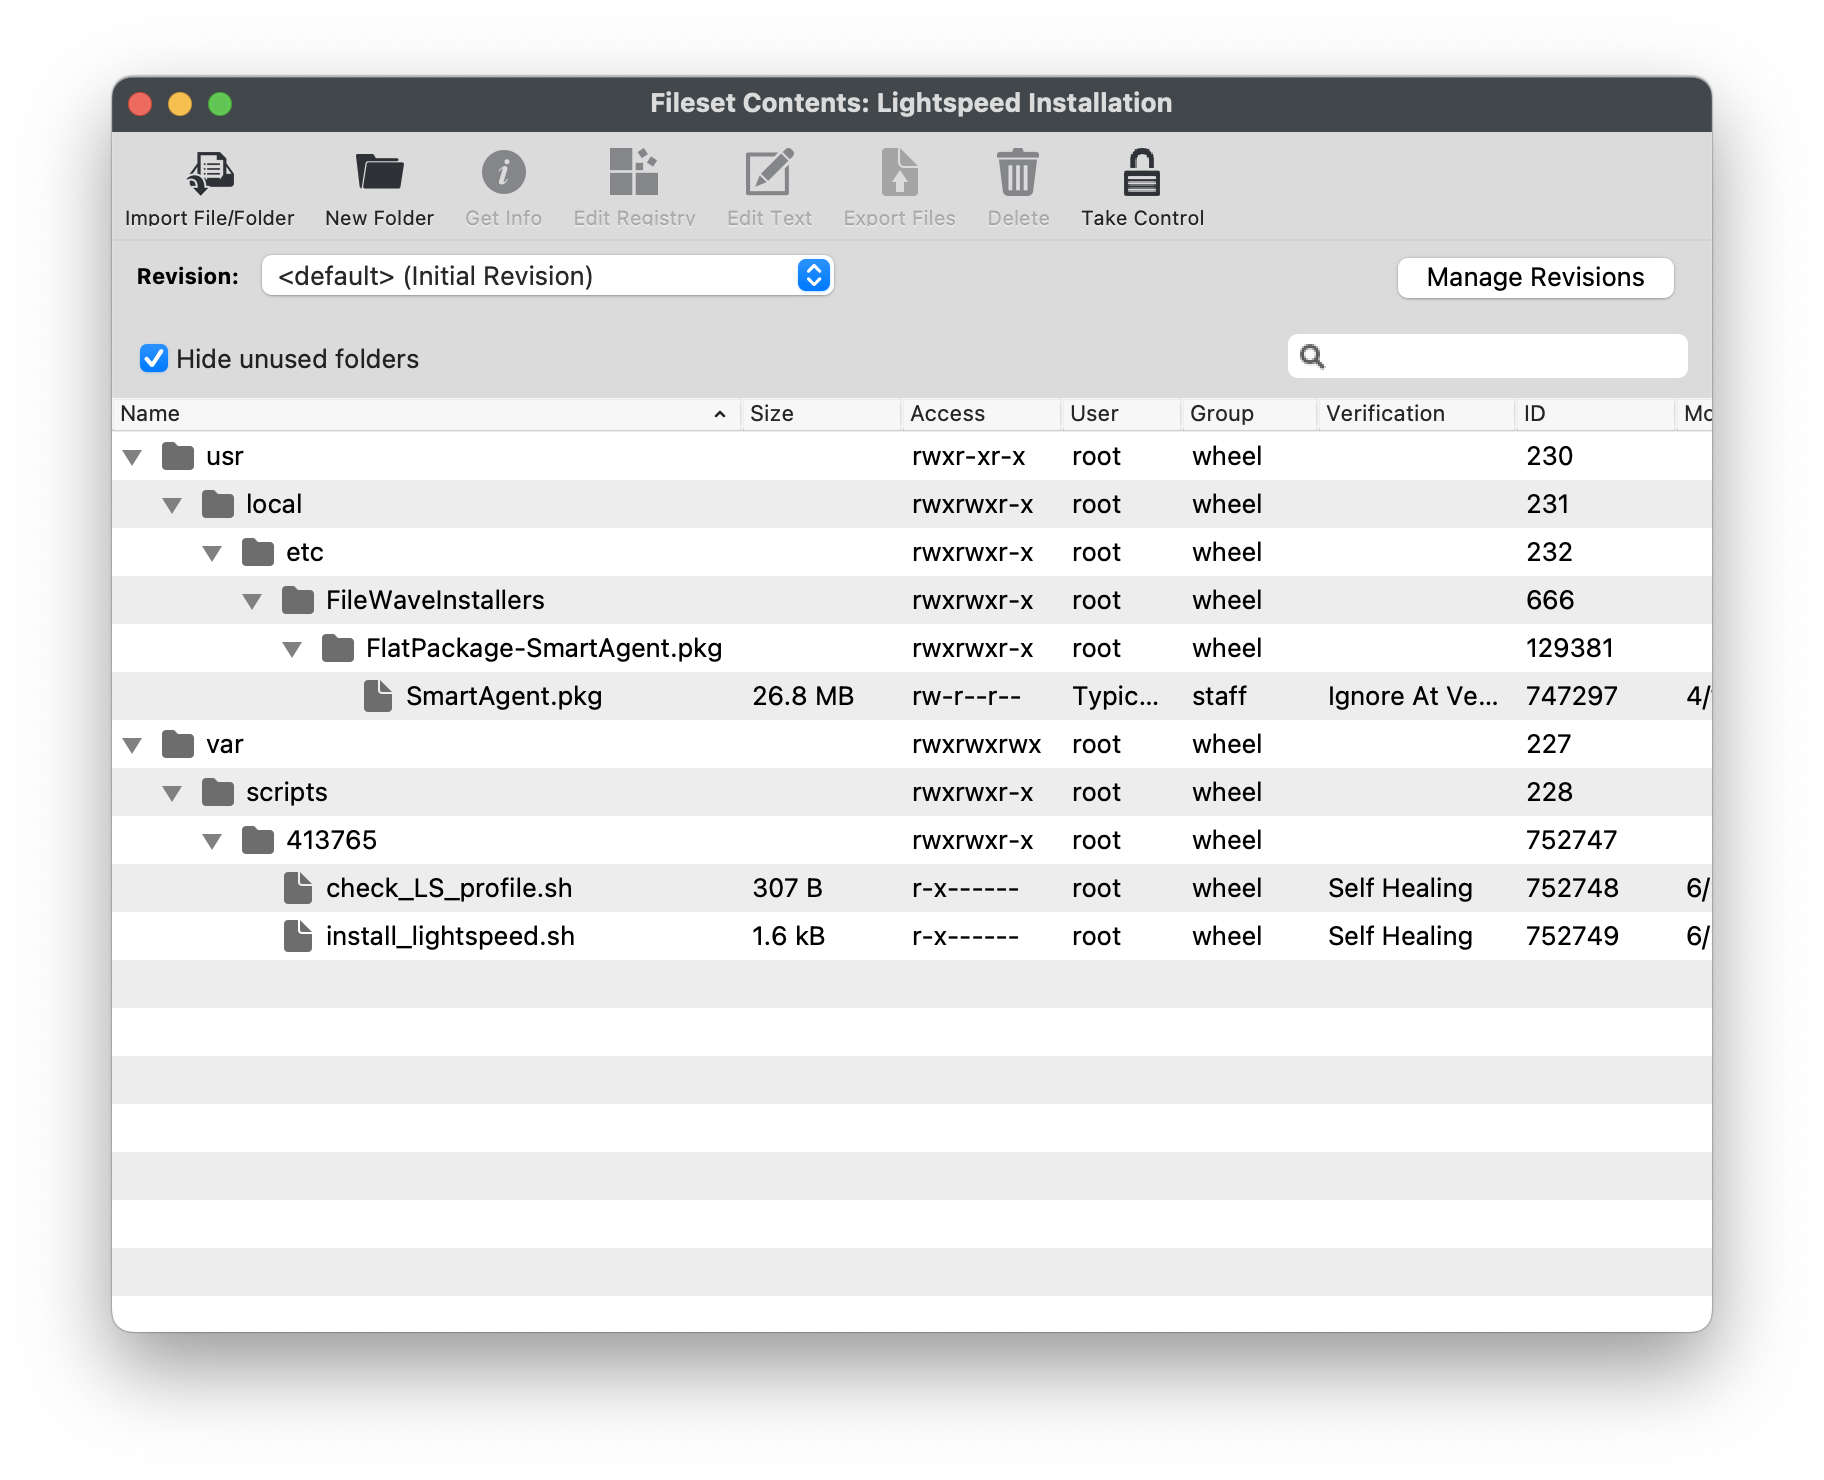
Navigate to Filesets > Create New Desktop Fileset > Empty Fileset > label Lightspeed Install Script
- Click on Script in the menu to open the Script dialogue window
-
Highlight Activation Scripts and click on the Create button
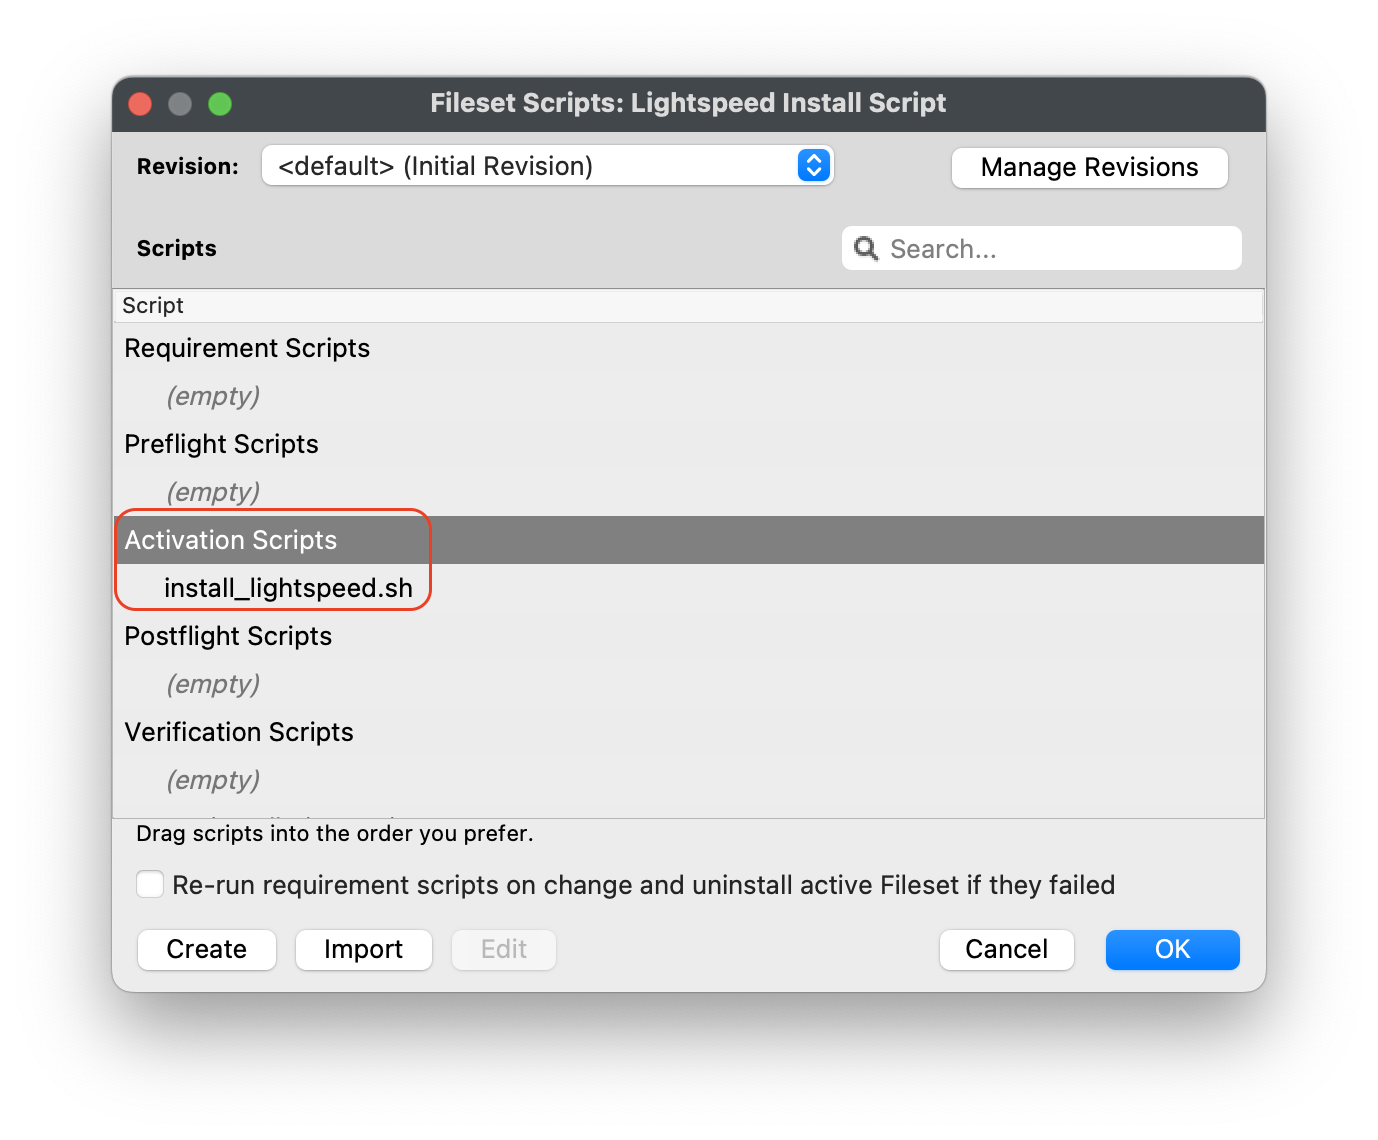
-
Label script, install_lightspeed.sh
-
Copy and paste the entire install.sh script that you saved your URL to hosted file from previous step on Editing the Install Script.
-
Click OK to save script
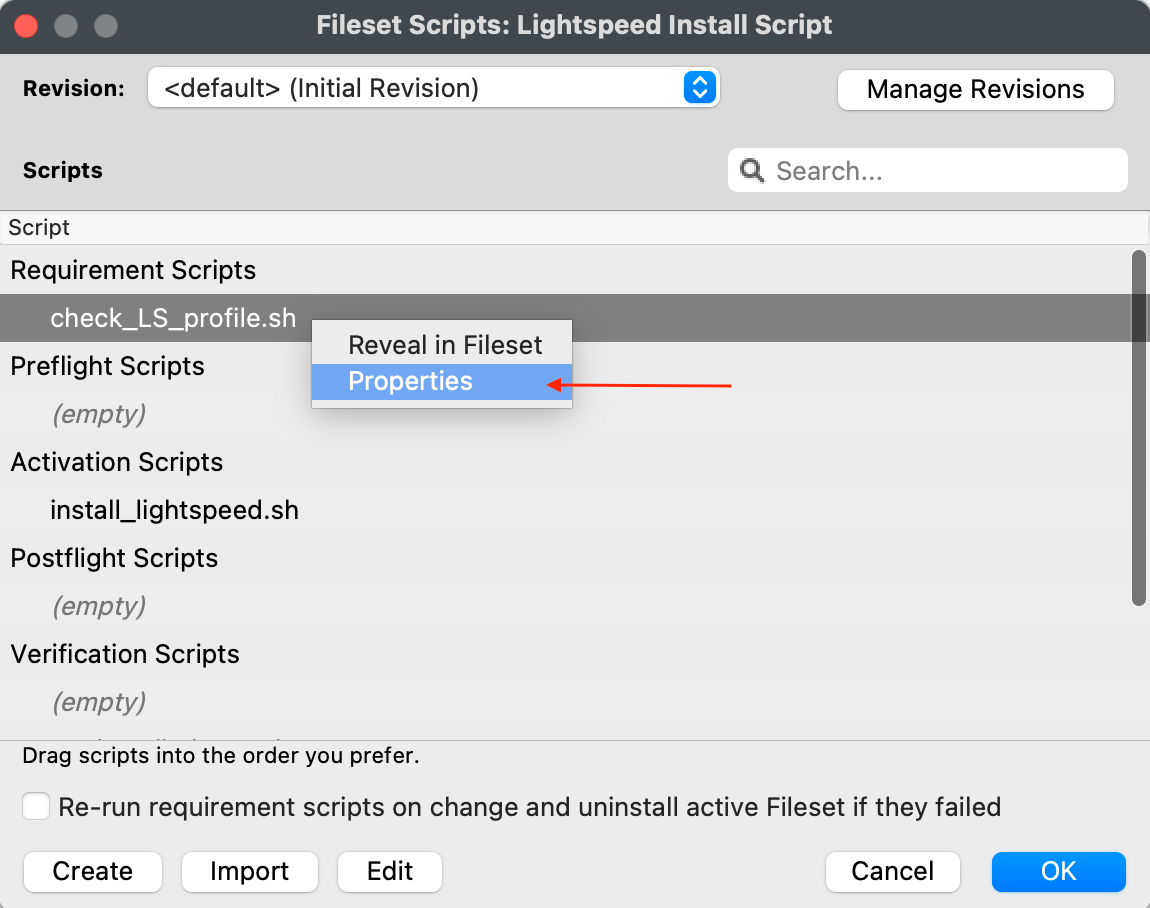
- Highlight Requirement Scripts and click on Create button
- Label script, check_LS_profile.sh
-
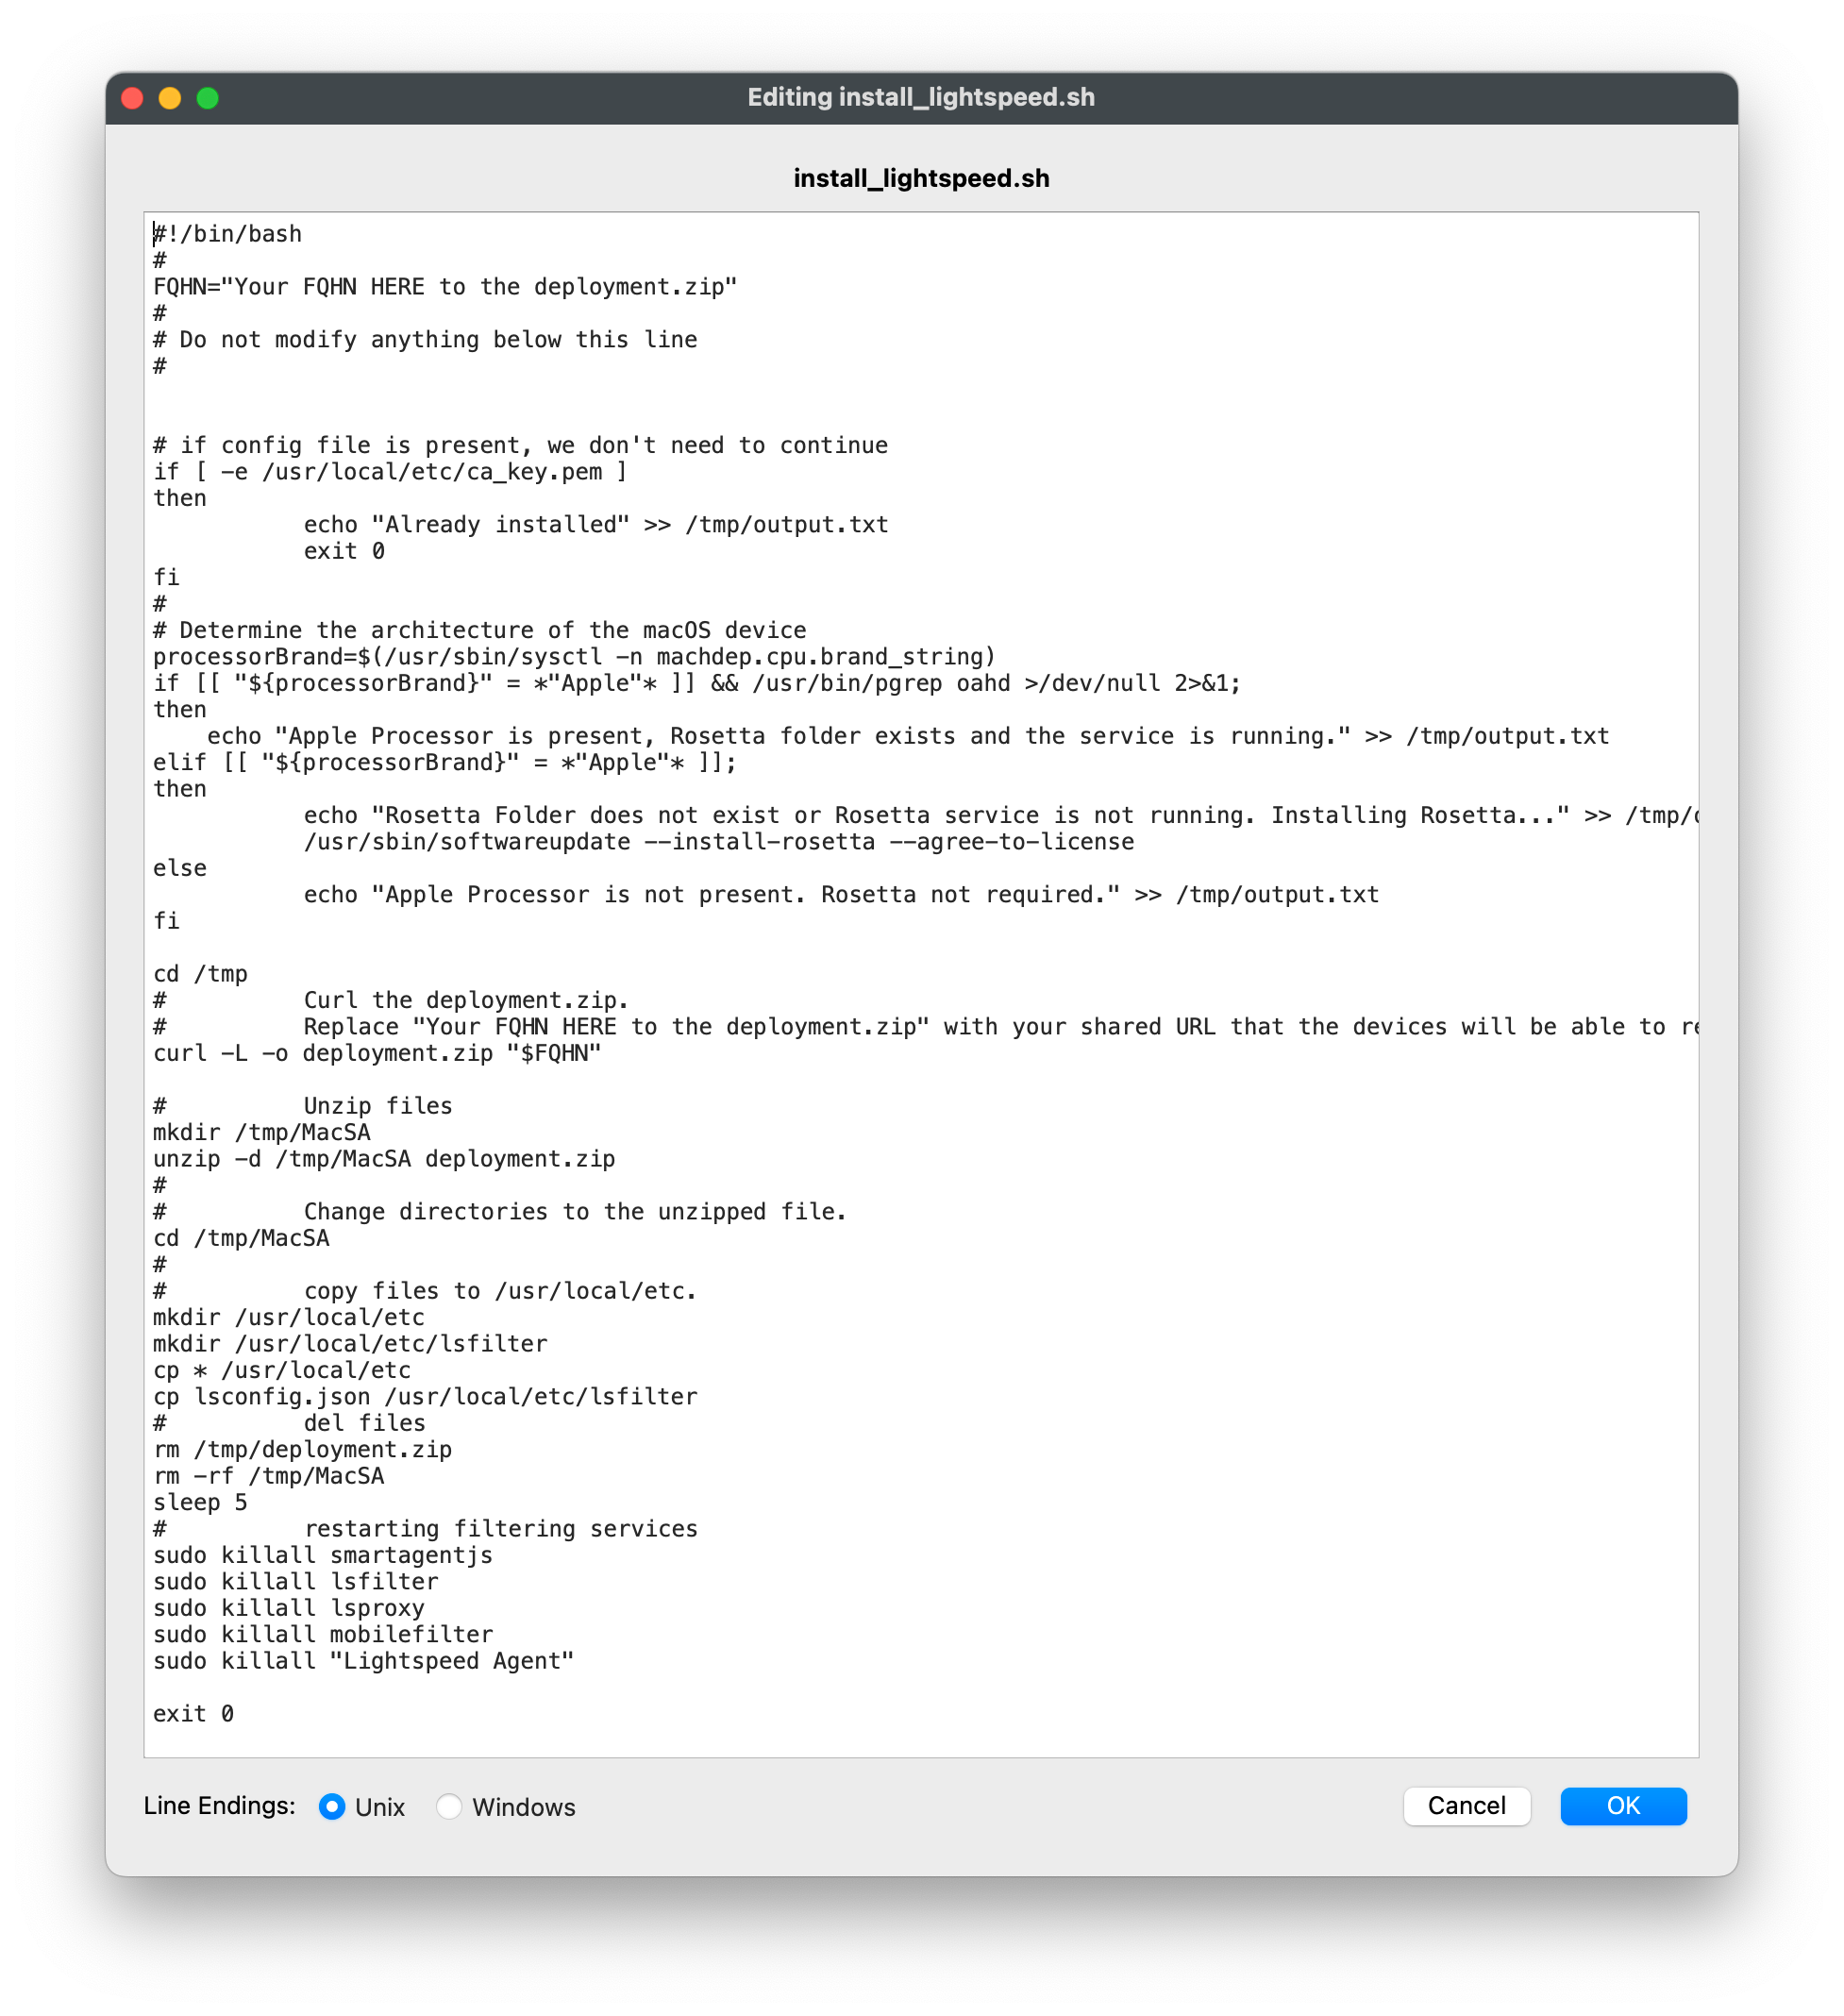
Copy and paste the entire check profile script below:
#!/bin/zsh

found_profile=""

while [ $# -gt 0 ]
do
	found_profile=$(profiles list all | awk -v search=$1  '$0 ~ search {print $NF}')
	if [ ! -z $found_profile ]
	then
		echo "Found installed profile: $found_profile"
		exit 0
	else
		echo "Did not find $1"
	fi
	shift
done

exit 1-
Click OK to save the script
-
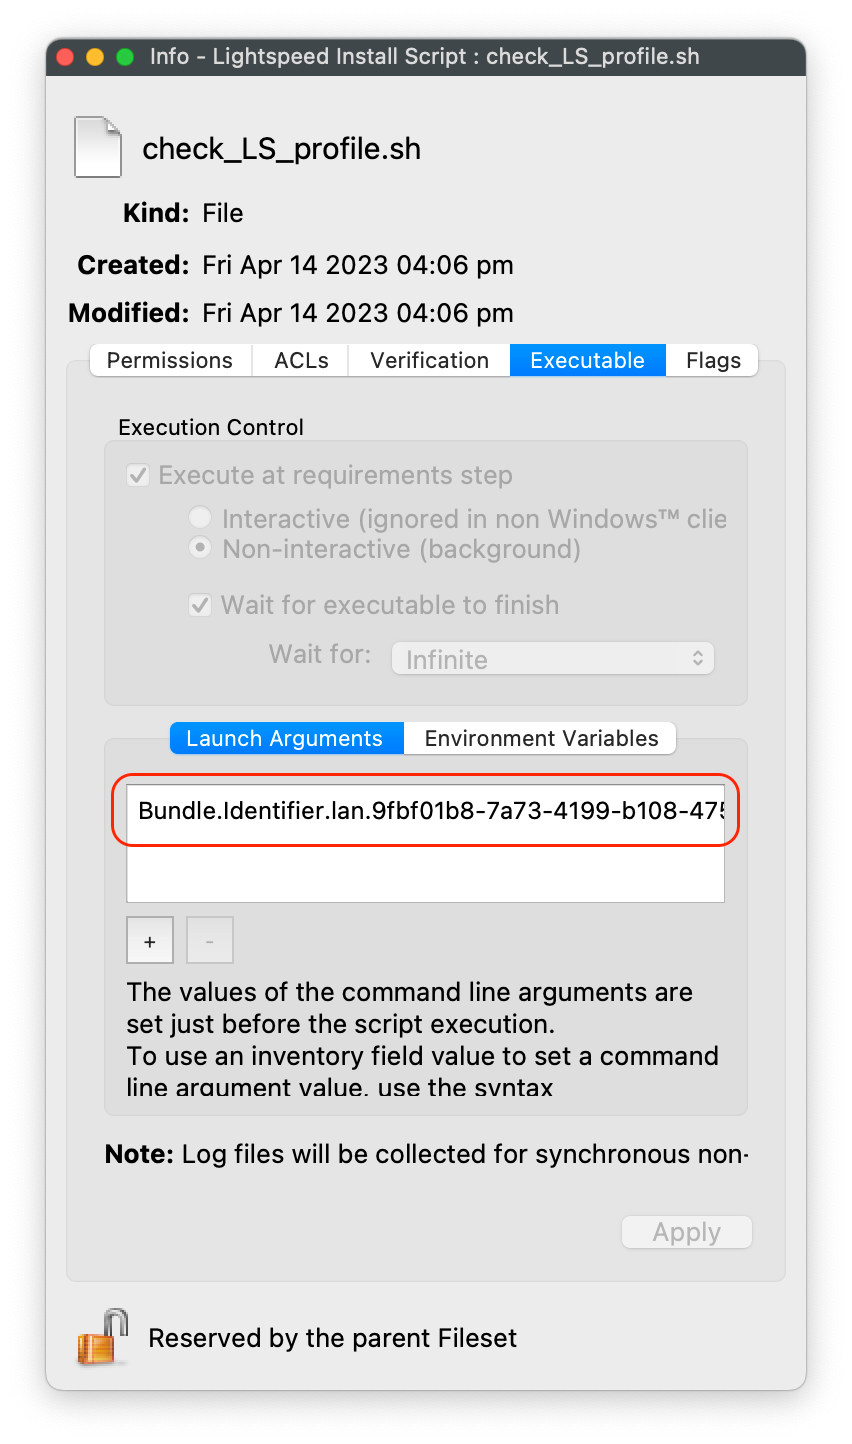
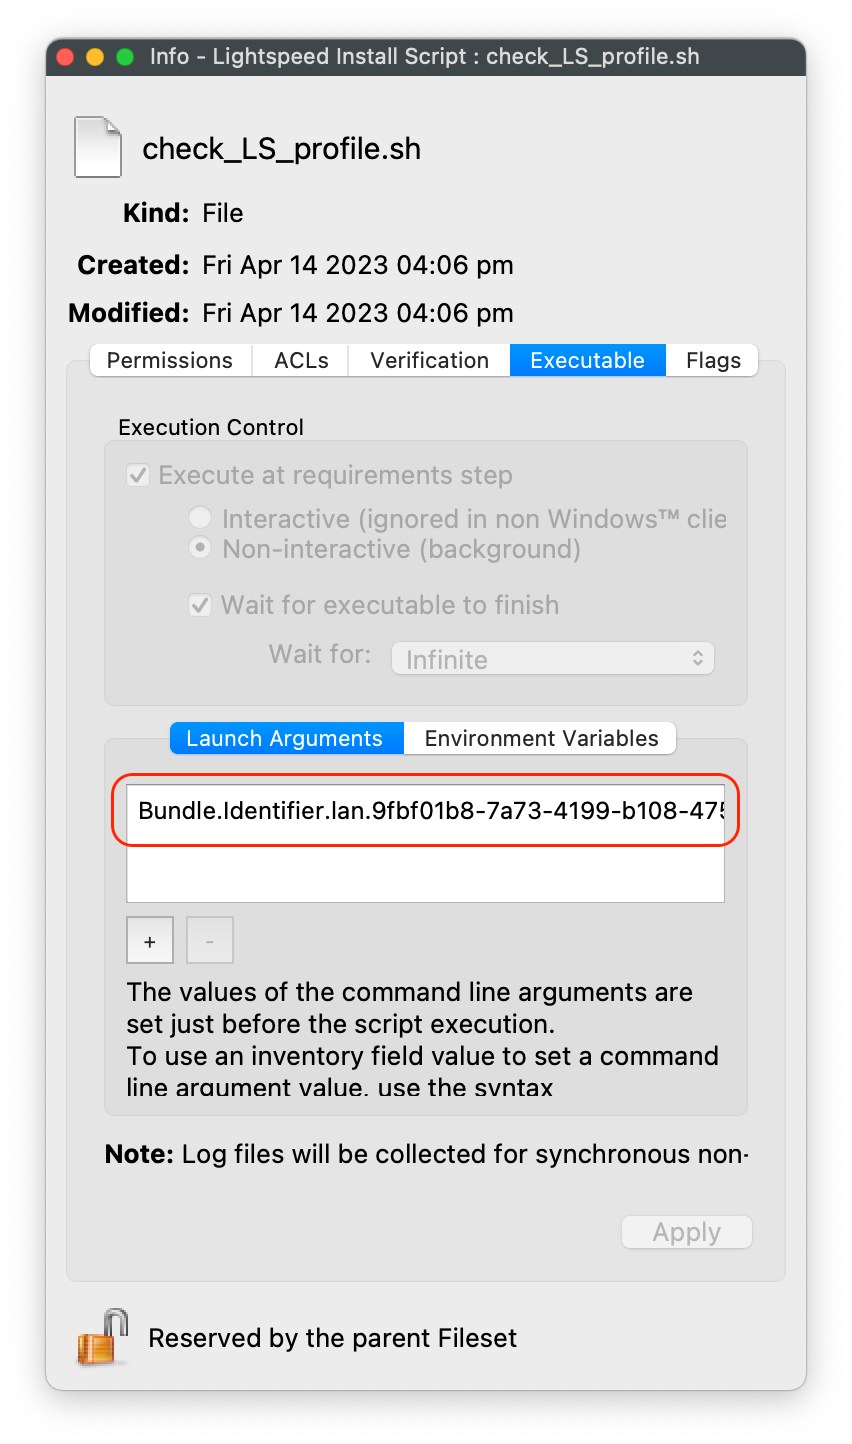
Highlight the check_LS_profile.sh and right-click to select Properties

- Select the Executable tab, under the Launch Arguments tab, click on the + button to add your Lightspeed Agent Profile’s Identifier (found by double-clicking on your Lightspeed Agent Profile)
-
Click Apply to save changes
-
Close out Properties of the Requirement Script
-
Click OK to save changes to Lightspeed Installation Fileset
Note: This Requirement scripts verifies that the Lightspeed Agent Profile is installed successfully BEFORE running the installation of Lightspeed.
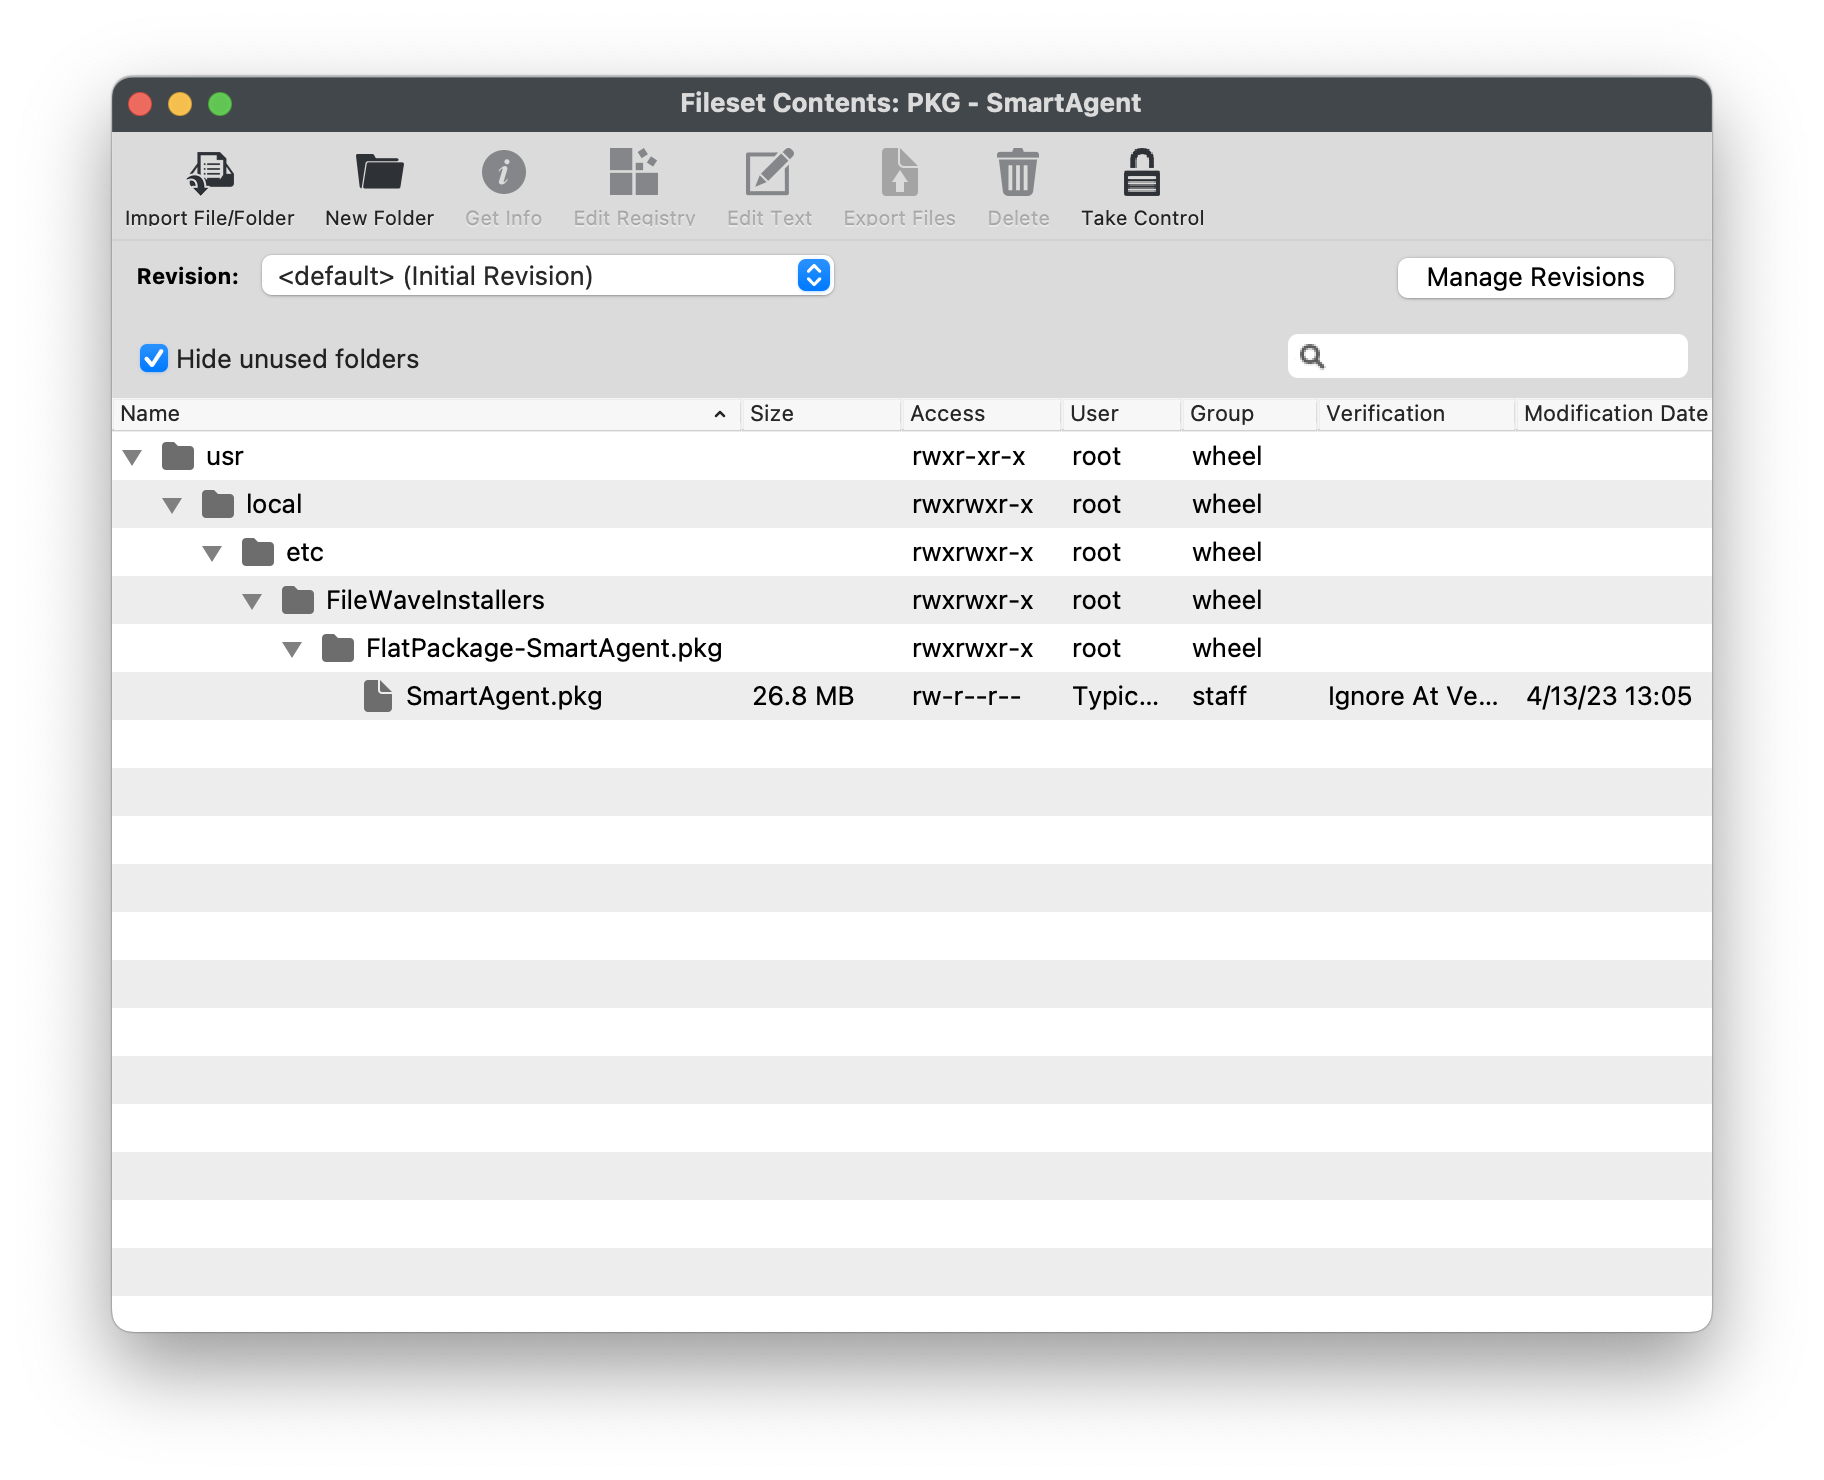
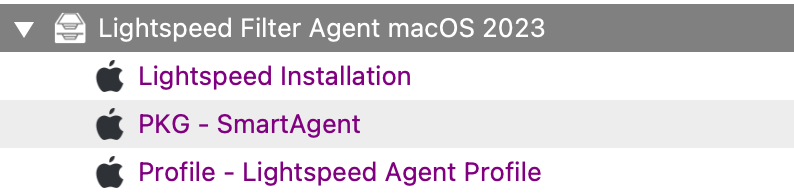
When all completed, the Fileset contents will include your Smart Agent PKG, Lightspeed Install and Profile.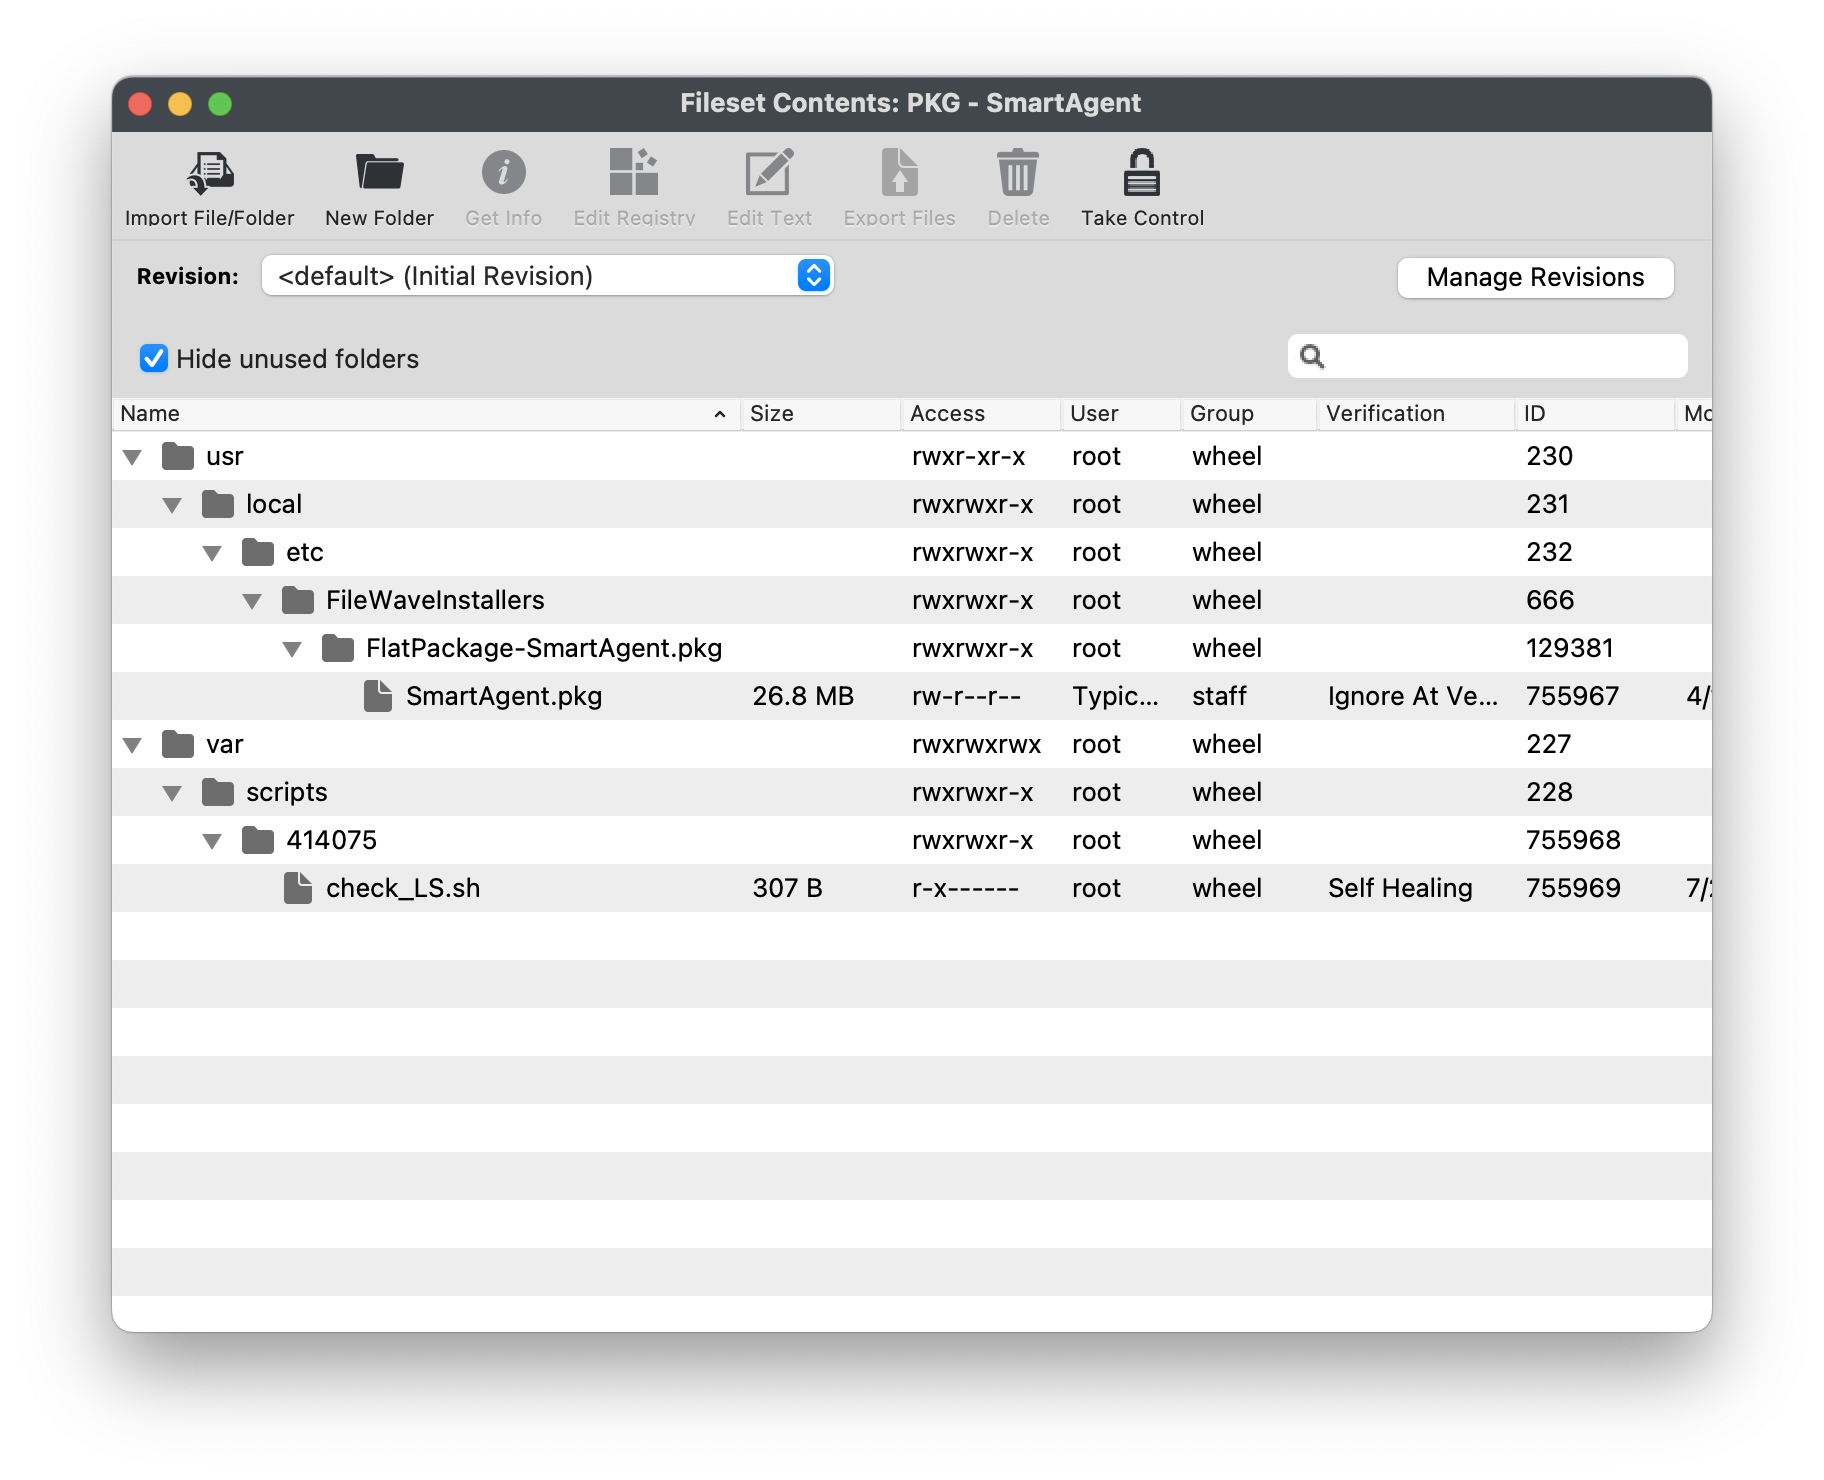
Creating Fileset Group for your Lightspeed Filter Agent Filesets
Keeping your Filesets organized is good practice, especially if there are multiple Filesets for software deployment. You may create a New Fileset Group, label it Lightspeed Filter Agent (macOS 2023), and move all the Filesets you created into that Fileset Group. Then you may associate the Fileset Group labeled Lightspeed Filter Agent (macOS 2023) to your devices versus individual Filesets.
Once all the Filesets and Profile have been created, you may associate the Fileset Group labeled Lightspeed Filter Agent macOS 2023 to a few devices as a test. This is to verify and confirm that the filter is installed and filtering properly based on your configurations. For best practice, always test a few devices before mass deployment.
Lightspeed Smart Filter Deployment (iOS 2023)
Needing to deploy Lightspeed for iOS devices? Review the KB article here: Lightspeed Smart Filter Deployment (iOS 2023).
Lightspeed Smart Filter Deployment (macOS v2.3.1+ using Certificate Manager)
Needing to deploy Lightspeed for macOS using Certificate Manager? Review the KB article here: Lightspeed Smart Filter Deployment using Certificate Manager.
No comments to display
No comments to display