
Deploy PaperCut Print Deploy on macOS
Description
Use this recipe to deploy the PaperCut Print Deploy client and its server configuration to macOS devices managed by FileWave.
Ingredients
- FileWave Central and macOS devices managed by FileWave
- PaperCut NG/MF 19.1 or later and macOS 10.13 or later
- PaperCut NG/MF administrator access
- A configured Print Deploy reference computer and at least one manually tested print queue
- Client access to the PaperCut Application Server on TCP ports 9191, 9192, 9195, and 9174
- The PaperCut Print Deploy PKG installer and
com.papercut.printdeploy.client.plistconfiguration file
Directions
Converting the DMG to a PKG installer
Download the macOS client from the Print Deploy area of your PaperCut NG/MF server.
- Log in to your PaperCut NG/MF server, for example,
https://print-server.example.net:9192/admin. - Click Enable Printing > Print Deploy. The Print Deploy page is displayed.
- Next to Download clients, click the macOS button at the bottom of the page.
- Save the .dmg file to your Documents folder.
- Look at the filename and check that the hostname between the square brackets is correct, for example,
pc-print-deploy-client[print-server.company.lan].dmg. - Double-click the .dmg file and copy PaperCut Print Deploy Client.pkg to the Desktop.
Creating .plist file to configure your MDM macOS clients
The PaperCut Print Deploy Client can use a .plist file to set its server address. You can share and deploy these files in many different ways, such as with a .mobileconfig file, a file-copy command, or a scripted file creation on the client. For our recipe, we are just going to deploy the .plist to the proper directory along with our .pkg.
Note: The .plist file needs to be in proper format. The PaperCut client will not function with your desired configurations if this is not saved in the correct format.
To create the .plist file:
-
Open a terminal and issue the following command:
defaults write ~/Documents/com.papercut.printdeploy.client server_host hostname -
Replace
hostnamewith the FQDN from the DMG filename, for example,print-server.company.lan. PaperCut recommends an FQDN rather than an IP address. -
Convert the .plist file with the following command:
/usr/bin/plutil -convert xml1 ~/Documents/com.papercut.printdeploy.client.plist
This will ensure that the file can be read correctly. -
Verify the contents of the new
.plistwith the following command:defaults read ~/Documents/com.papercut.printdeploy.client.plist
The output should be:macOS:Documents localadmin$ defaults read ~/Documents/com.papercut.printdeploy.client.plist { "server_host" = "print-server.company.lan"; } macOS:Documents localadmin$
Example .plist file
<?xml version="1.0" encoding="UTF-8"?>
<!DOCTYPE plist PUBLIC "-//Apple//DTD PLIST 1.0//EN" "http://www.apple.com/DTDs/PropertyList-1.0.dtd">
<plist version="1.0">
<dict>
	<key>server_host</key>
	<string>YOUR_PRINT_SERVER_ADDRESS</string>
</dict>
</plist>
Download here: com.papercut.printdeploy.client.plist.zip
Replace the YOUR_PRINT_SERVER_ADDRESS, with your print server address if you use the example .plist file.
Creating the Fileset
- In FileWave Central, choose New Fileset, select the PKG Fileset type, and choose PaperCut Print Deploy Client.pkg.
- Open the Fileset Contents and clear Hide unused folders.
- Navigate to Library > Managed Preferences. Create the folders if they are not present.
- Upload
com.papercut.printdeploy.client.plistto/Library/Managed Preferences/. - Close the Fileset window to save it.
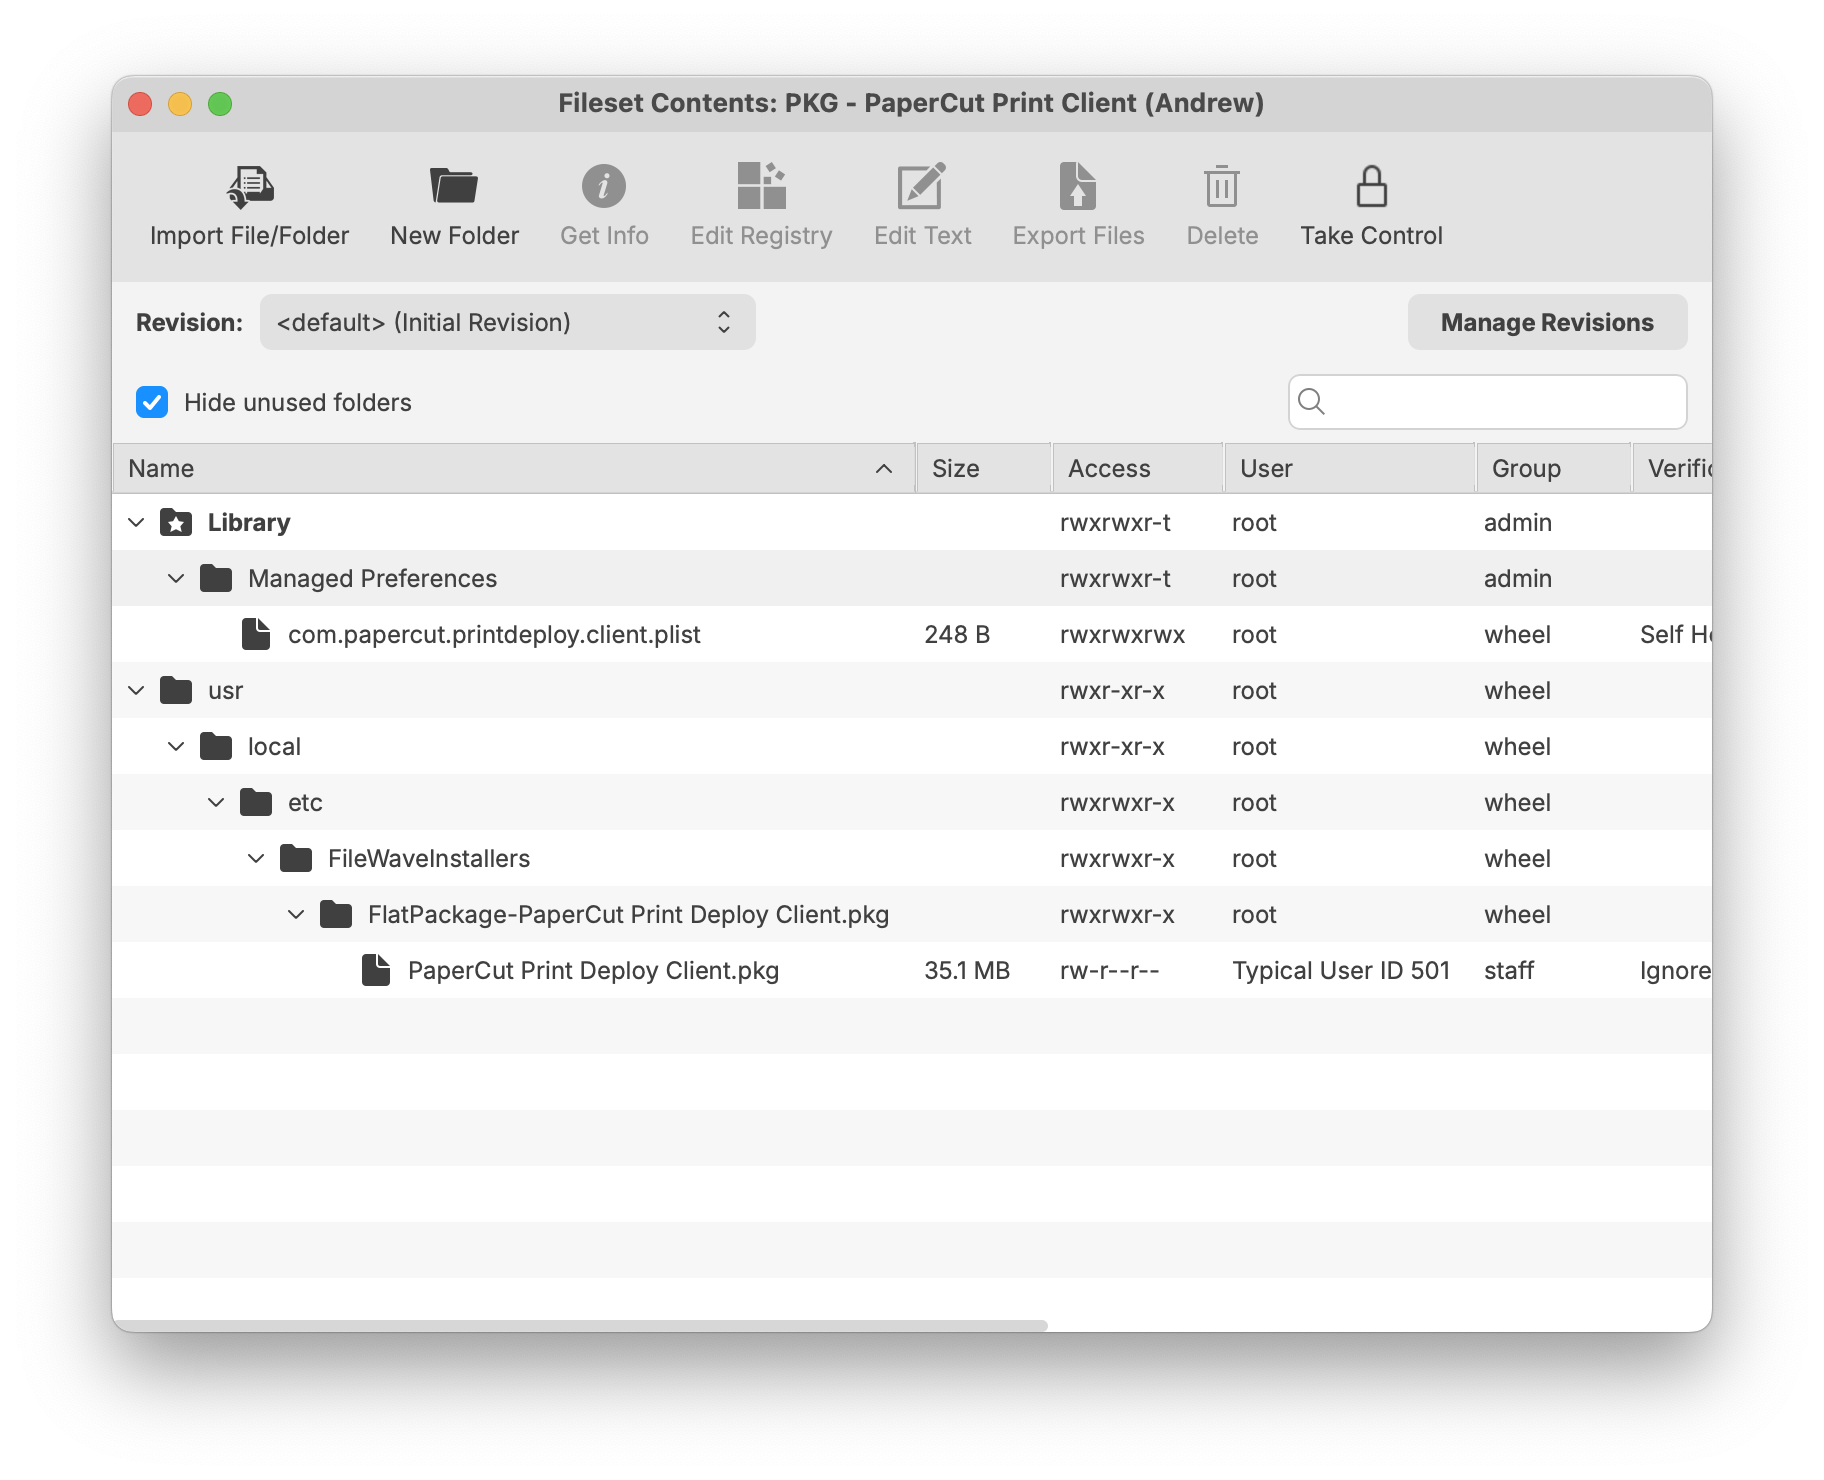
Use the exact target path. If /Library/Managed Preferences/ is not present in the Fileset, create it before uploading the plist.
Be sure the .plist file has the proper formatting and that the .plist file is in the correct directory. If the .plist file is found, the PaperCut Print Deploy client should honor the file's settings.
Deploy to a small test group first. Confirm that the client installs, accepts a known-good PaperCut login when prompted, and receives the expected print queues before expanding the deployment. A No Printers Found message can indicate either a connection failure or a PaperCut Zone assignment that does not include the user.
No comments to display
No comments to display