Create TCC Privacy Policy Control Payloads
Description
There is no way to escape the need to identify which services are being requested and require approval through the Privacy section of the Security & Privacy Preference Pane. Indeed there is an in-depth KB to assist this recognition. When an action triggers this process, there should also be an addition to the relevant Service, which may be seen from the Security & Privacy Preference Pane. Once these details have been established, the profile then needs to be built. This relies on the commands being run in a Terminal shell to obtain certain information, e.g BundleID and Code Signature.
To simplify this process, a Finder service has been built, which may:
- Create new Privacy Profiles
- Allow and Deny service rules and add Additional Apple Events
- Edit an already created Privacy Profile to update or add additional items
Requirements
- The following service
- Ironically, the Finder Service in its own right requires some privacy allowance
| ↓ macOS |
 |
Directions
- Unzip the service
- Double click to install the service
- When the service is first run, there will be a prompt to allow the service access rights; click OK
Now that the Service has the allowance to run, Privacy Profiles may be built with this Service.
Hidden Apps and Binaries
The service relies on selecting items with Finder; some though are hidden from finder view. An example is the FileWave Client.
To build Privacy Payloads for the FileWave Client for example, the selection should be:
- /usr/local/sbin/FileWave.app
To access these items, users may use Terminal to open the containing folder in Finder. For example:
open /usr/local/sbin/
Example
Consider the requirement to grant Terminal Full Disk Access
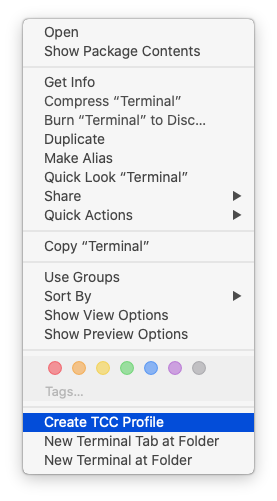
- Select Terminal.app in Finder
- Right-click and select 'Create TCC Profile'
- Note: On macOS Monterey, you will right click then choose Quick Actions then Create TCC profile
The first window will provide an option to create a new file or add to an existing file.
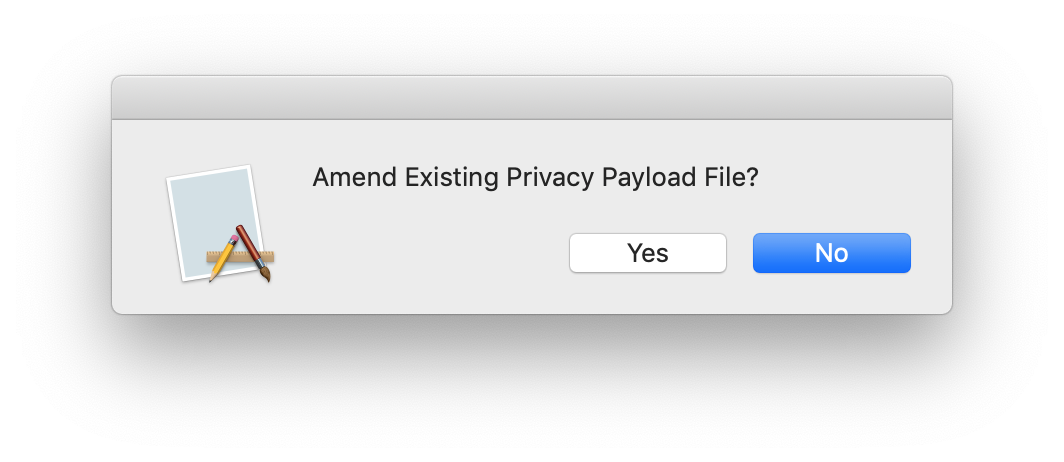
Select 'No'. You will then be presented with a Window of items to 'Allow'.

Select 'All Files'. The next two windows give the option to select items to 'Deny' and Add Apple Events, skip both of these and additionally select 'No' to 'Add other Apple Event'

Save the file and Finder will become active with the created file highlighted, ready to drag into FileWave.
Adding to an existing file
When choosing to add to an existing file, any additional item selected will have its services added from those newly selected. If an App, Bundle or Binary selected is one that already exists in the file, it will be reset and each service selected will replace those in the file; other Apps, Bundles, or Binaries that live inside the file will be left intact.
Delete: Cancel
When choosing to amend an already existing file, if 'Delete: Cancel' option is selected, the original file will be left as was, with no amendments. Choosing Save, however, will overwrite the original file.
Selecting Items
When selecting services, the interface is a standard Finder interface. As such you can use the Shift key to select a group of services or Command (⌘) click to select multiple items individually.
FileWave Client Binary
Managed allowance of services must be delivered through MDM to a device that has UAMDM, the FileWave Client, therefore, will not have any additional access granted when installed. Since each customer will have their own security requirements, there should be careful consideration when choosing which services to allow.
Examples could include:
- Accessibility
- System Post Events
- Full Disk Access
- Apple Events:
- System Events
- Osascript
- SystemUIServer
- Finder
Below is an example, which includes each of the items mentioned in the list. However, this should be edited to meet your own requirements
| ↓ maOS |
|
|

No comments to display
No comments to display