Microsoft Office 365 OAuth and Exchange Profile
What
Basic Authentication has been deprecated as of December 2022. Now only a Modern Authentication method (using OAuth) will work. This KB article will guide on how to setup and get connected with FileWave's Exchange Profile.
Requirements are:
- FileWave Central
- Administrative access to your Microsoft Azure for the URL and Tenent ID
When/Why
Microsoft has introduced a new Modern Authentication method (using OAuth), using FileWave’s Exchange Profile can be configured to connect to your Exchange services. If you have Users setup within Microsoft Azure directories, you may want to use variables that can be extracted and populated in for users or email addresses. For more information and other variables that can be used in iOS/macOS Profiles please review: Using variables in iOS/macOS Profiles.
How
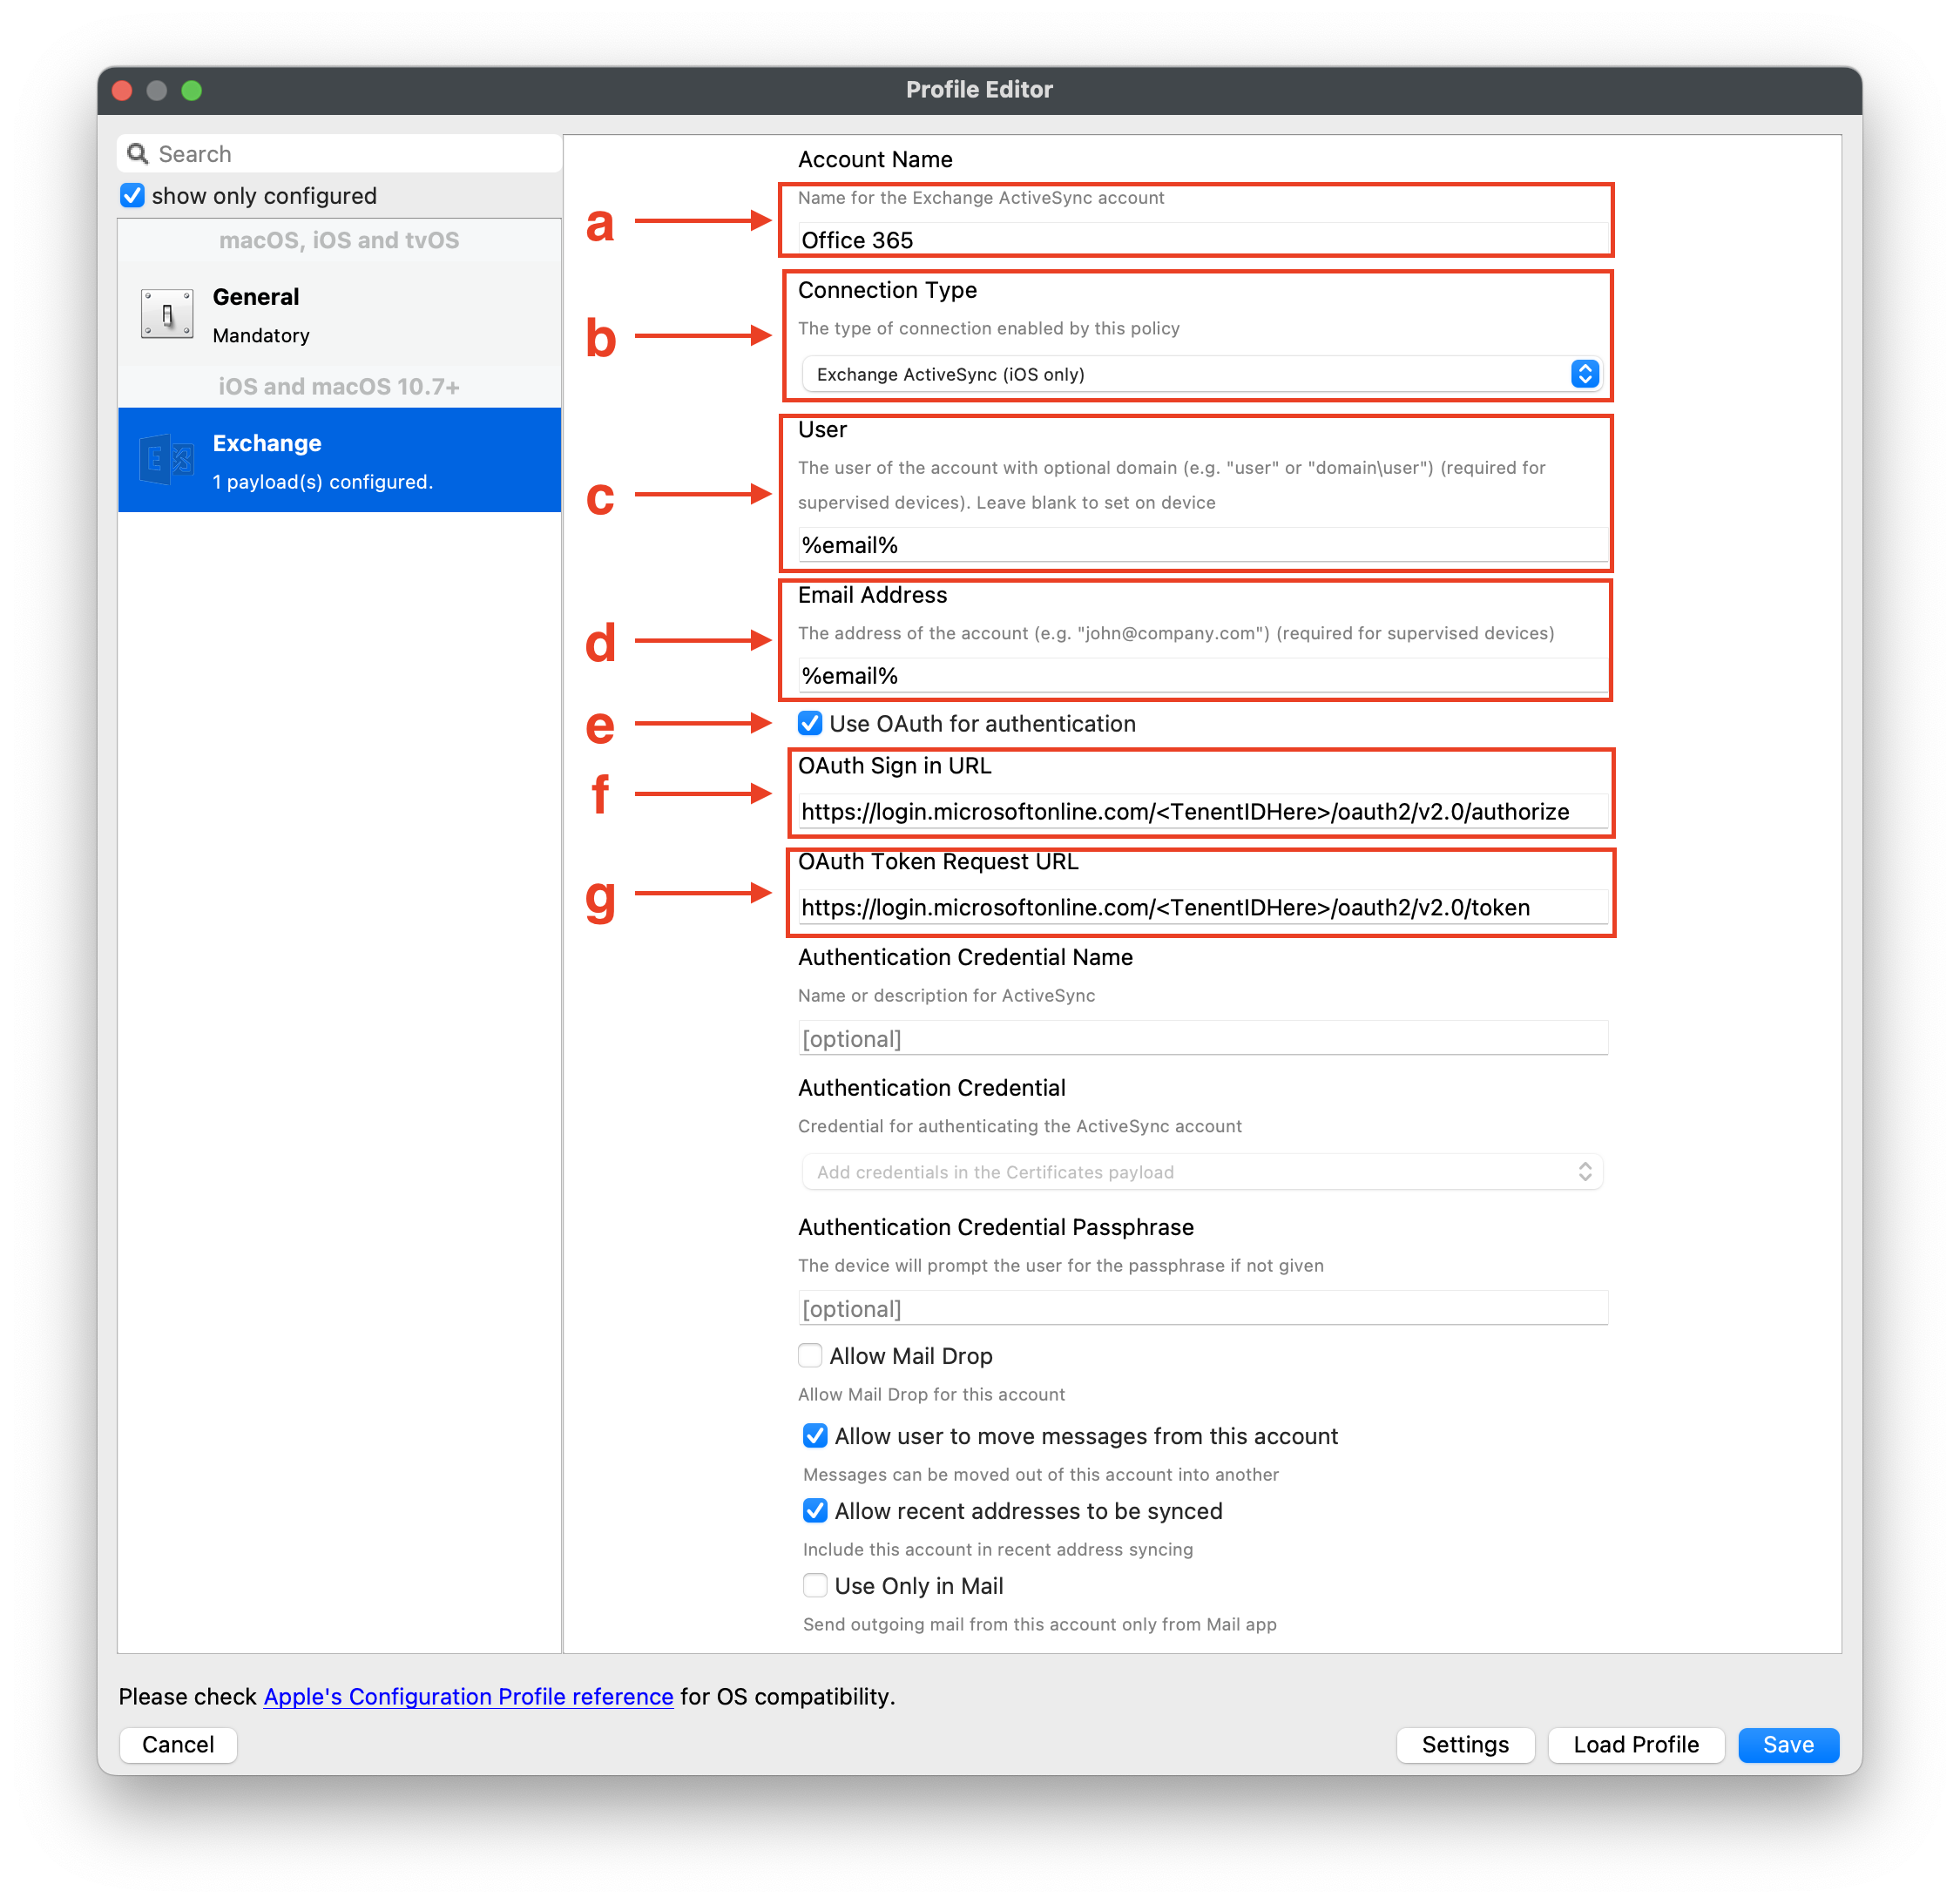
Now let’s create the Exchange Profile. You will want to open FileWave Admin and create a new Profile by selecting Filesets > Create New Desktop > Profile.
- Choose the Exchange Payload and then configure the following:
- Account Name - Name of your choice
- Connection Type - Choose iOS or macOS
- User - You may use the variable for the username or for email to populate in the user’s account; %username% or %email%
- Email Address - You may use the variable for email to populate in the email address; %email%
- Check the box ‘Use OAuth for authentication’ to enable OAuth method
- OAuth Sign in URL -
https://login.microsoftonline.com/<Tenent.ID.Here>/auth2/v2.0/authorize; be sure the Tenent ID matches from your Microsoft Azure account - OAuth Token Request URL -
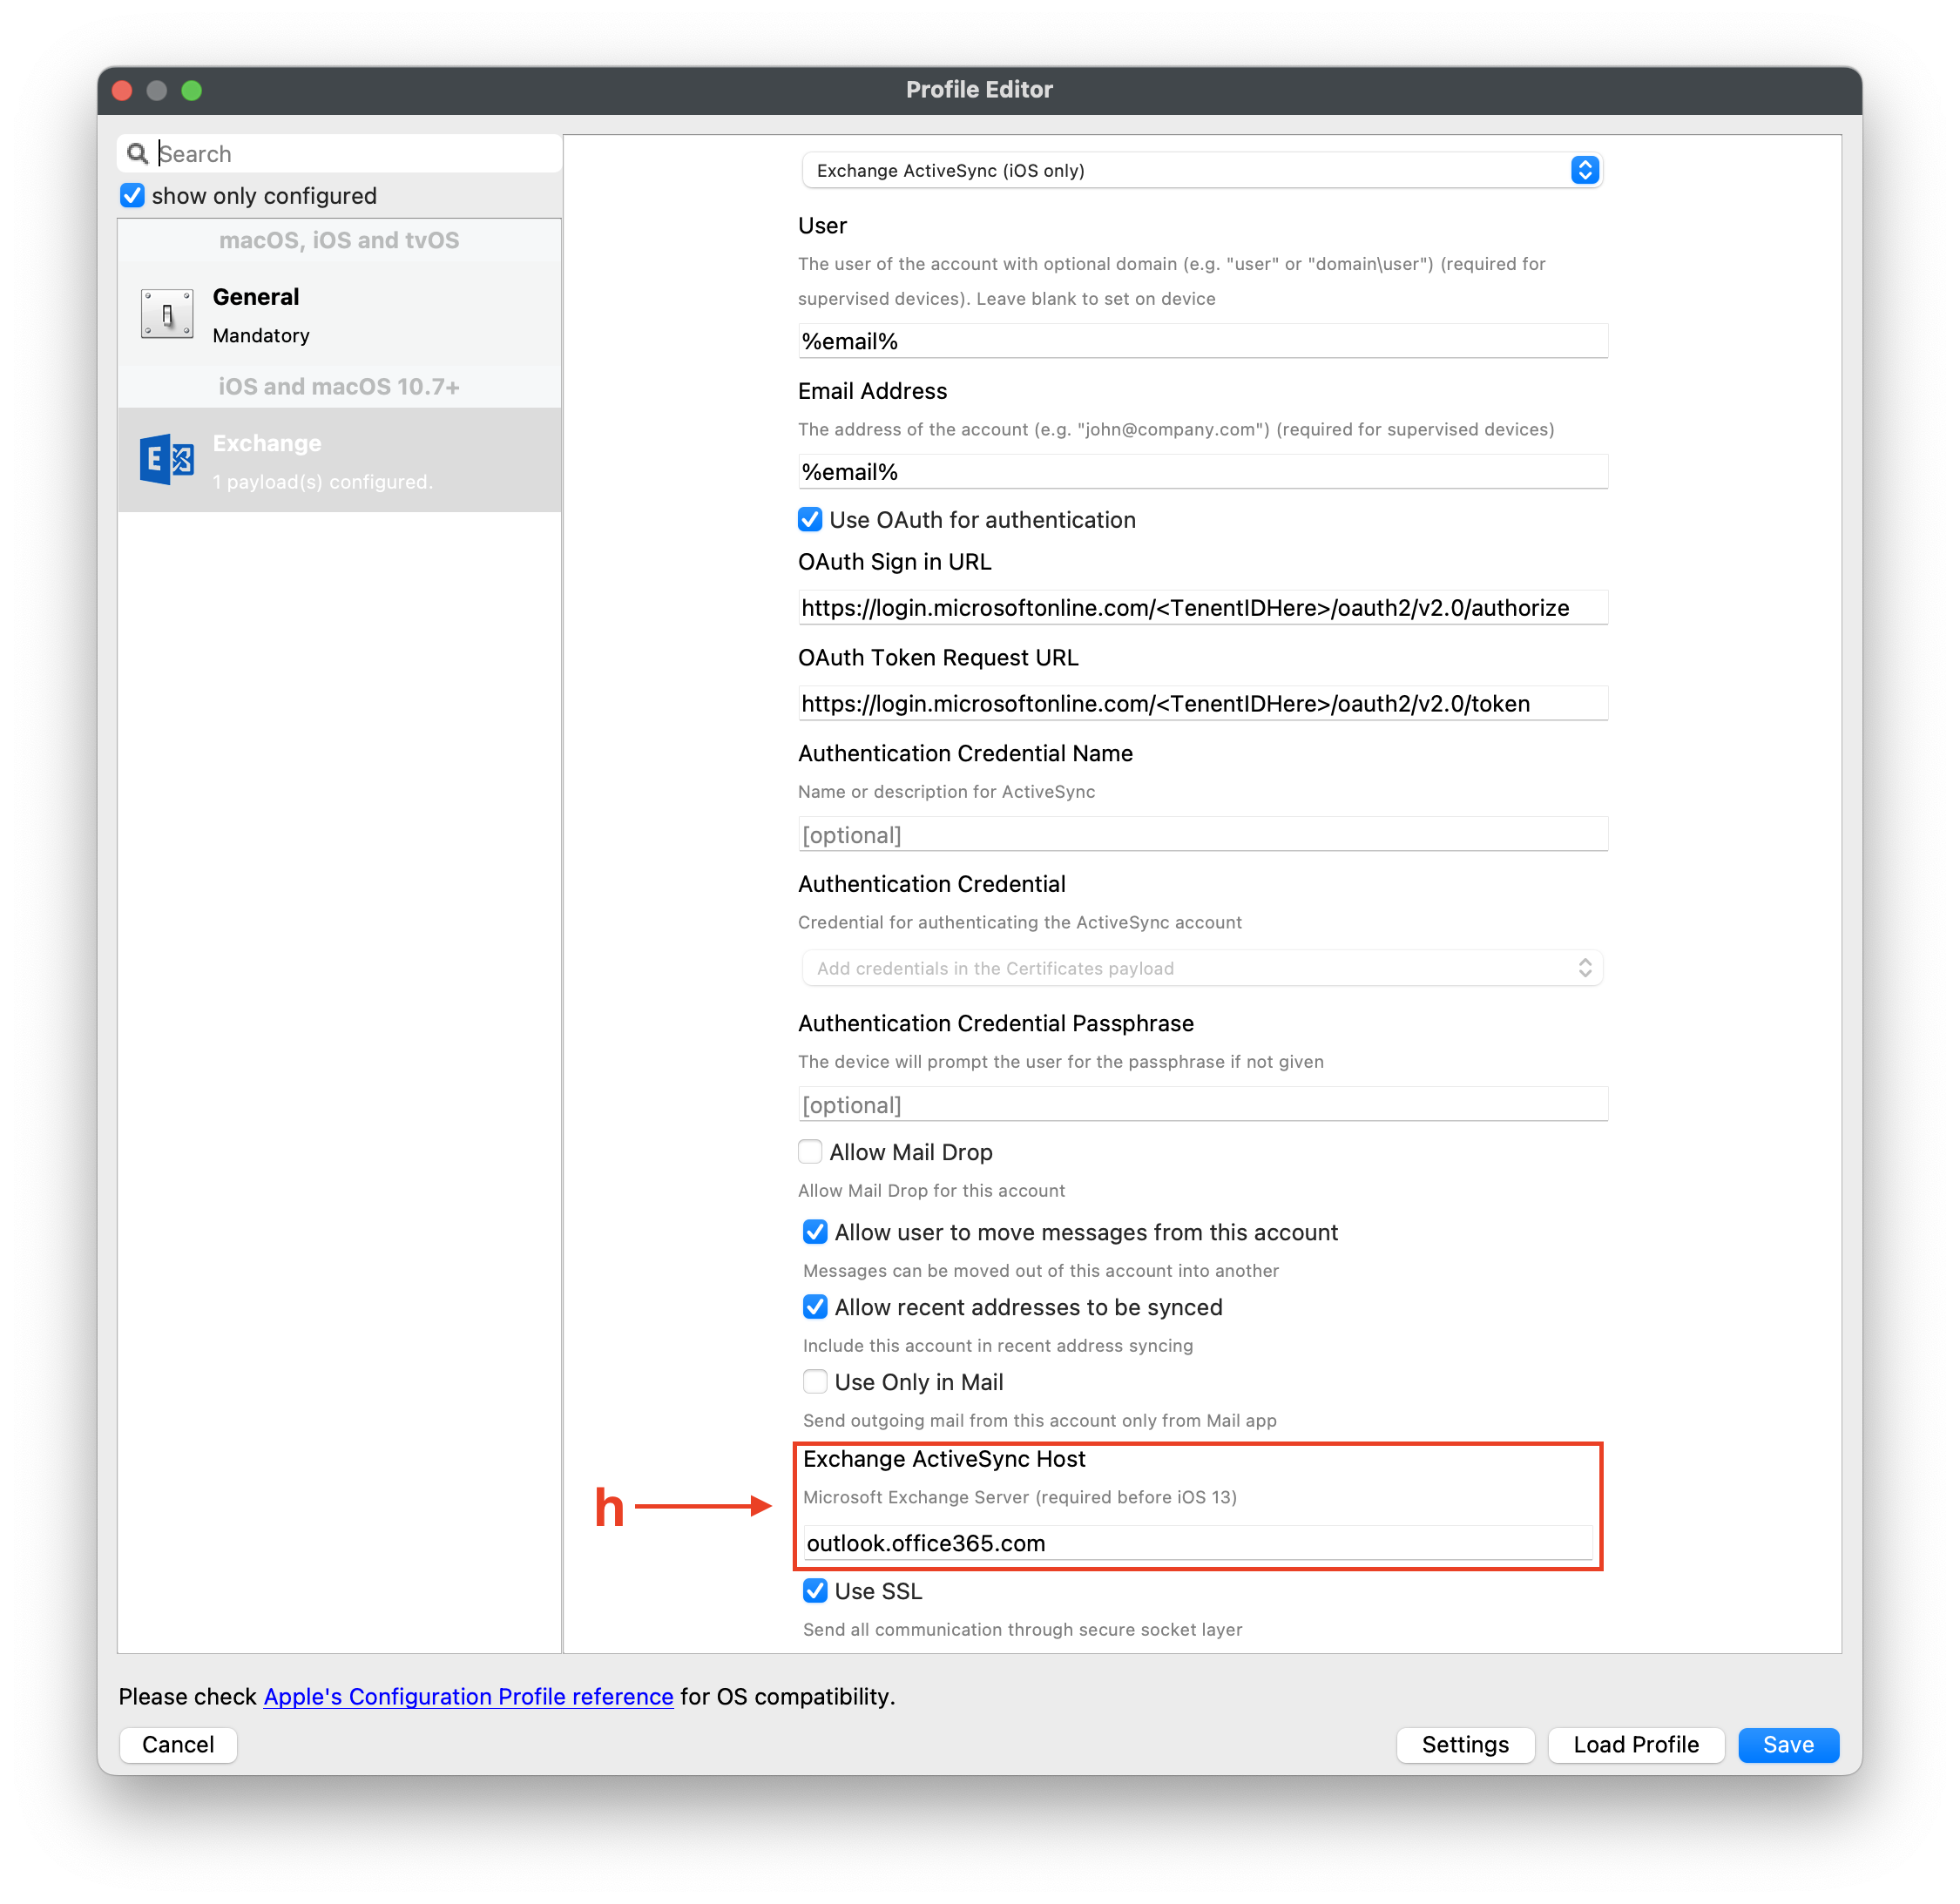
https://login.microsoftonline.com/<TenentIDHere>/oauth2/v2.0/token; be sure the Tenent ID matches from your Microsoft Azure account - Exchange Active Host URL -
outlook.office365.com - Optional settings - you may check based on your desired settings for the mail account
Below is an example screen shot:
Related Content
- Deprecation of Basic authentication in Exchange Online | Microsoft Learn
- Be sure to review Microsoft Office documentation on setting up Exchange Online | Microsoft Learn
No comments to display
No comments to display