Enrolling Computer Clients into FileWave
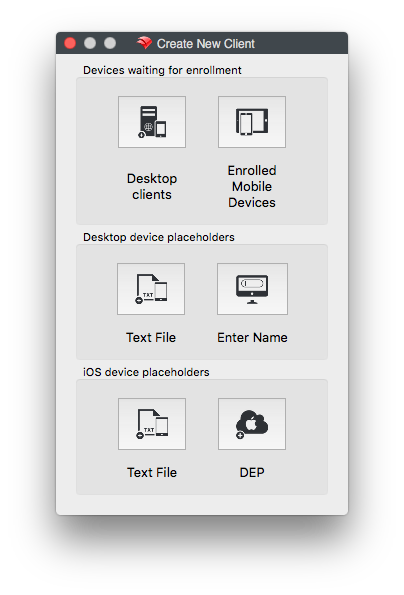
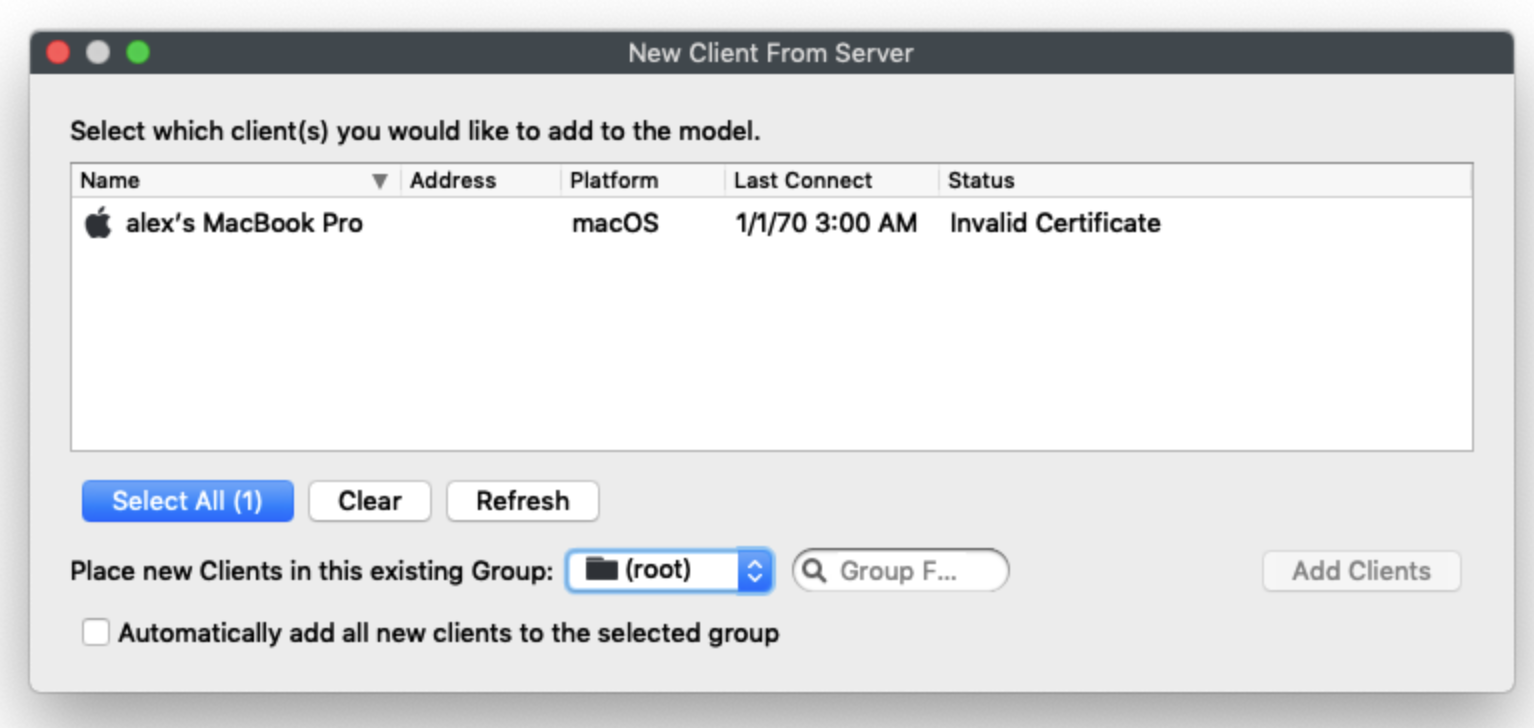
Click the New Client toolbar icon to open the Create New Client window. Click Desktop clients to open New Client From Server, where computer clients appear after the FileWave Client on the device checks in with the FileWave Server specified in the client settings. Those settings are either entered manually during client installation or included when a custom client installer is built from the FileWave Support webpage.
|
For Text File see Importing Computer Clients from a File |
|
Column Name |
Notes |
|
|
Name |
The Client Name the computer is attempting to connect with (see Sync Computer Name) |
|
|
Address |
The IP address the client is connecting from. This may be the device's internal address or a NAT address if the computer is connecting from the internet. |
|
|
Platform |
The OS of the client; macOS or Windows |
|
|
Last Connect |
The last time the FileWave Client attempted to check in with the server. The default check-in interval is every 2 minutes. |
|
|
Status |
You will see one of three options:
All three status states can be approved by selecting and adding the client. |
You can assign clients to a group during enrollment or leave them in the root group. You can also place clones of those clients into other groups later.
To pre-assign new clients to a specific group, select Automatically add all new clients to the selected Group. If you are enrolling clients in batches, you can change this selection between batches.
No comments to display
No comments to display