Expanding the IVS Disk Drive - VirtualBox

![]()
Imaging Appliance - VirtualBox Resize HD
This guide will help you extend the Imaging Virtual Servers (IVS) hard drive space on Imaging for VirtualBox.
For VirtualBox
The following steps will help you resize the virtual hard drive for the FileWave Imaging Appliance running on Oracle VirtualBox.
1. Power off the virtual machine.
2. Open a command command prompt or terminal and extend the vmdk using the following commands ( replace source.vmdk with the path to your vbox vmdk, and "NUMBER OF MEGABYTES" according to the FULL size that you want the hard drive to be ) :
"C:\Program Files\Oracle\VirtualBox\VBoxManage.exe" clonehd "source.vmdk" "cloned.vdi" --format vdi
"C:\Program Files\Oracle\VirtualBox\VBoxManage.exe" modifyhd "cloned.vdi" --resize (NUMBER OF MEGABYTES)
"C:\Program Files\Oracle\VirtualBox\VBoxManage.exe" clonehd "cloned.vdi" "resized.vmdk" --format vmdk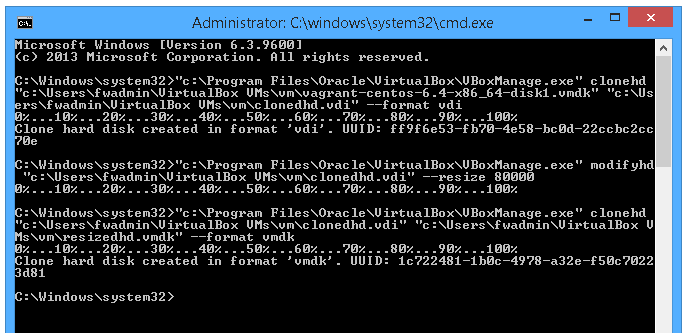
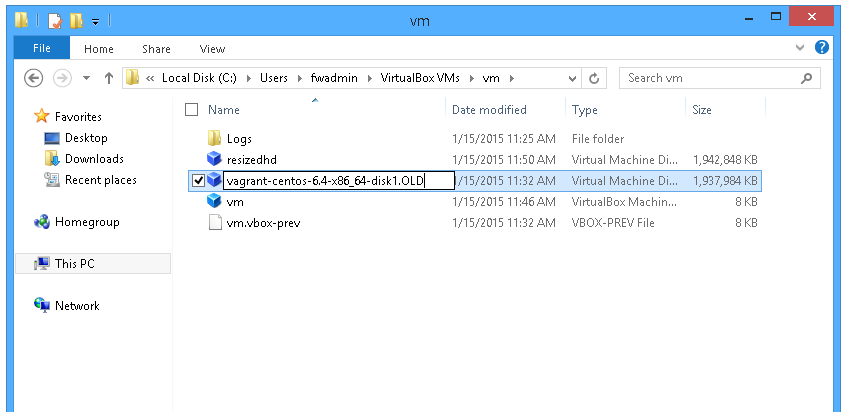
3. Rename the original vmdk file to "vagrant-centos-6.4-x86_64-disk1.OLD" and rename resized.vmdk to the original "vagrant-centos-6.4-x86_64-disk1"
4. In FileWave Imaging we created a imaging-control command for extending the virtual hard drive size. Power on the IVS and login.
5. Run the below imaging-control command to increase the hard drive.
imaging-control increase harddrive6. You will be asked "Have you extended the hard drive in the VM settings?". Answer "y".
7. You will then select "ENTER", and it will restart your IVS with the increased Hard Drive.
8. After this you are done.
No comments to display
No comments to display