Importing FileWave OVA (VirtualBox)
Step-by-step guide
1. First, you'll need to download and unzip the virtual appliance from FileWave Downloads

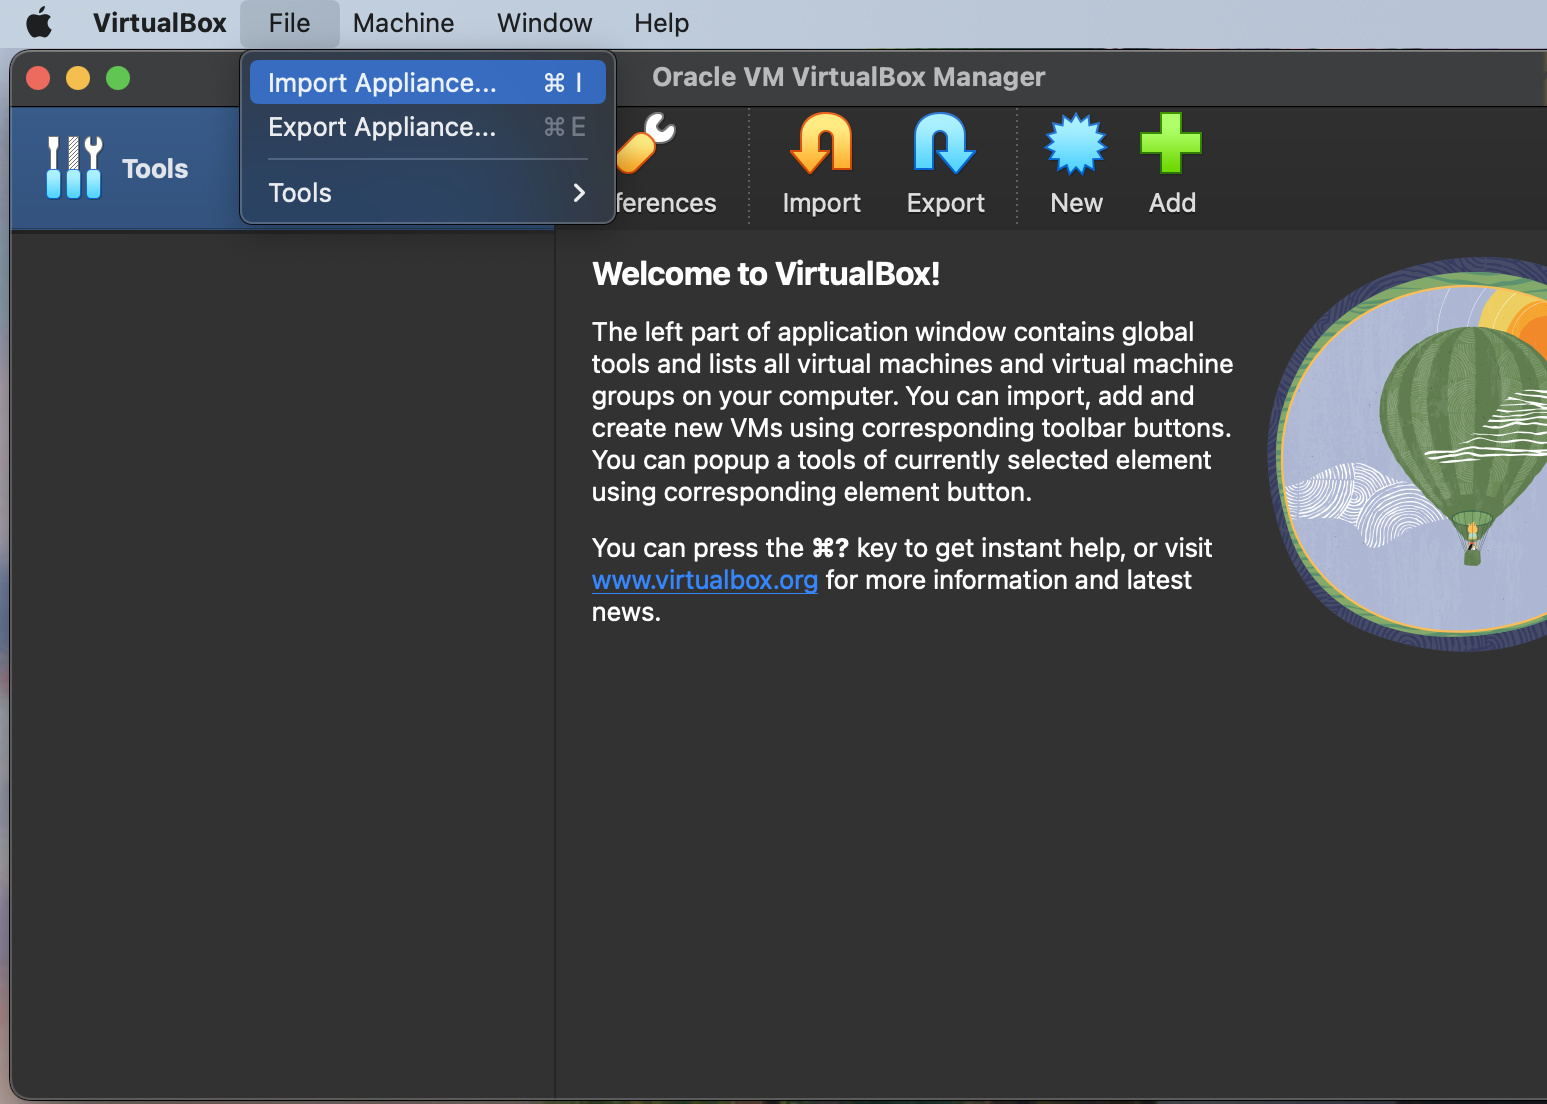
2. Open Oracle VirtualBox. Click “File” and “Import Appliance".
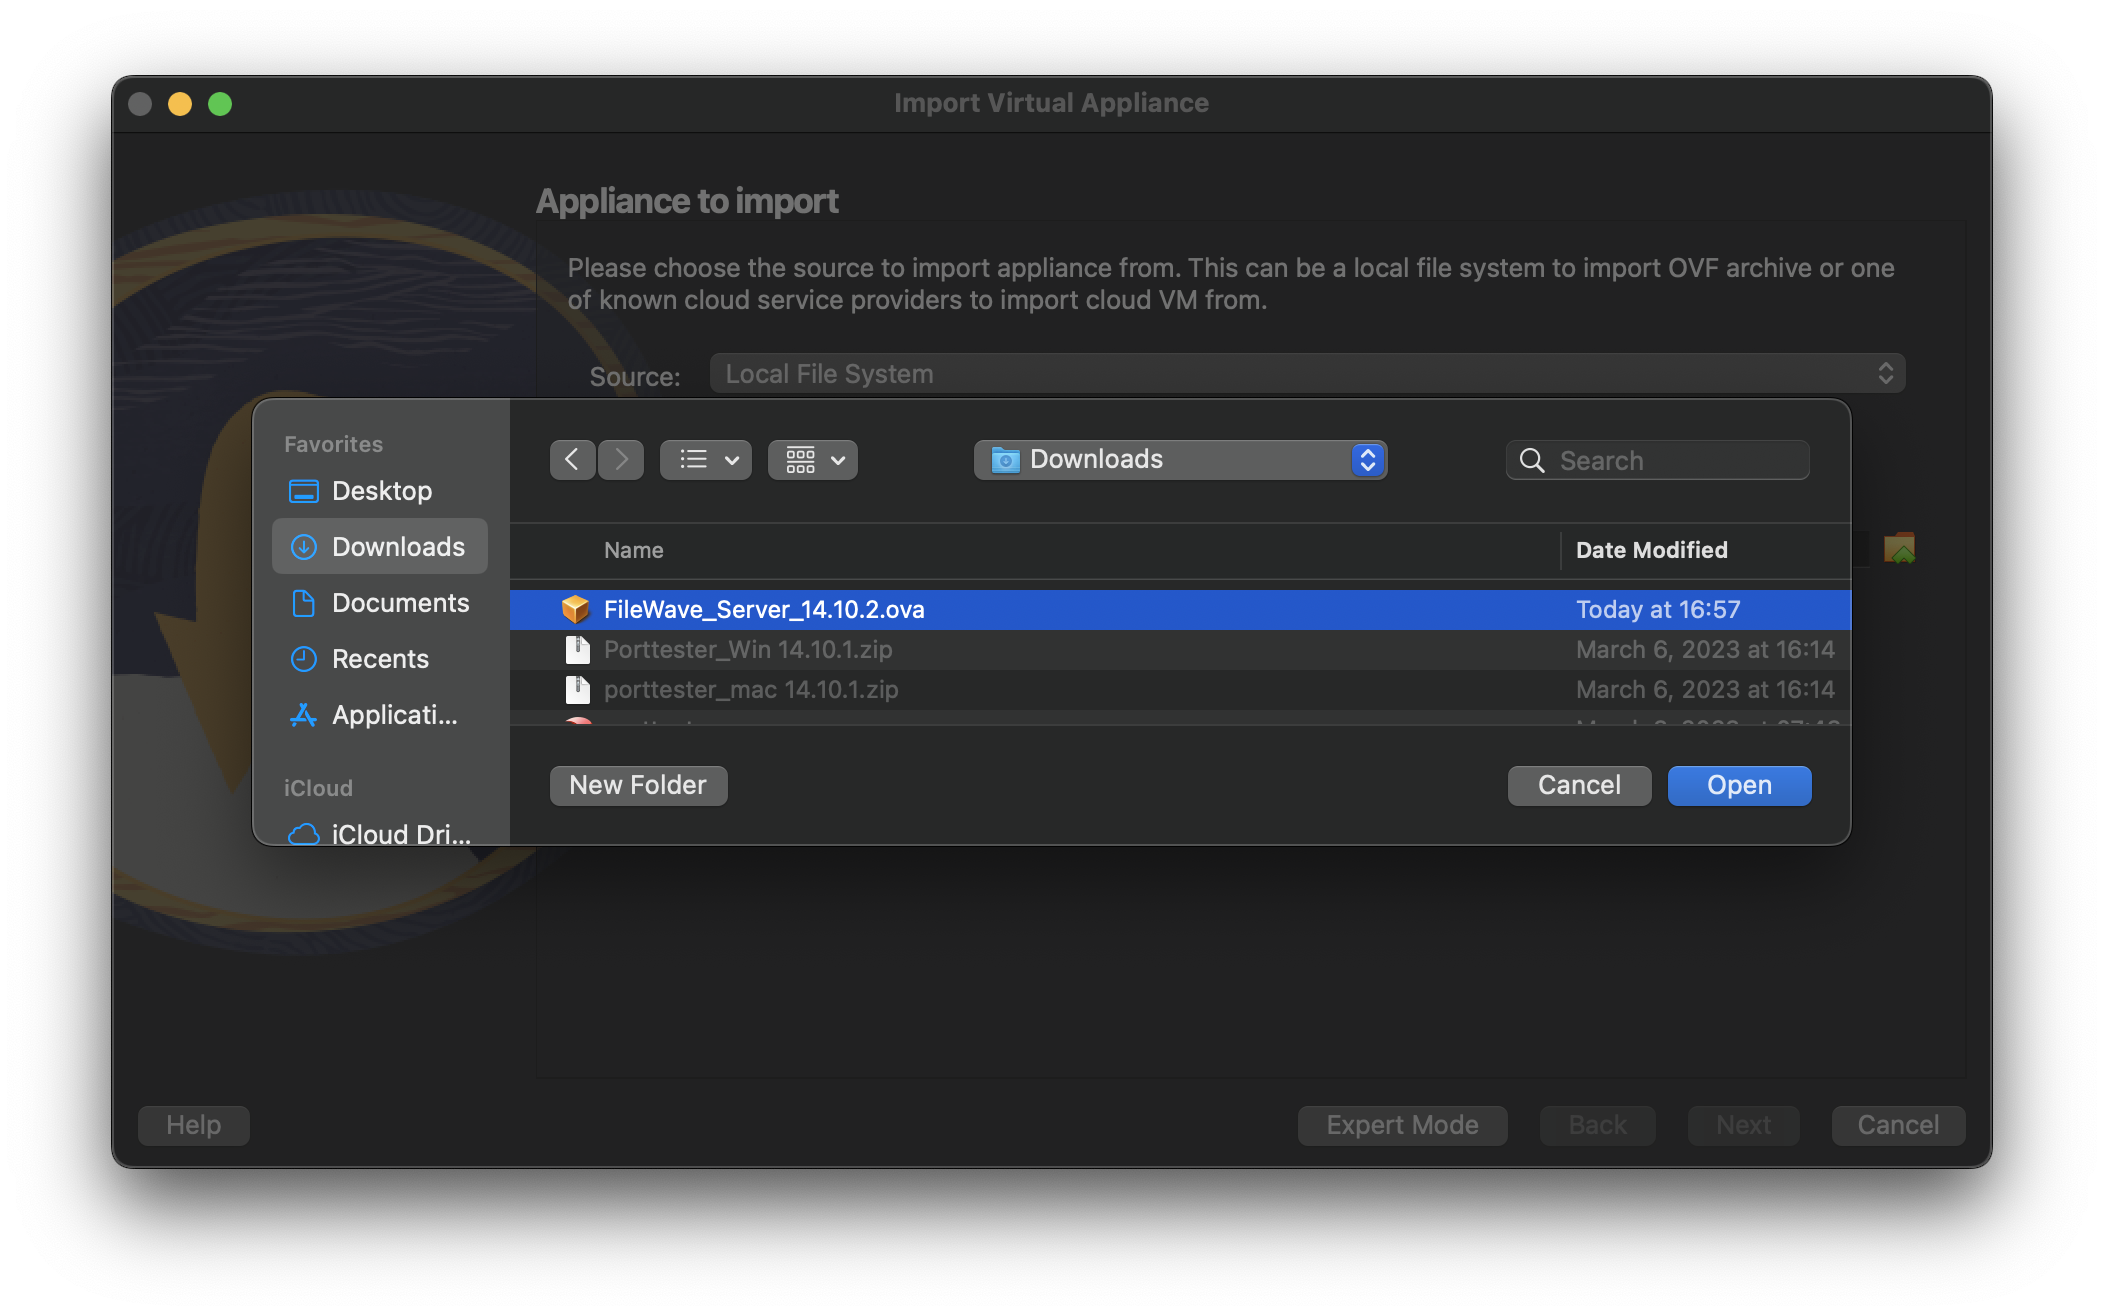
3. Browse your machine for the unzipped OVA/OVF from FileWave and click “Open”.
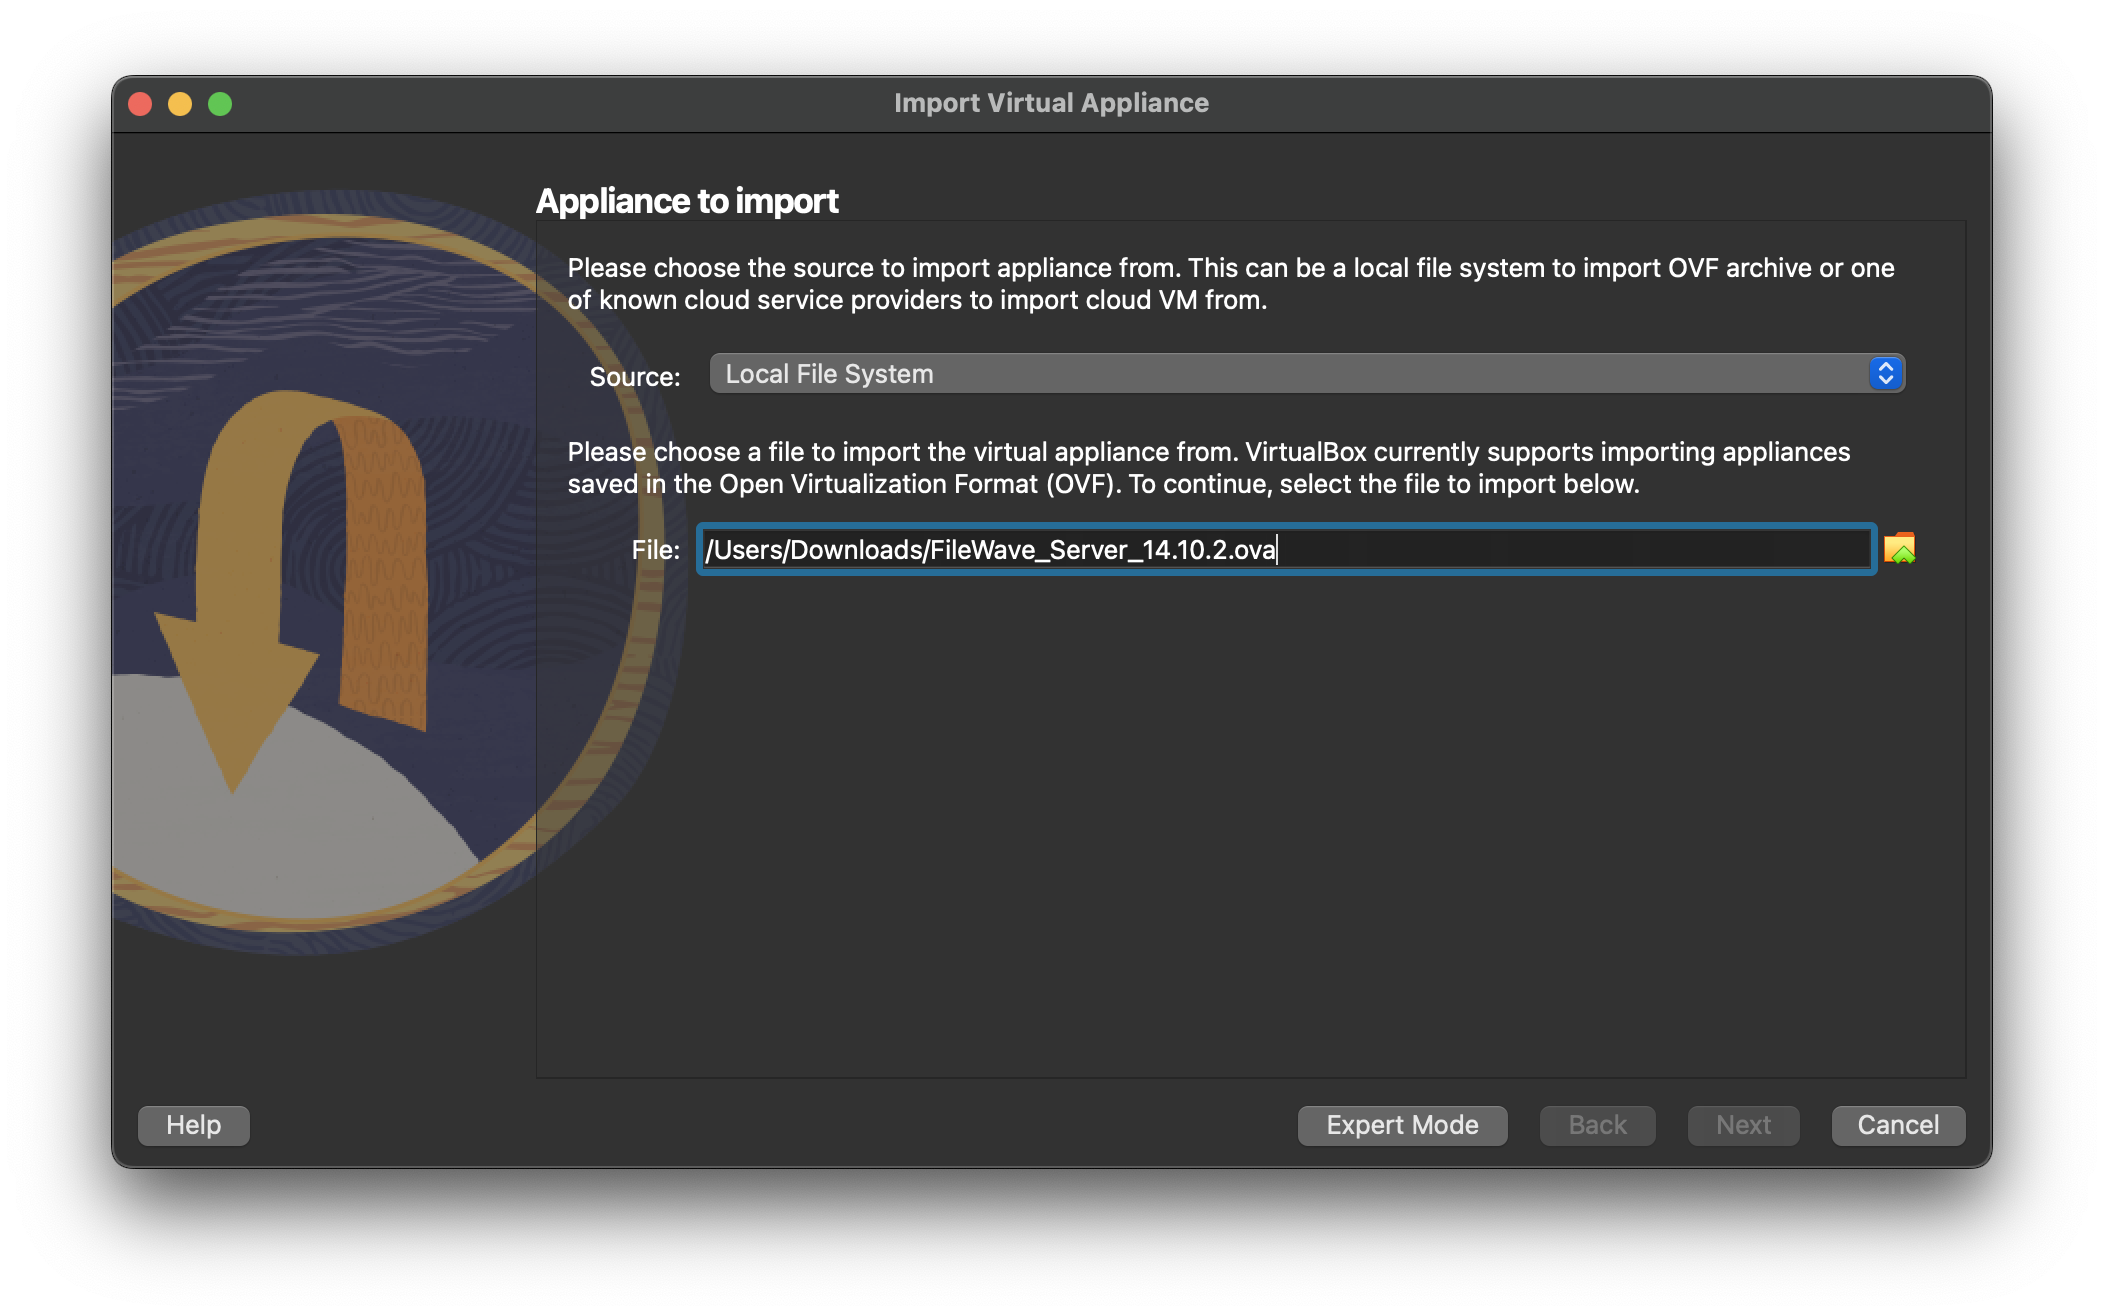
4. Click "Continue/Next"
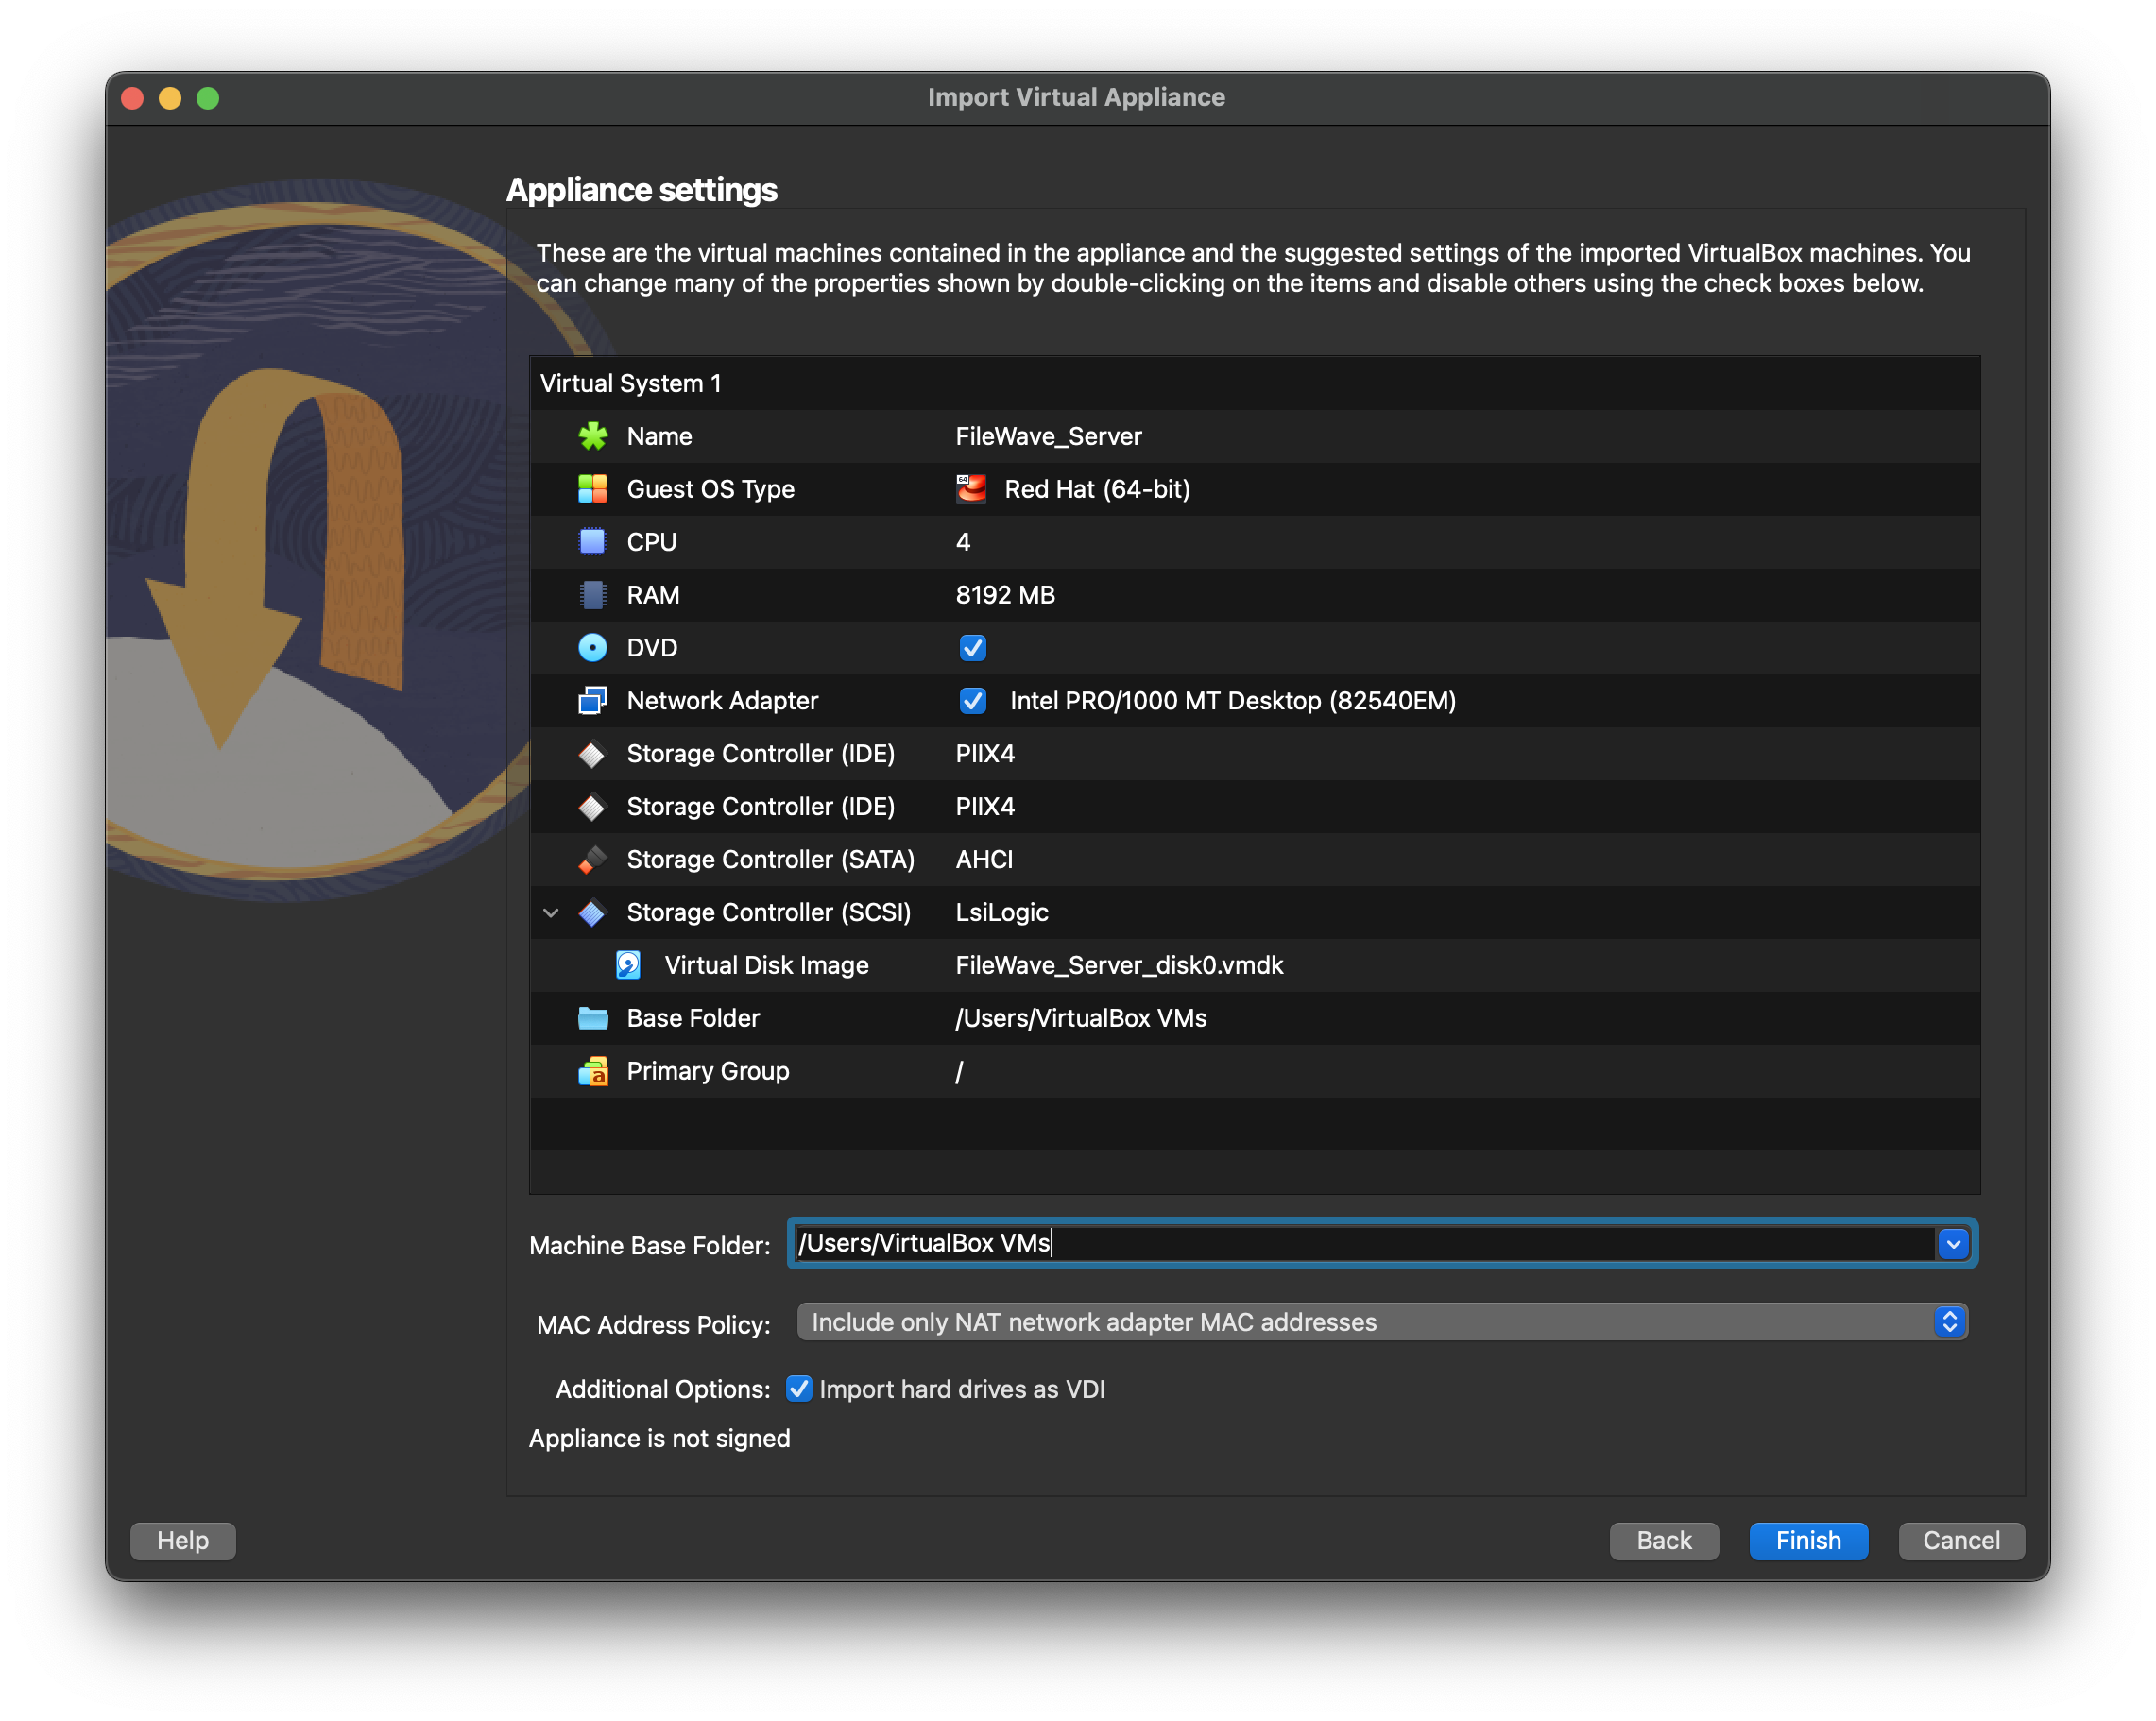
5. Then you will select "Import/Finish" to begin the import process.
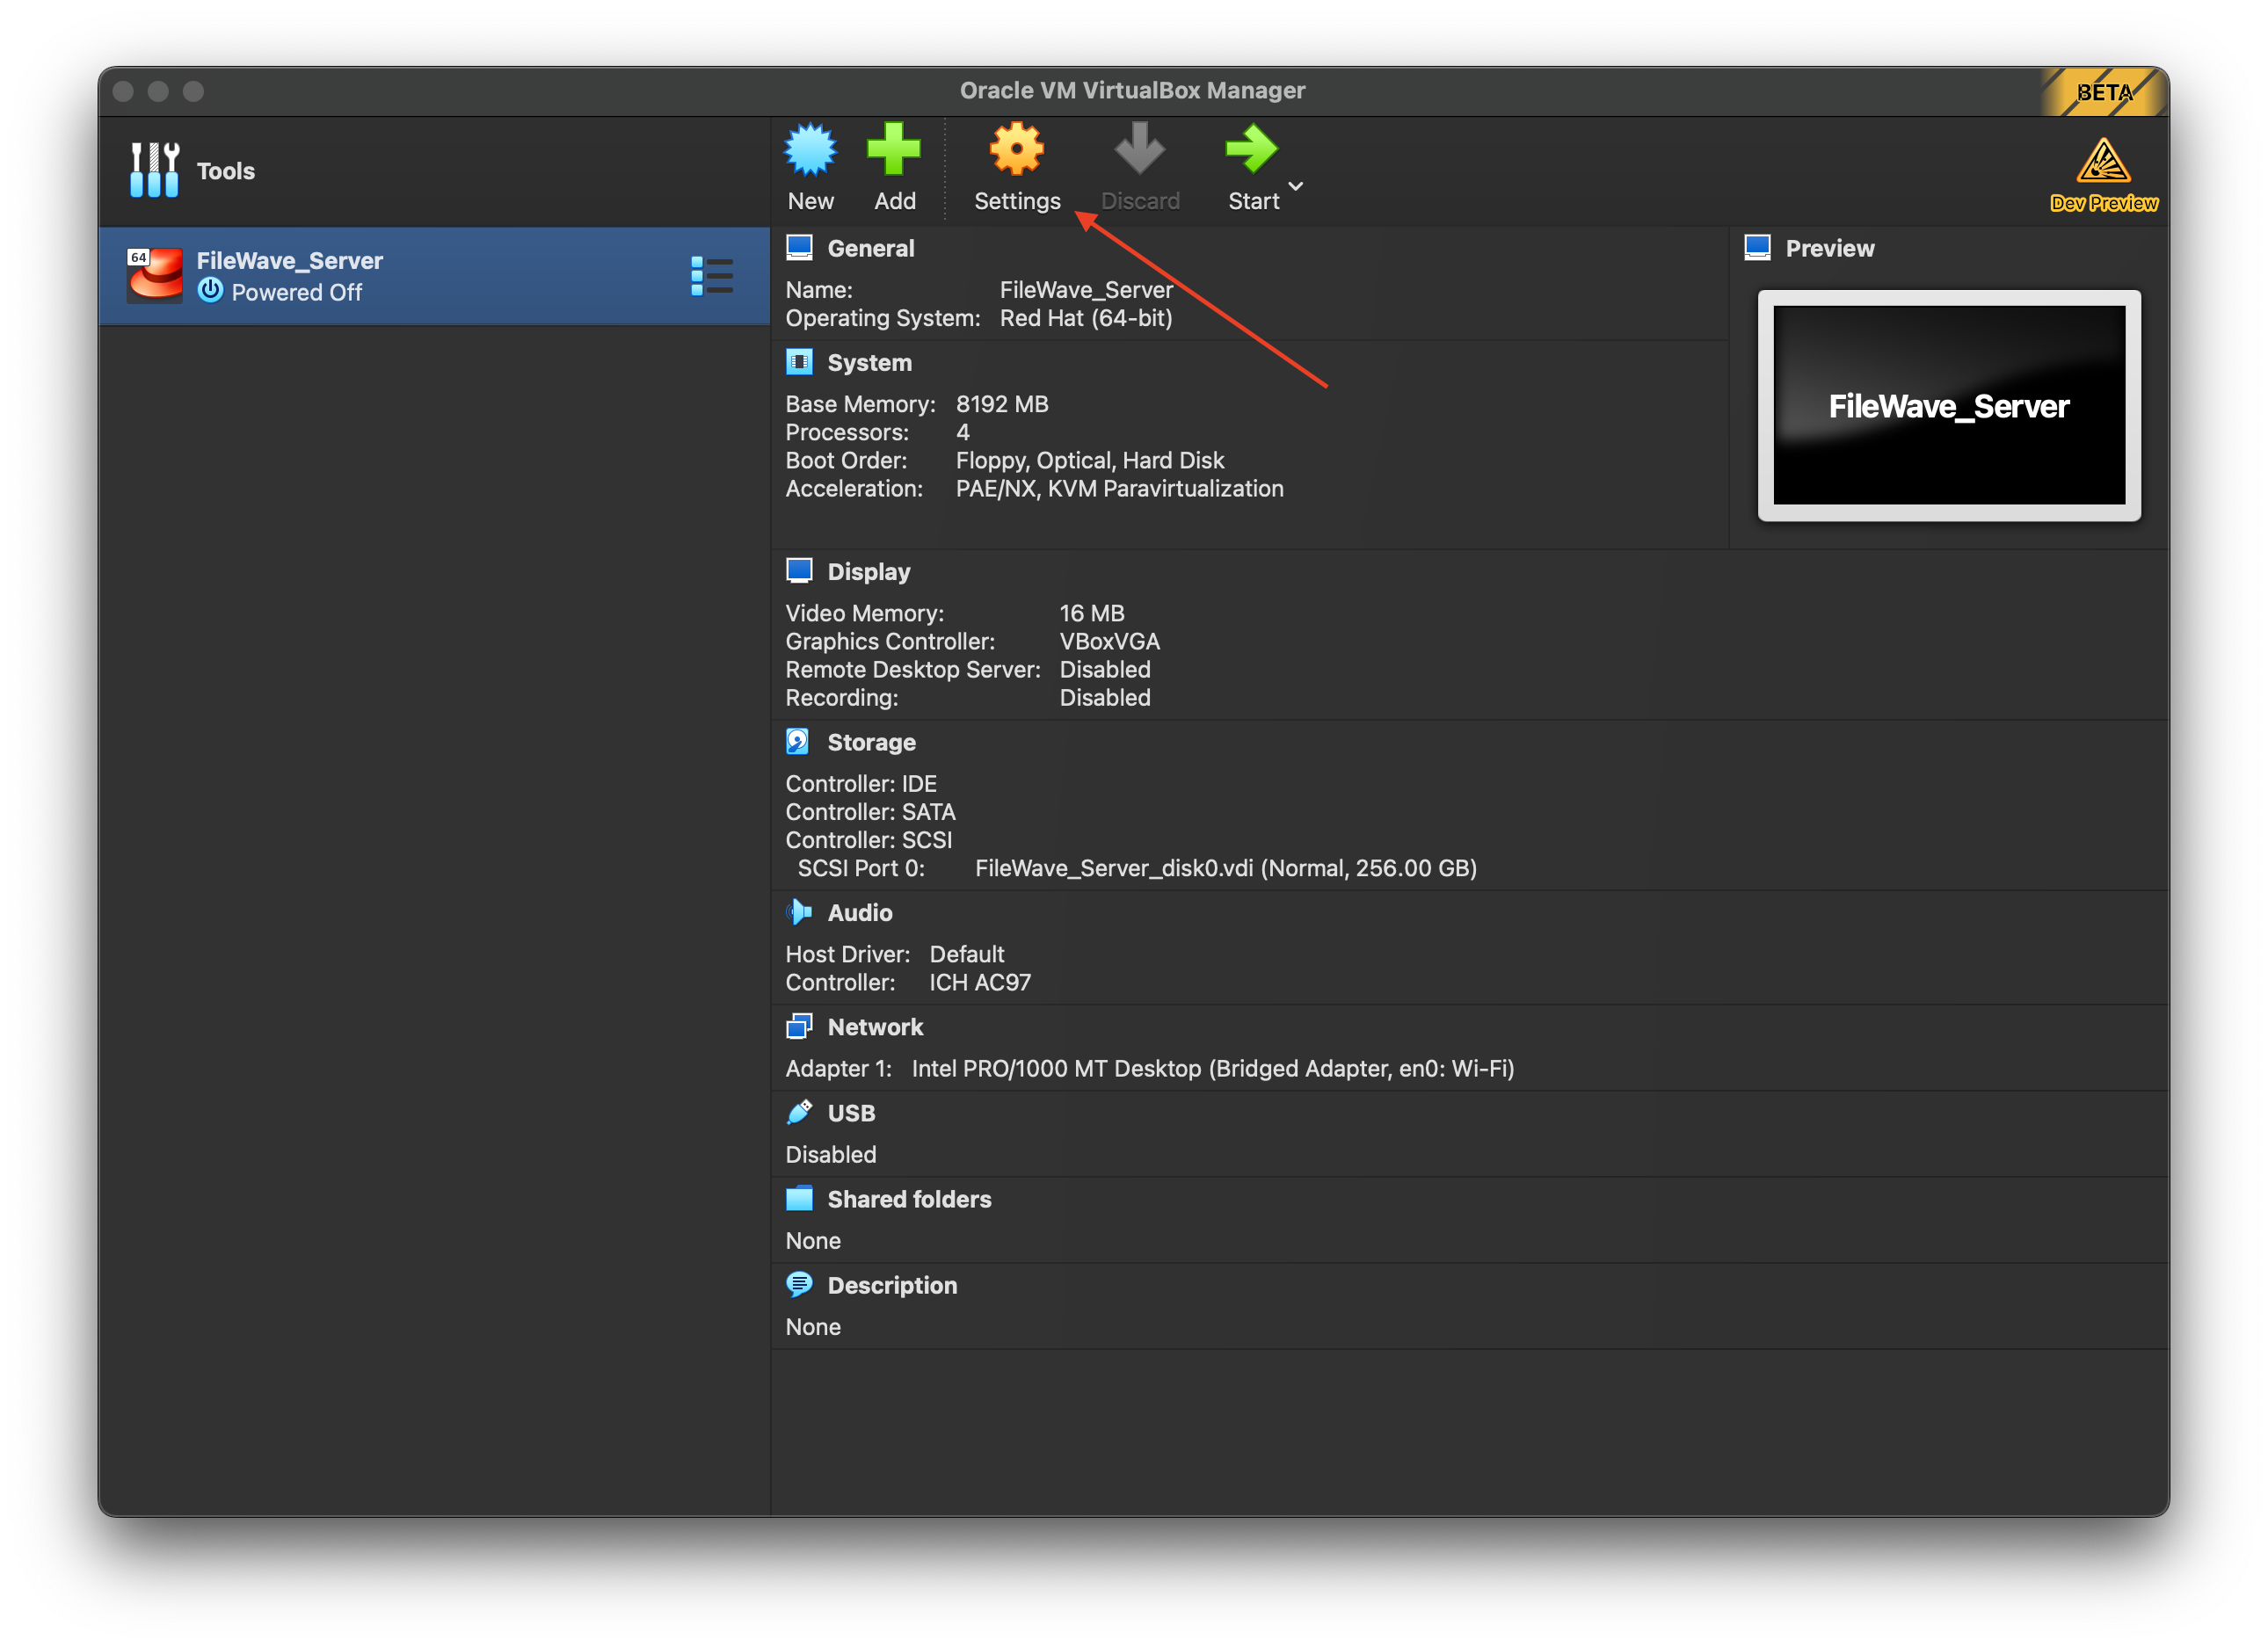
6. Once imported successfully, select "Settings" to change the Storage settings.
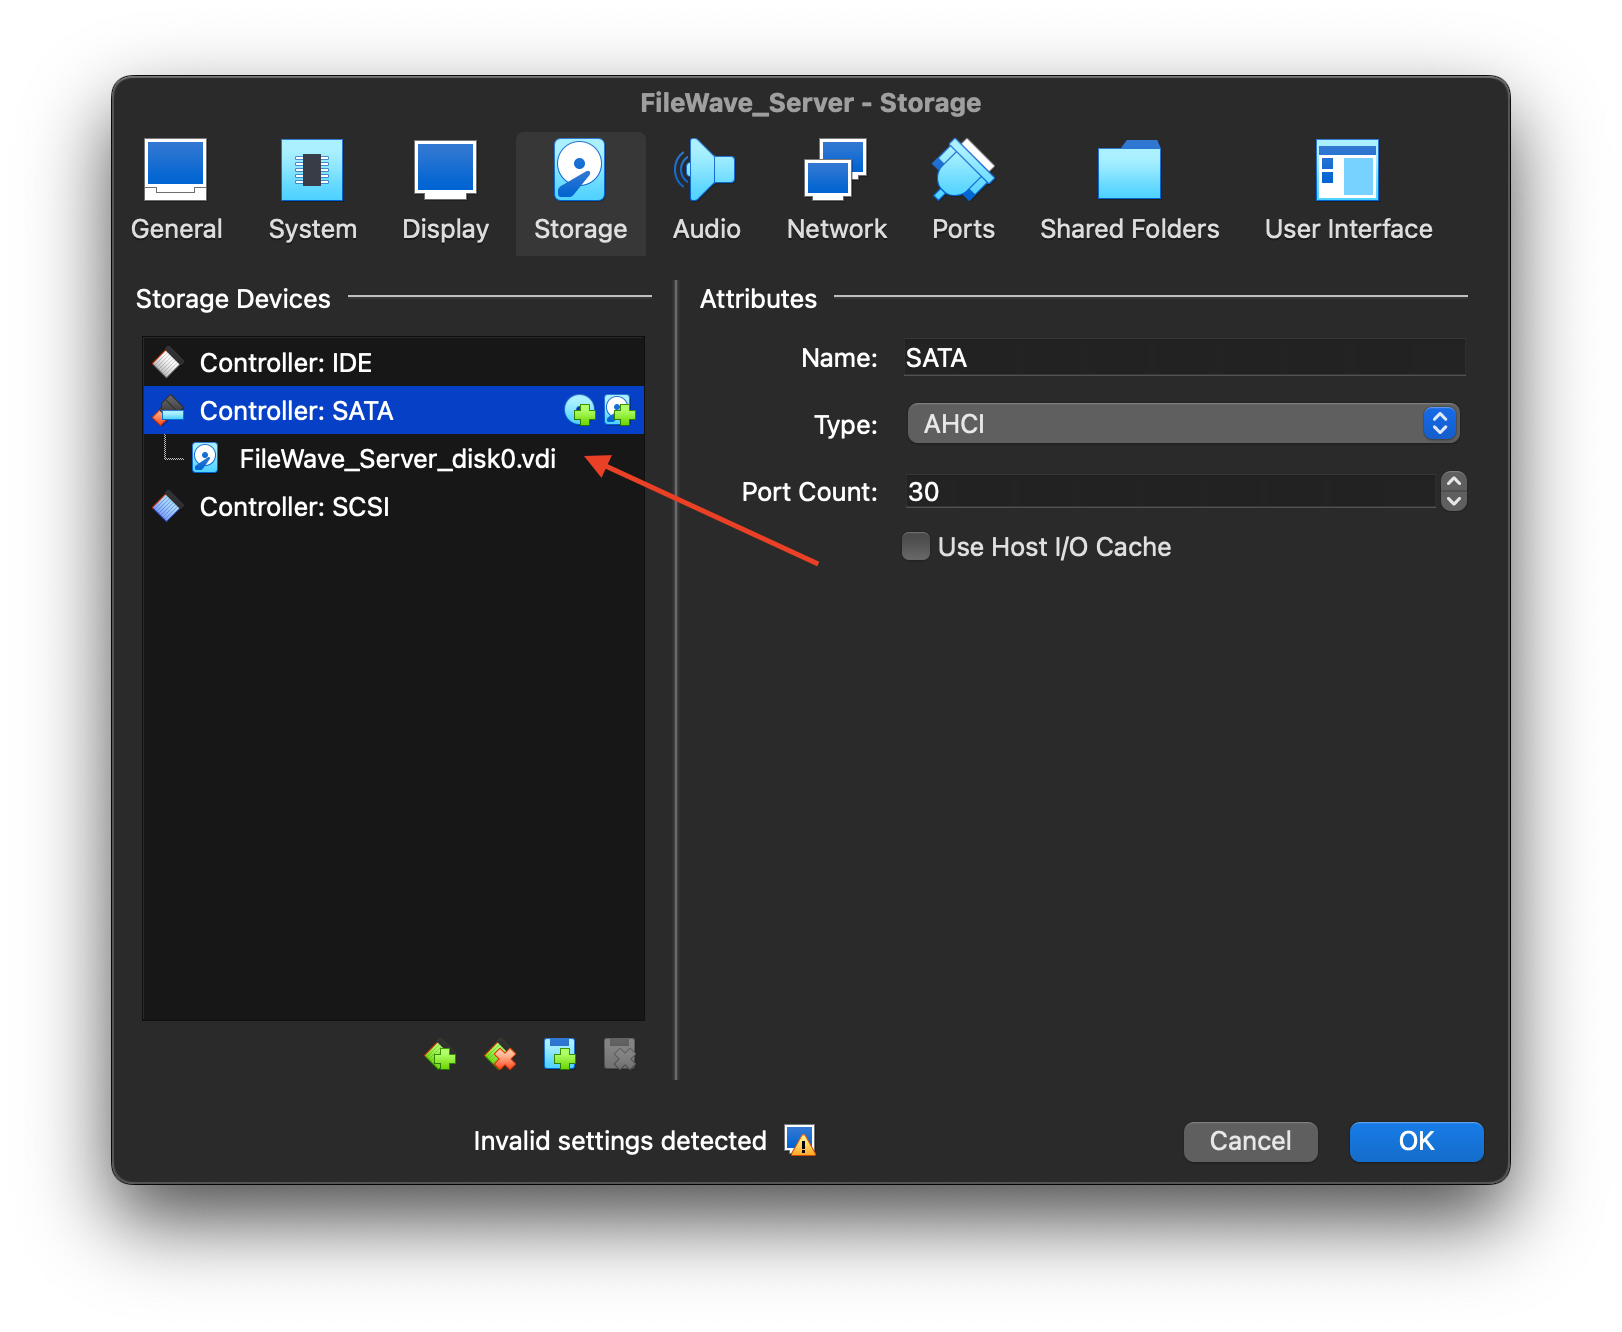
7. Select "Storage" and move the .vdi file from SCSI to SATA.
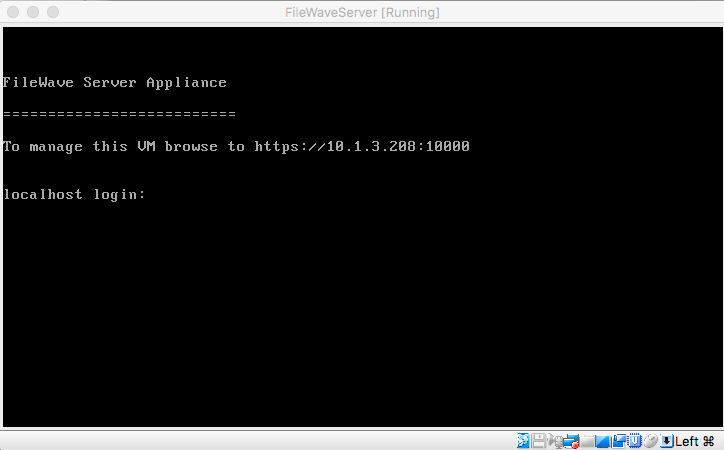
8. Click "Start" to verify that the appliance starts successfully.
You've successfully imported the IVS Appliance! For next steps, please be sure to complete Changing the IP Address of your IVS (Static) and, if importing version 15.5+, please see: Setting the Password on First Login to FileWave Appliances (15.5+)
No comments to display
No comments to display