
Enrolling Computer Clients into FileWave
Use FileWave Central to admit a macOS or Windows computer after its native FileWave Client has been installed and has contacted the intended Server. This is separate from MDM enrollment. If you have not installed the Client yet, follow Desktop / Laptop Client Install and Configure first.
For a new installation, build a configured Client installer in Central when the Server is 16.4.0 or later; earlier Servers use the external custom builder. The installer supplies the Server connection settings. Where a manual installer prompts for them, enter the settings for your intended Server.
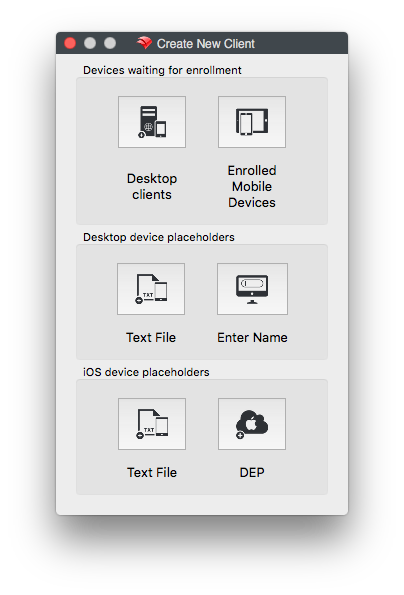
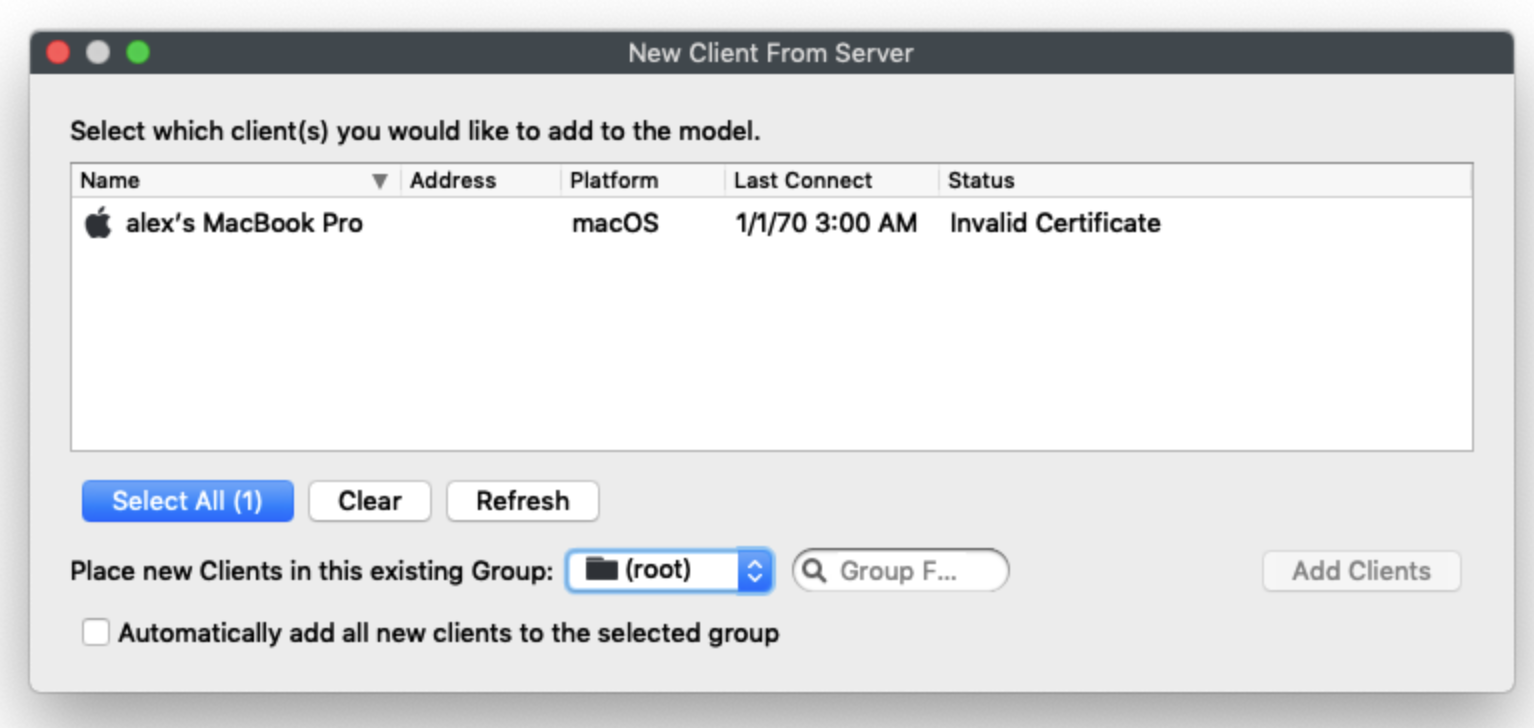
First check whether the computer already appears in Clients; an automatically admitted device does not need to be added again. For a waiting computer, click the New Client toolbar icon to open Create New Client, then select Desktop clients to open New Client From Server.
|
For Text File see Importing Computer Clients from a File |
|
Column Name |
Notes |
|
|
Name |
The Client Name the computer is attempting to connect with (see Sync Computer Name) |
|
|
Address |
The IP address the client is connecting from. This may be the device's internal address or a NAT address if the computer is connecting from the internet. |
|
|
Platform |
The OS of the client; macOS or Windows |
|
|
Last Connect |
The last time the FileWave Client attempted to check in with the server. The default check-in interval is every 2 minutes. |
|
|
Status |
You will see one of three options:
All three status states can be approved by selecting and adding the client. |
You can assign clients to a group during enrollment or leave them in the root group. You can also place clones of those clients into other groups later.
To pre-assign new clients to a specific group, select Automatically add all new clients to the selected Group. If you are enrolling clients in batches, you can change this selection between batches.
Finish manual admission and check the result
- Match the waiting computer to the device you installed using its name, platform and recent connection information. Review certificate warnings and resolve any identity conflict before approval; an IP address alone may identify a shared NAT connection.
- Select the intended computer and a group whose existing Deployments you have reviewed, then click Add Clients. Automatic addition is optional, not required for a manual enrollment.
- Review pending changes with the other administrators before selecting Update Model. Manual admission changes the model, and this action commits shared pending work, not just your new computer. See How FileWave turns your changes into device work.
- Confirm the computer appears in Clients with the intended group and recent Last Connect. Check its reported platform and Client version against the device. A Model Update is not proof that the computer has received its work.
If the computer is missing, check both Clients and the waiting queue, the installer's Server address, network access and certificate trust before reinstalling. For a step-by-step Windows example, including initial inventory checks, see Windows Enrollment.
No comments to display
No comments to display