Fileset Creation and Deployment
Section Details
Use the platform sections below to create the Filesets or profiles you need. After you have at least one Fileset, use this page to associate it with devices or groups.
- Windows Software
- iOS Software and Profiles
- macOS Software and Profiles
- Android Software and Policies
- Windows Imaging Setup
- OS Software Updates
FileWave 16.4 and later: If Central reports an upload-validation problem while creating or editing a Fileset, do not associate or deploy it yet. Review Advanced Fileset Editing, correct the incomplete upload, and verify the Fileset contents first.
Associate Filesets to Clients
After a Fileset exists, associate it with client devices or groups. A standard association installs in the background, a Kiosk association makes the item available on demand, and scheduled association options let you control download, activation, inactivation, deletion, and reboot timing. This section covers the common association workflow in FileWave Central. You can also create associations from the Clients or Filesets views when that is faster for your workflow.
Associate Fileset using drag-and-drop
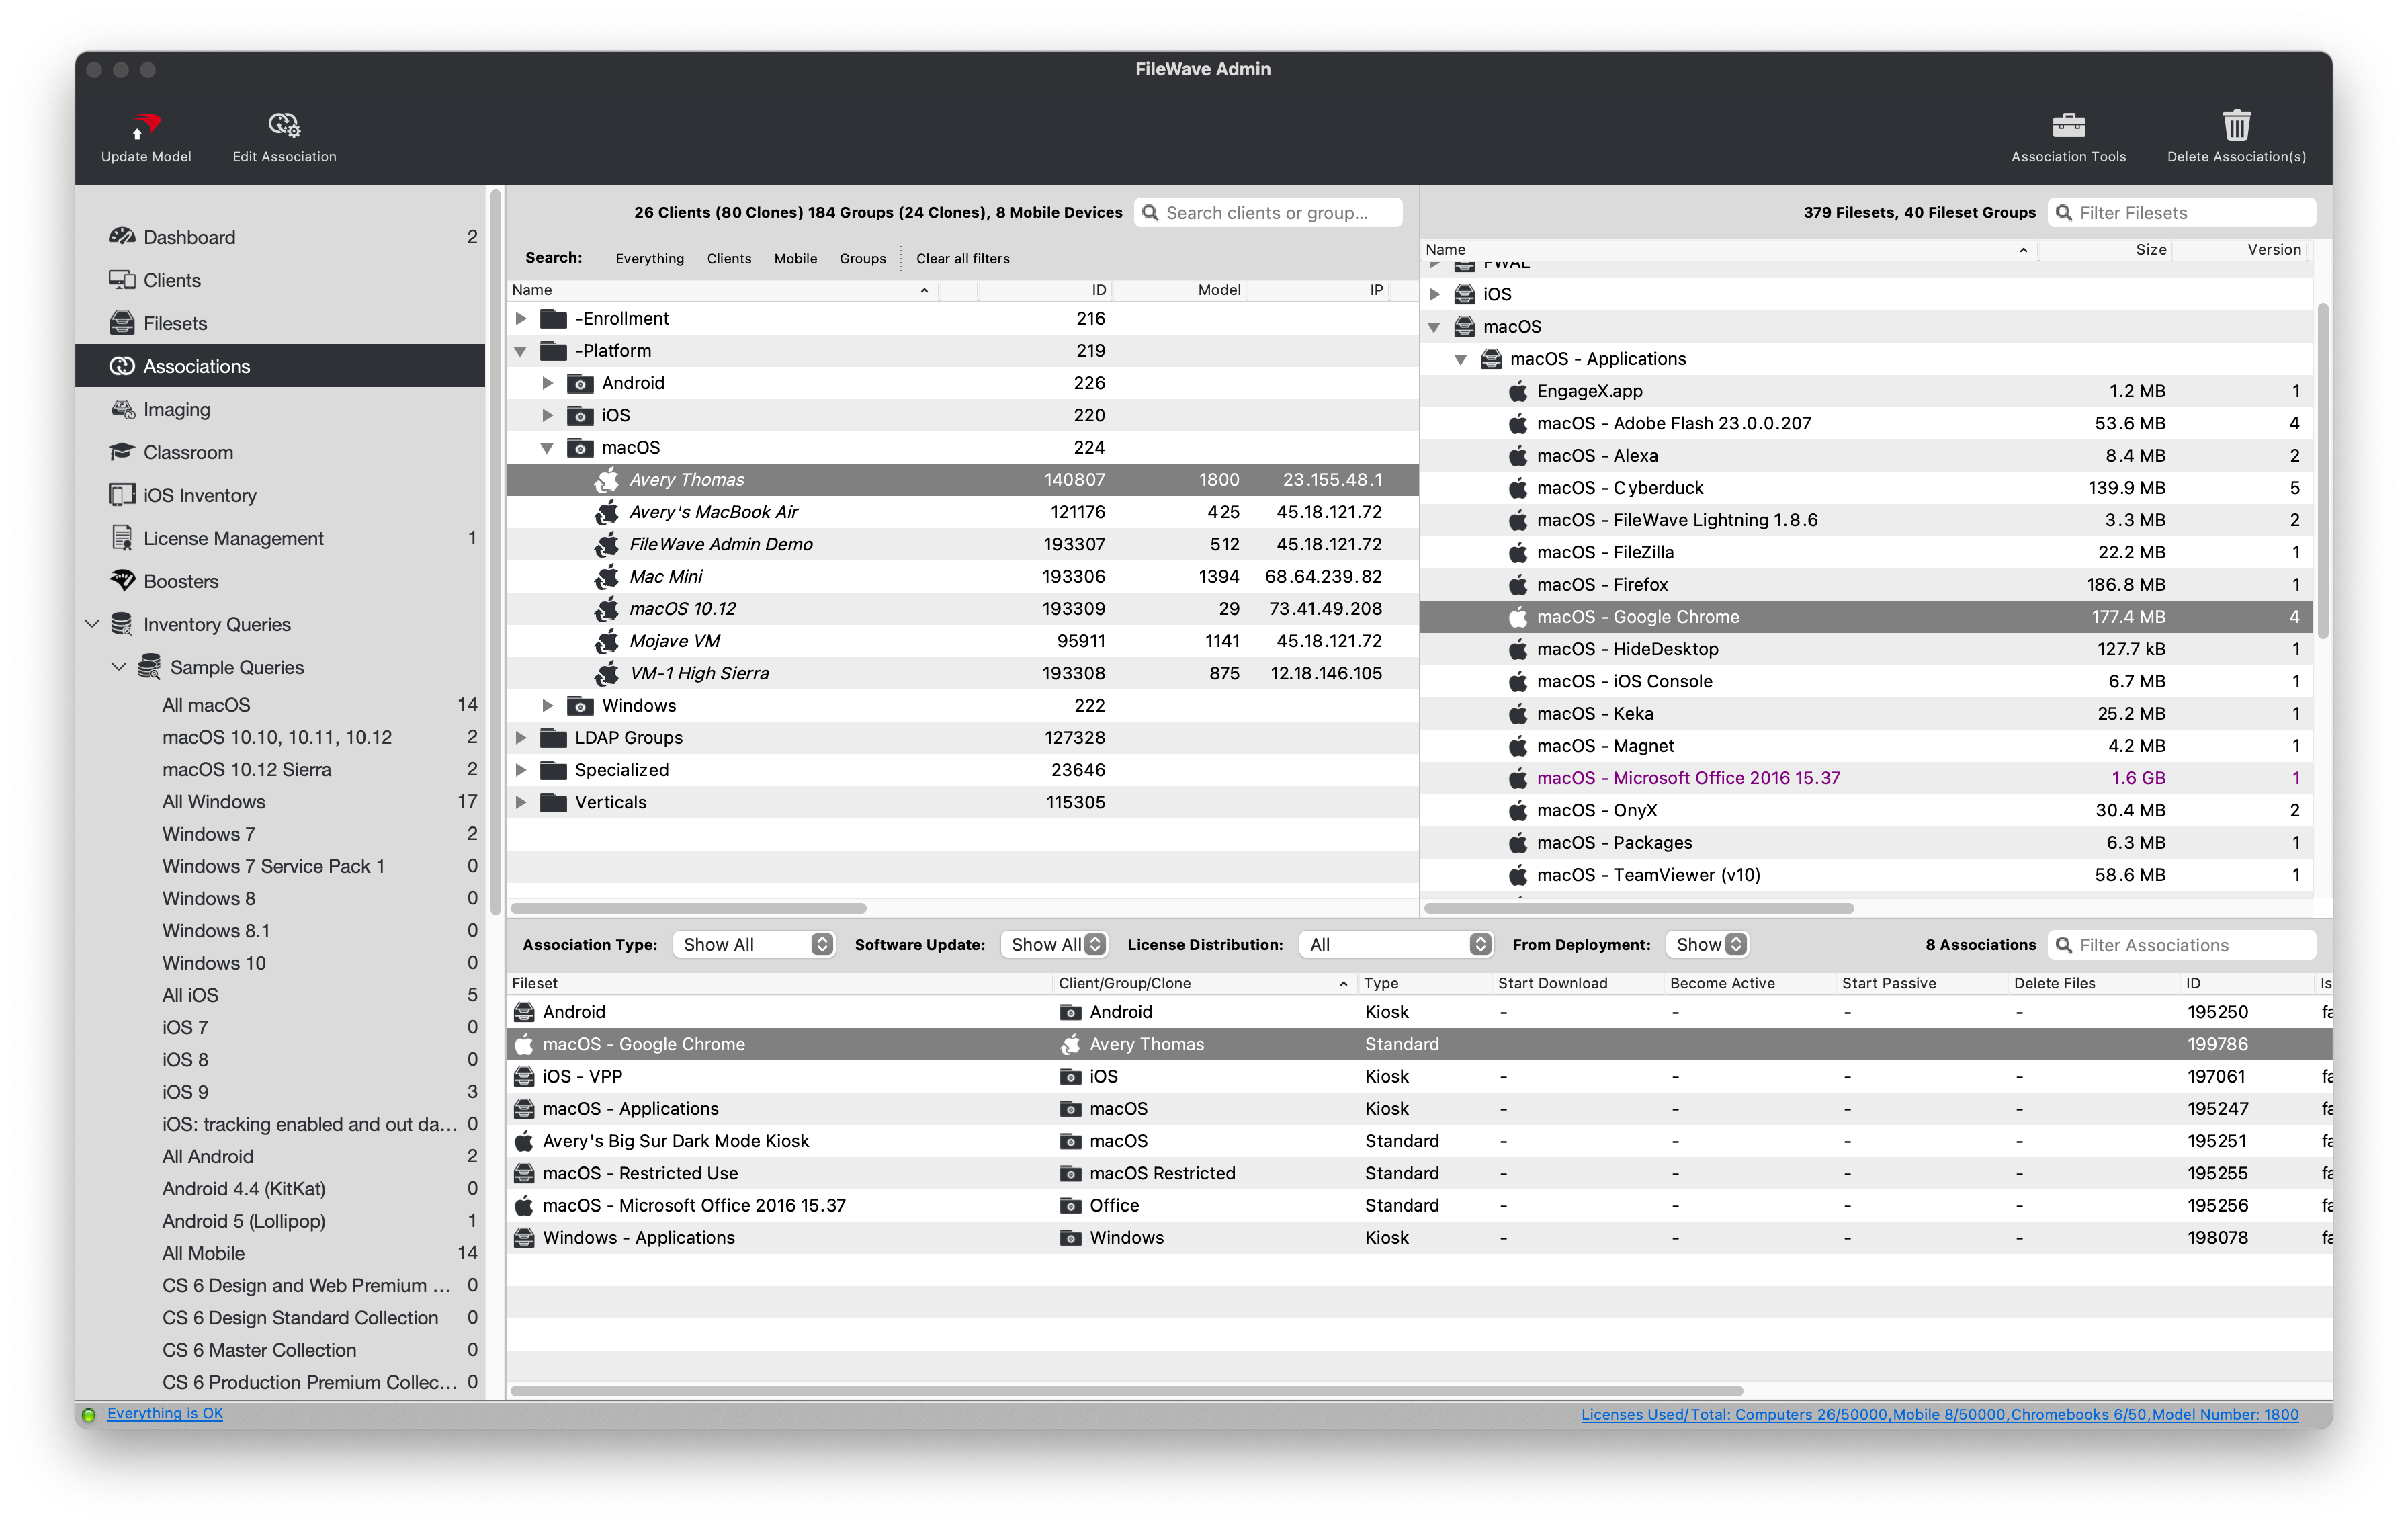
- Open FileWave Central and navigate to Associations.
- Find and select an individual device or client group from the left pane.
- This example uses the macOS device named "Avery Thomas".
- Find and select an individual Fileset or Fileset group from the right pane.
- This example uses the macOS Fileset named "macOS - Google Chrome".
- Drag the "macOS - Google Chrome" Fileset from the right pane onto the "Avery Thomas" macOS device.
- You can associate Filesets one-to-one, one-to-many, or many-to-one.
- A new Standard association appears in the bottom pane.
- Standard associations are the default and install in the background without user interaction.
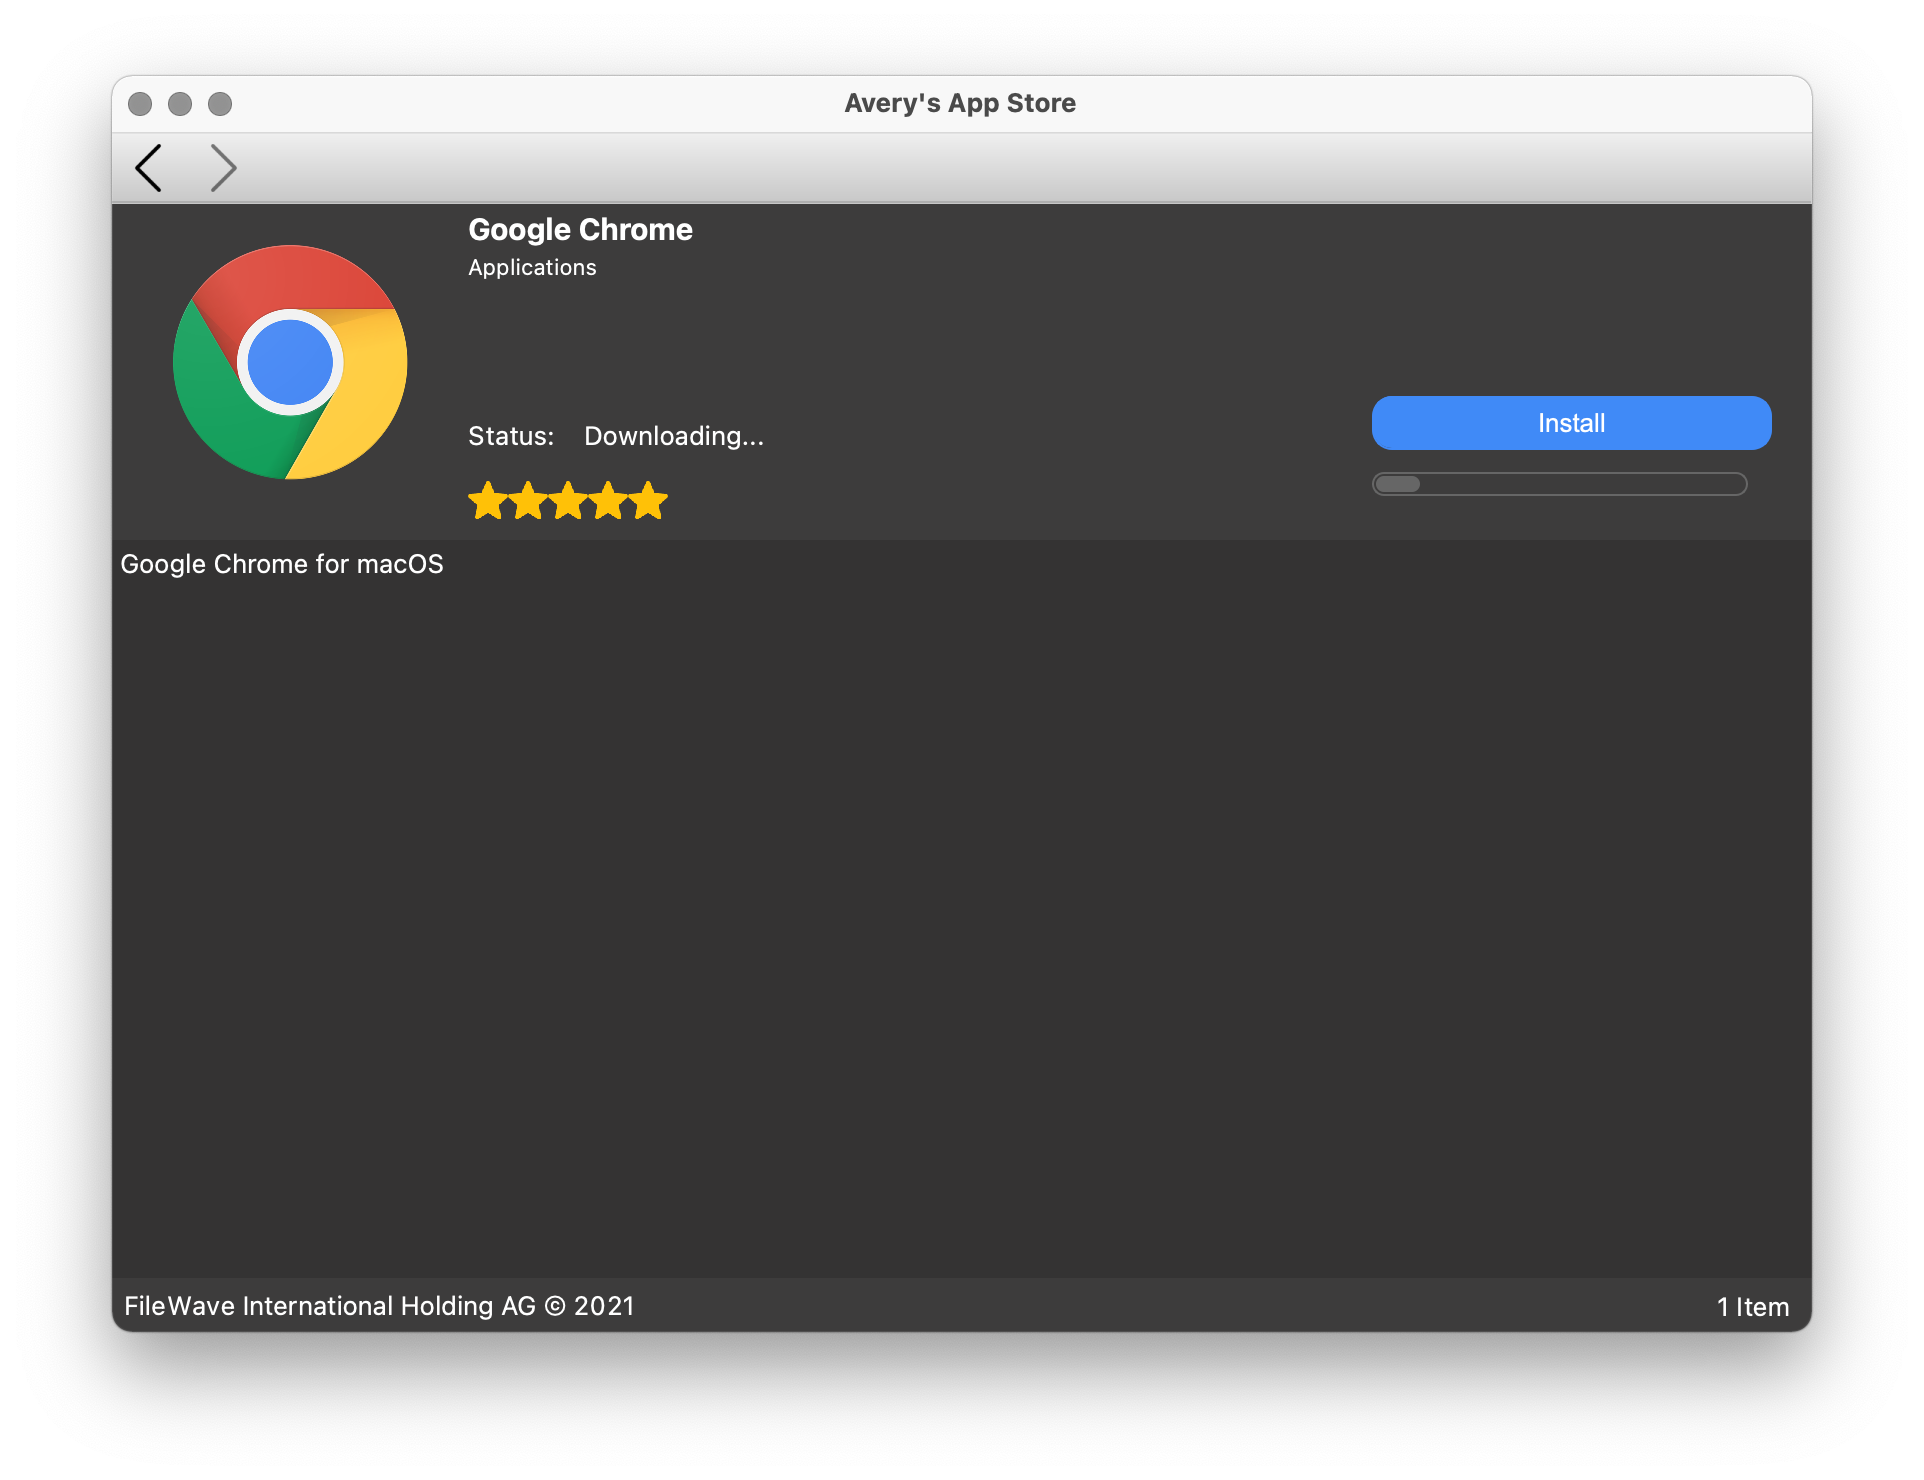
Deploy Fileset in the Kiosk
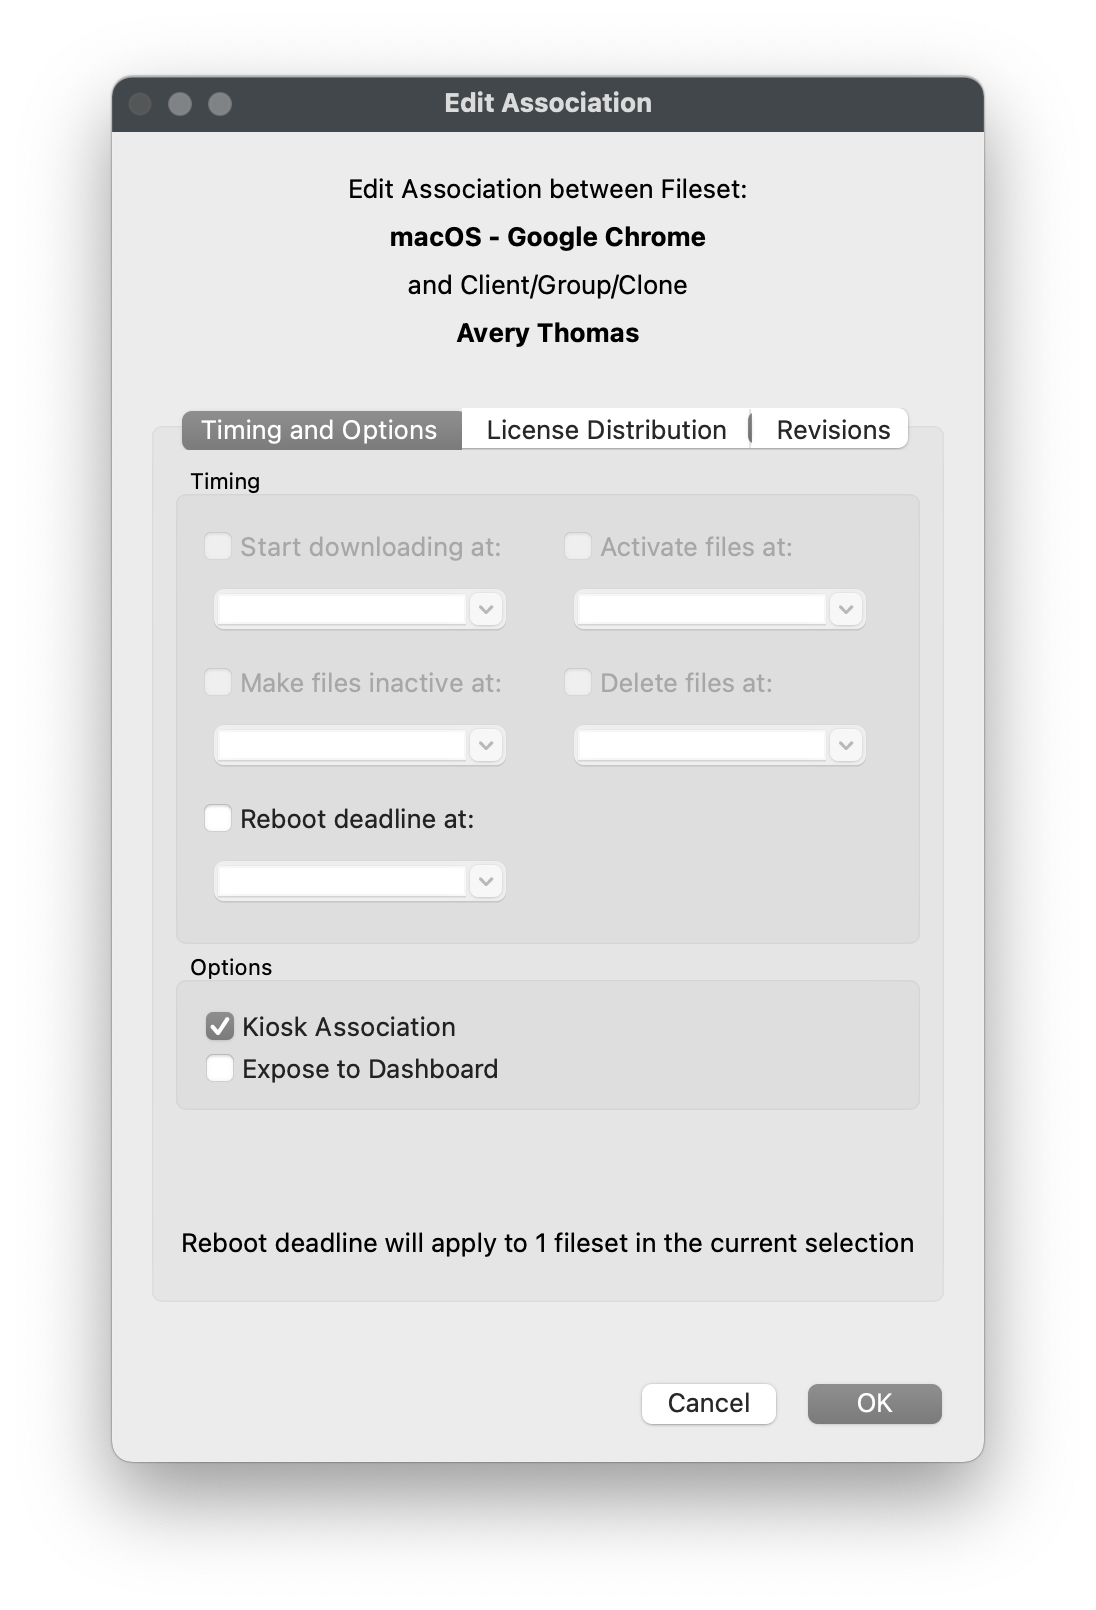
A Standard association installs in the background. To make the Fileset optional for the end user, change the association type to Kiosk. FileWave Kiosk is available on macOS, Windows, and iOS (App Portal), and can be customized to match your organization's look and feel.
- Open FileWave Central and navigate to Associations.
- Double-click an existing association from the bottom pane.
- Check Kiosk Association.
- Click OK to save the change.
- Run Update Model to commit the association change to devices.
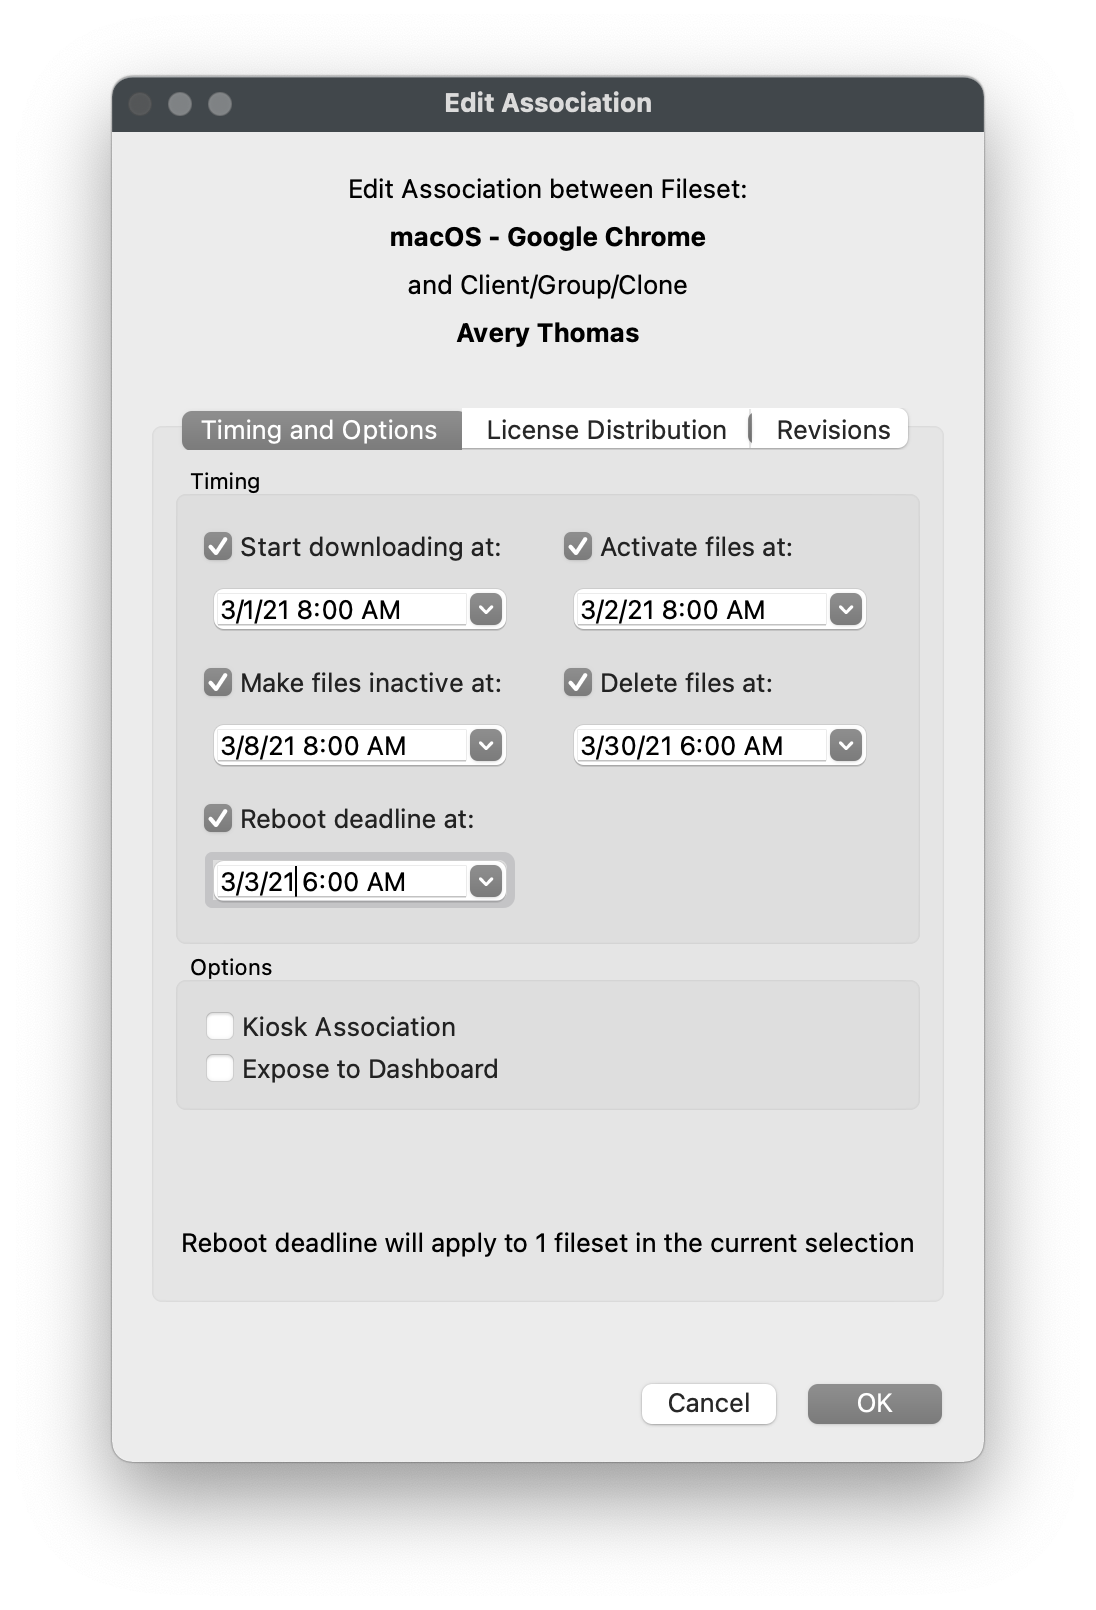
Schedule Fileset deployment
Use association scheduling when a Fileset or group of Filesets needs a specific deployment window. Kiosk associations cannot be scheduled except for the Reboot deadline at option.
- Open FileWave Central and navigate to Associations.
- Double-click an existing association from the bottom pane.
- Specify a date and time for any needed scheduled events.
- Start Downloading at: Downloads Fileset files, including installers, to a temporary location.
- Activate files at: Moves Fileset files to their final location and runs installers or activation scripts.
- Make files inactive at: Moves Fileset files from their final location back to a temporary location.
- Delete files at: Deletes the Fileset files from the device.
- Reboot deadline at: Forces a reboot of the client device. The Fileset must have Requires Reboot enabled in Fileset Properties.
- Click OK to save the changes.
- Run Update Model to commit the association changes to devices.
No comments to display
No comments to display