Windows Enrollment
How to enroll Windows Clients into FileWave
If you haven't already, review the Platform Integrations > Windows section for guidance on installing the Windows FileWave Client. If your organization uses Microsoft Entra ID and users sign in to Windows with Entra ID credentials, consider enrolling Windows devices through Microsoft Entra ID instead. That path also enables Windows MDM management in FileWave. Learn more in the Windows MDM article.
After a Windows desktop client checks in, it waits for approval before it can receive associations. Add it to the model from FileWave Central.
- Open FileWave Central.
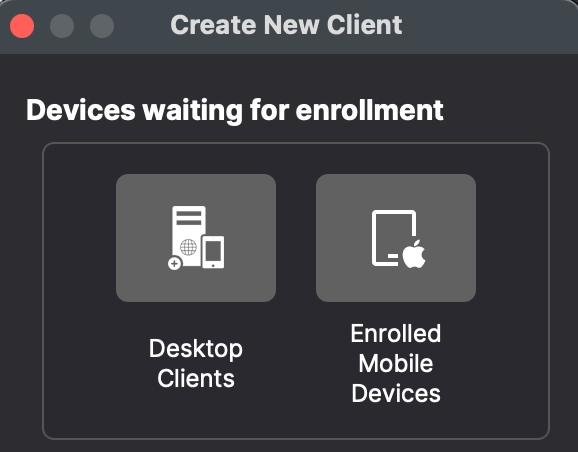
- Click the “New Client” button in the toolbar.
- Select “Desktop Clients”. The “Enrolled Mobile Devices” option is for MDM-enrolled devices, not a standard Windows desktop client.
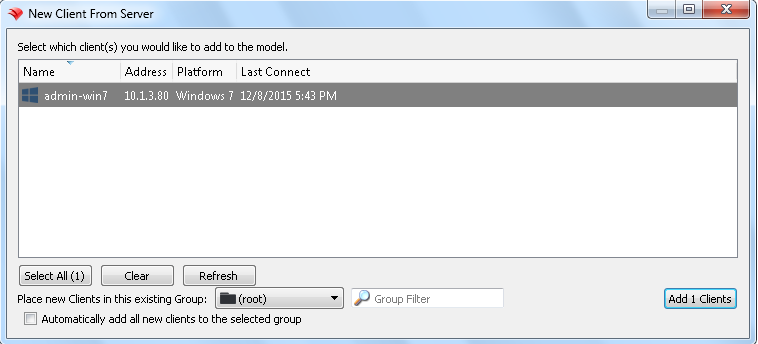
- Select the new Windows client from the list.
- Optionally choose the group for the new client, then click “Add Clients”.
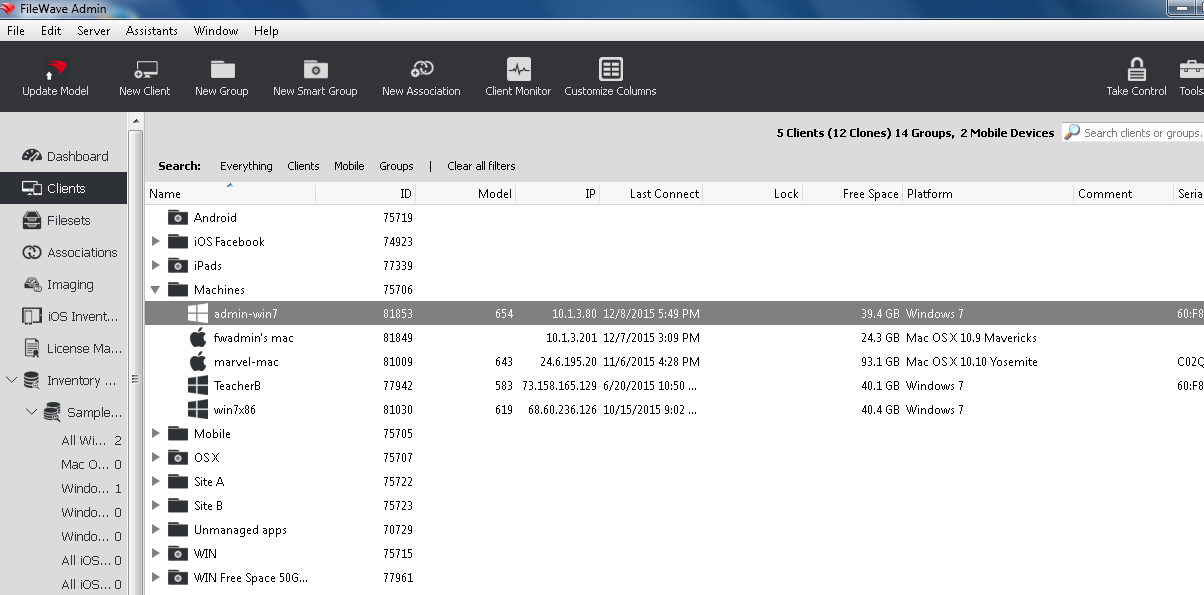
After you click “Add Clients”, FileWave Central opens the Clients view. Adding a client changes the model, so run a model update before expecting the Windows client to receive Filesets or settings.
You can also configure FileWave to add new clients automatically and skip the manual approval step. This is covered in Conflict Resolution.
Making Changes to the Model
Update the model whenever you want FileWave to apply model changes. You can update after one change or after a batch of changes, such as adding clients, creating groups, or assigning Filesets.
Your FileWave environment can now manage the Windows client. From here, continue adding clients, organizing groups, and deploying Filesets.
No comments to display
No comments to display