Apple Manual Enrollment
Not able to use DEP?
Apple's Device Enrollment Program is great but you may find that all or some of your devices aren't showing in Apple School Manager or Apple Business Manager. Devices are usually excluded because they were not purchased directly from Apple or an Authorized Reseller. iOS device capable of running iOS 11+ can be manually added to your ASM/ABM account but unfortunately this not yet an option for macOS. This section covers several manual enrollment methods and why you might need to leverage them.
Add iOS devices to ASM/ABM using Apple Configurator 2
If you have an iOS 11+ or tvOS 11+ device that was not originally purchased from Apple or an Apple Authorized Reseller, you can manually add the device to ASM/ABM using Apple Configurator 2. Please first review Apple's documentation here followed by FileWave Knowledge Base article here for more FileWave-specific processes. Once the device has been added to ASM/ABM you can take advantage of DEP for any future enrollments of this device.
MDM-enroll Apple devices using URL Enrollment
If ADE is unavailable, you can MDM-enroll an iPhone, iPad, Apple Vision Pro, or Mac using FileWave URL Enrollment. This method allows an end user to enroll a previously configured device without a factory reset. The user may be able to remove the MDM profile and unenroll the device. On macOS, the user also needs administrator privileges to install the MDM profile.
If getting authentication required during enrollment, please review this section to learn how to disable URL enrollment authentication.
macOS URL Enrollment
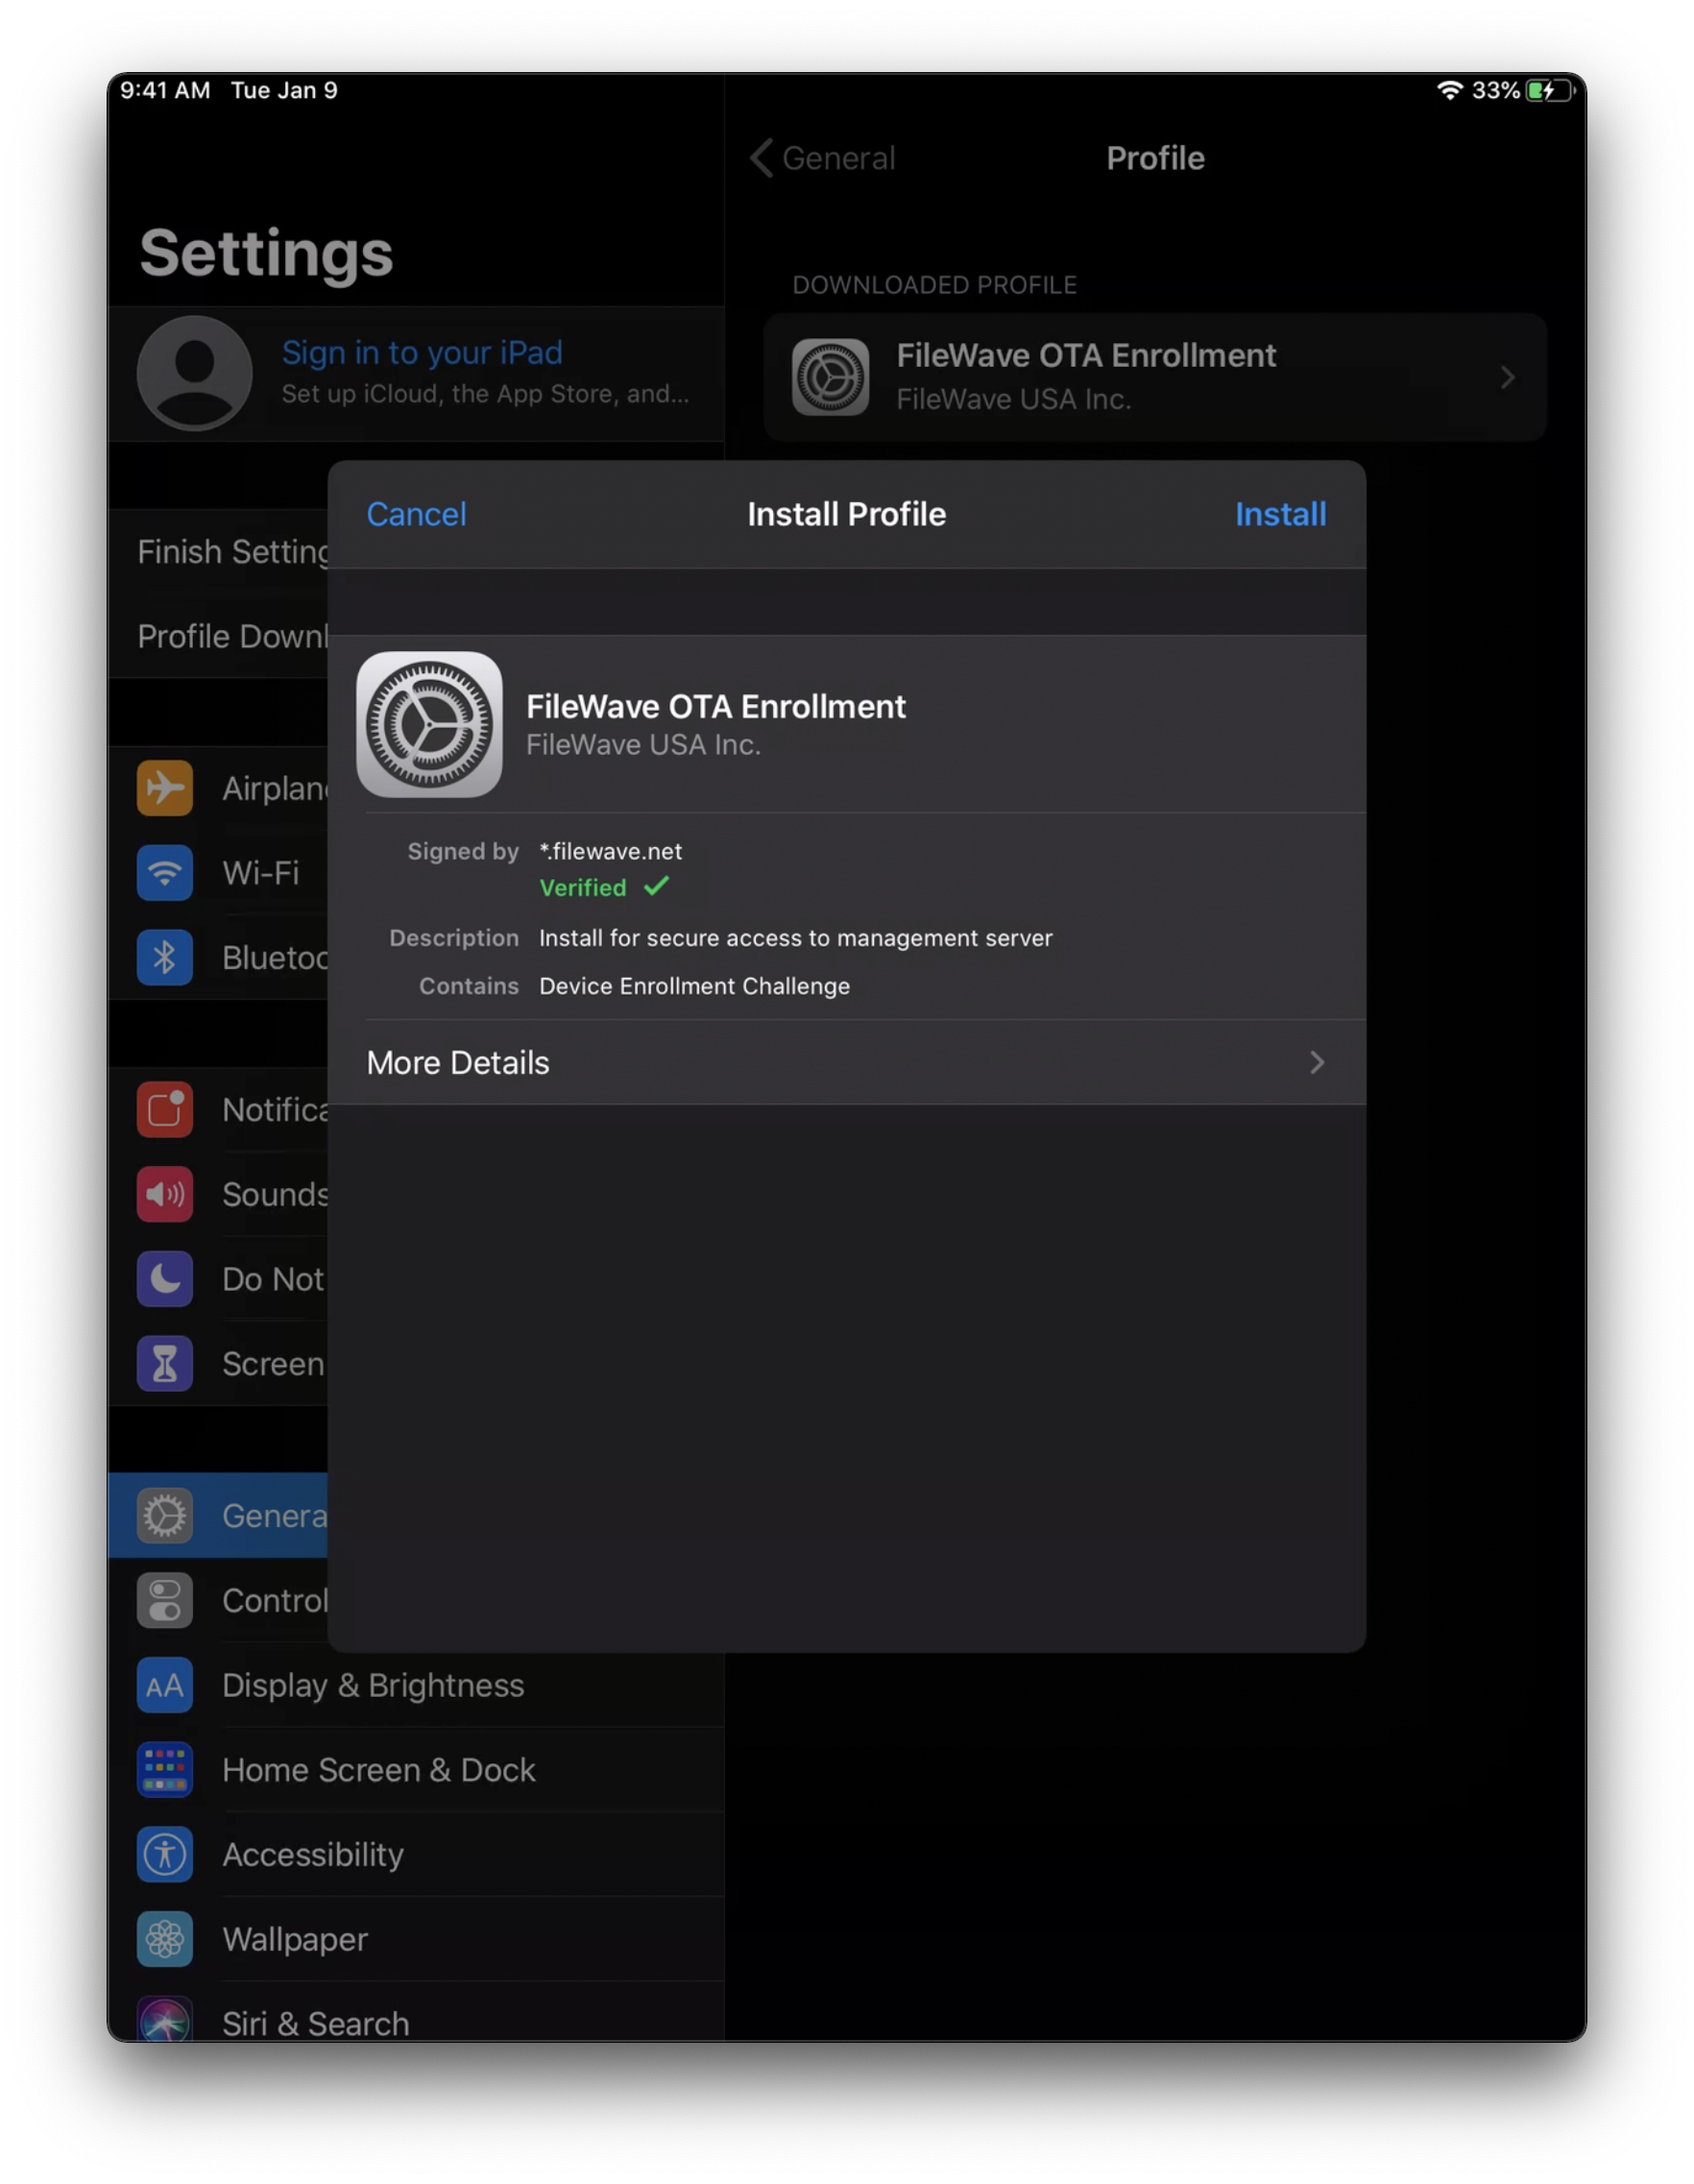
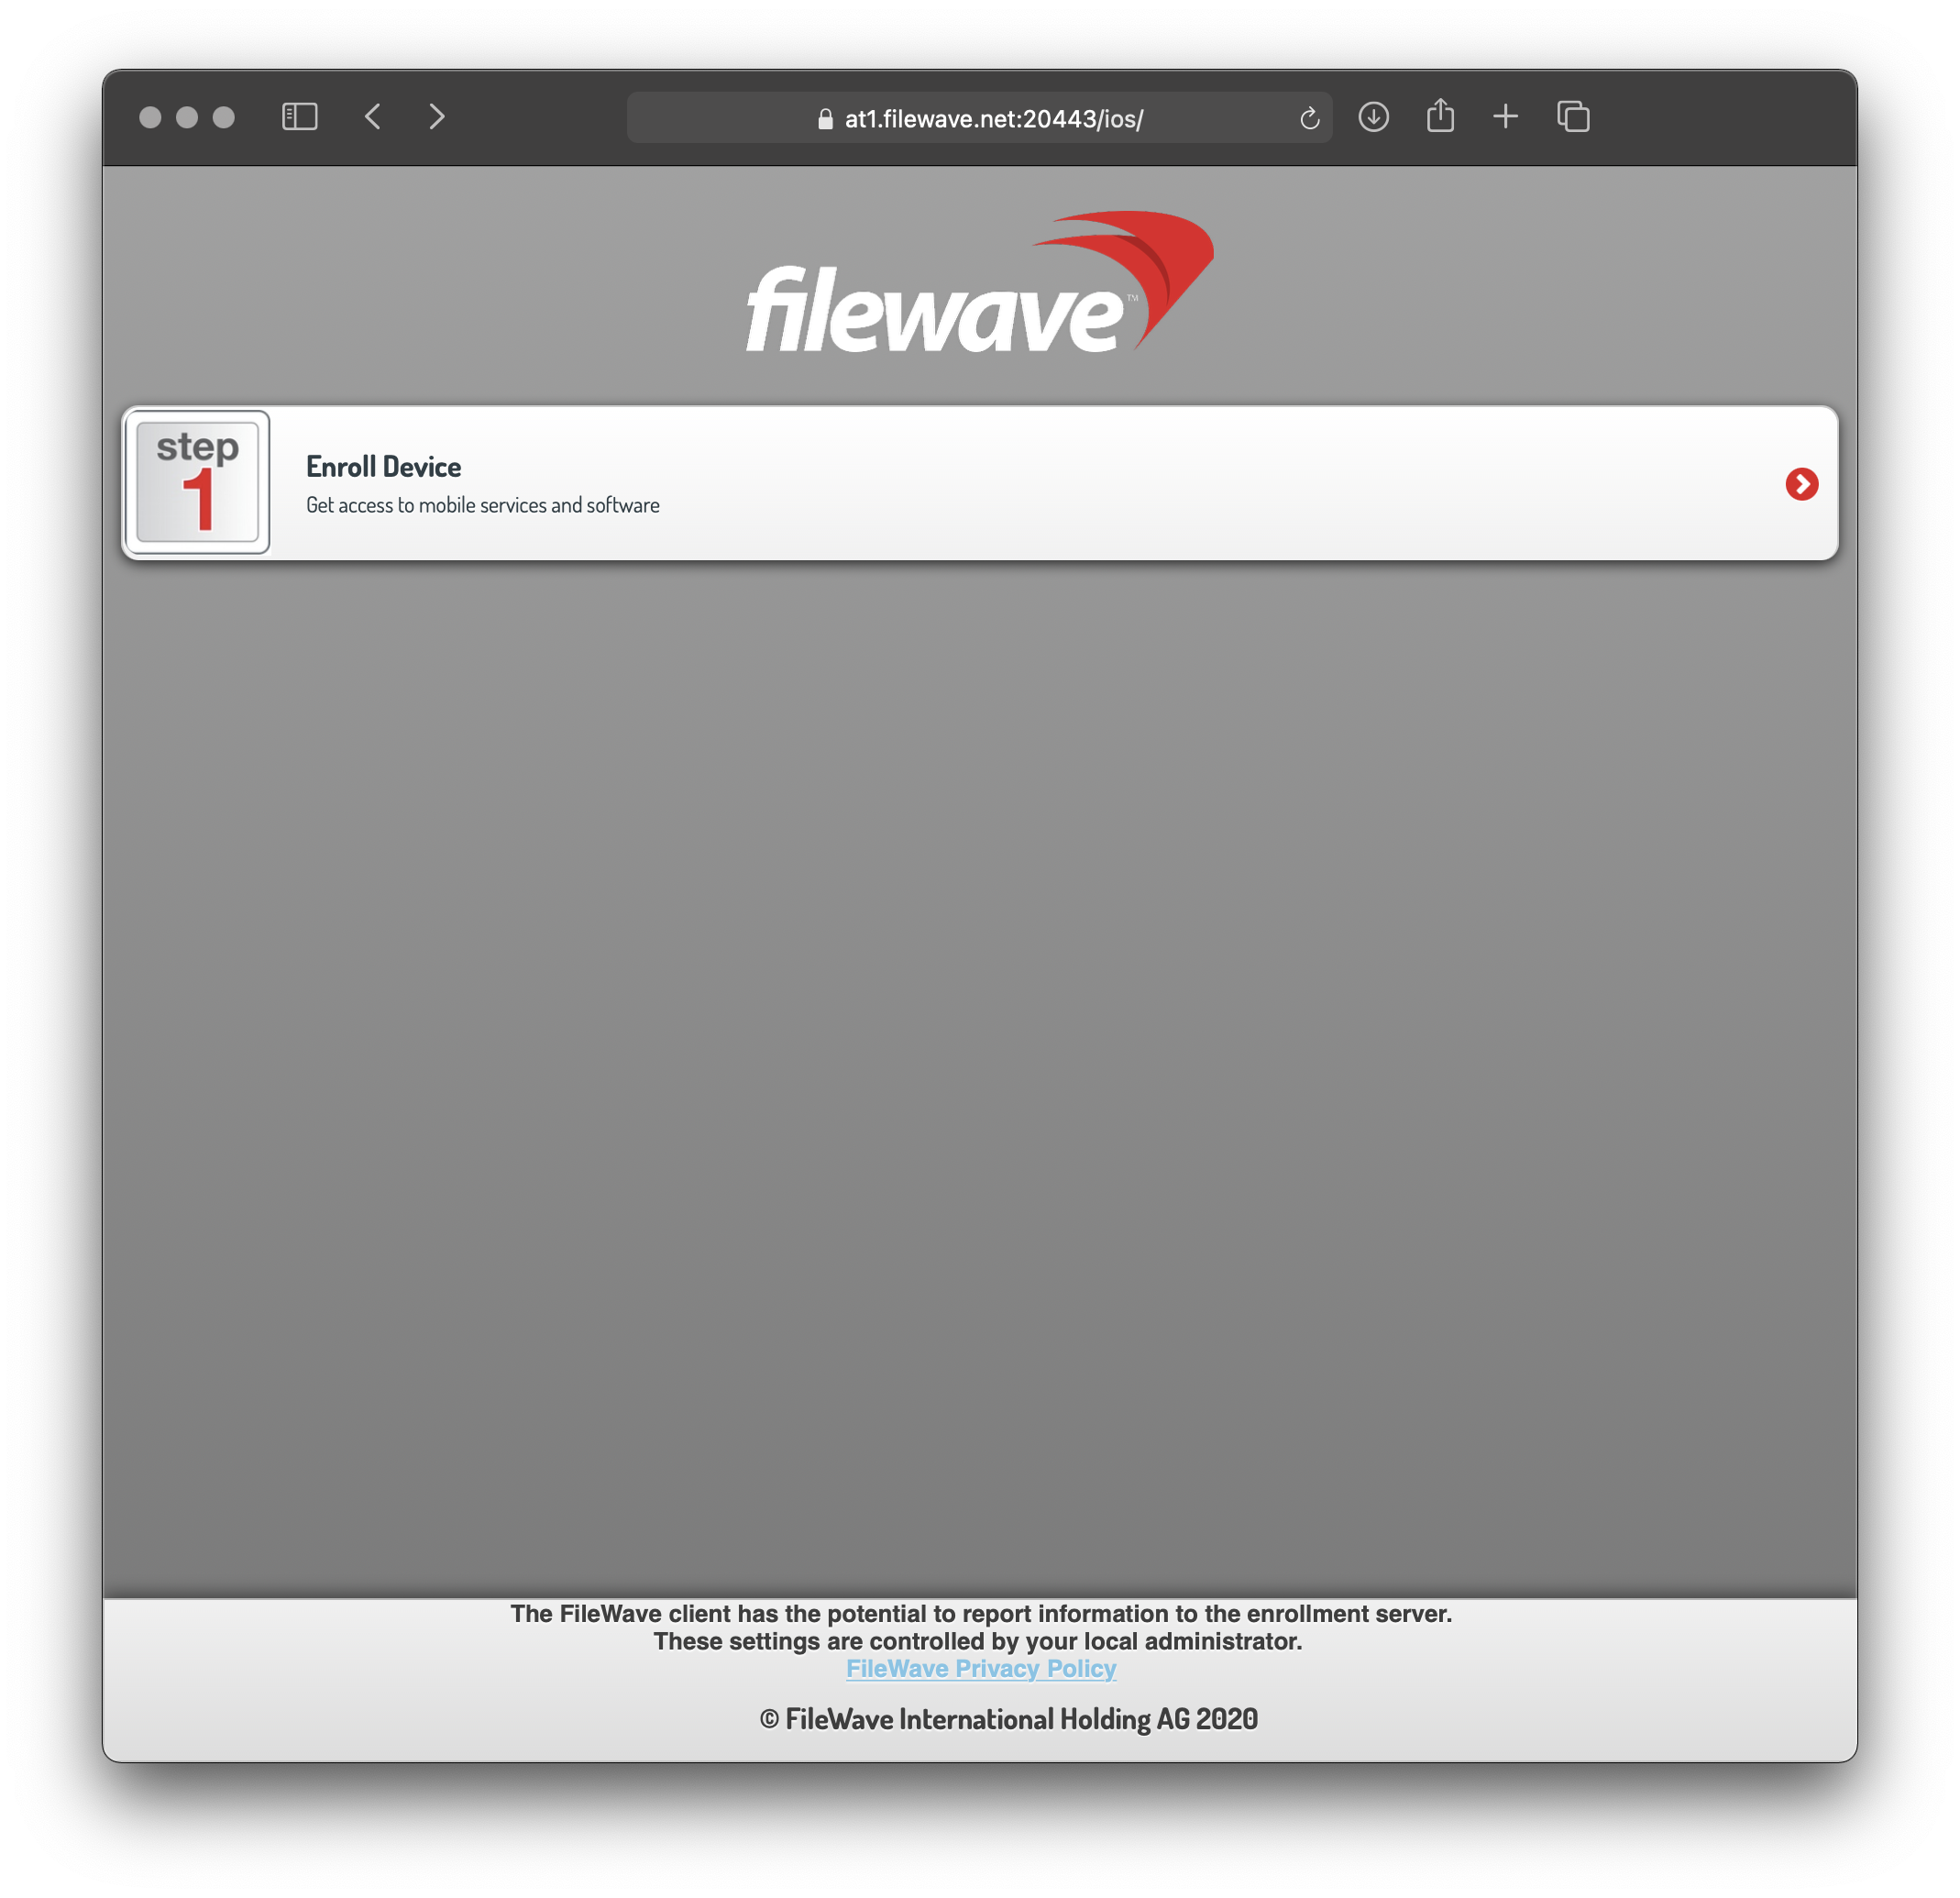 Navigate to "https://yourfilewaveserver.domain.com:20443" using web browser of choice.
- Click the large "Enroll Device" button to download the MDM Enrollment Profile.
- If using a self-signed certificate, you will see an additional step to download certificate.
- If enrollment authentication is enabled, please authenticate.
- Located the downloaded MDM Enrollment Profile "enroll.mobileconfig".
- Double-click on the "enroll.mobileconfig" file.
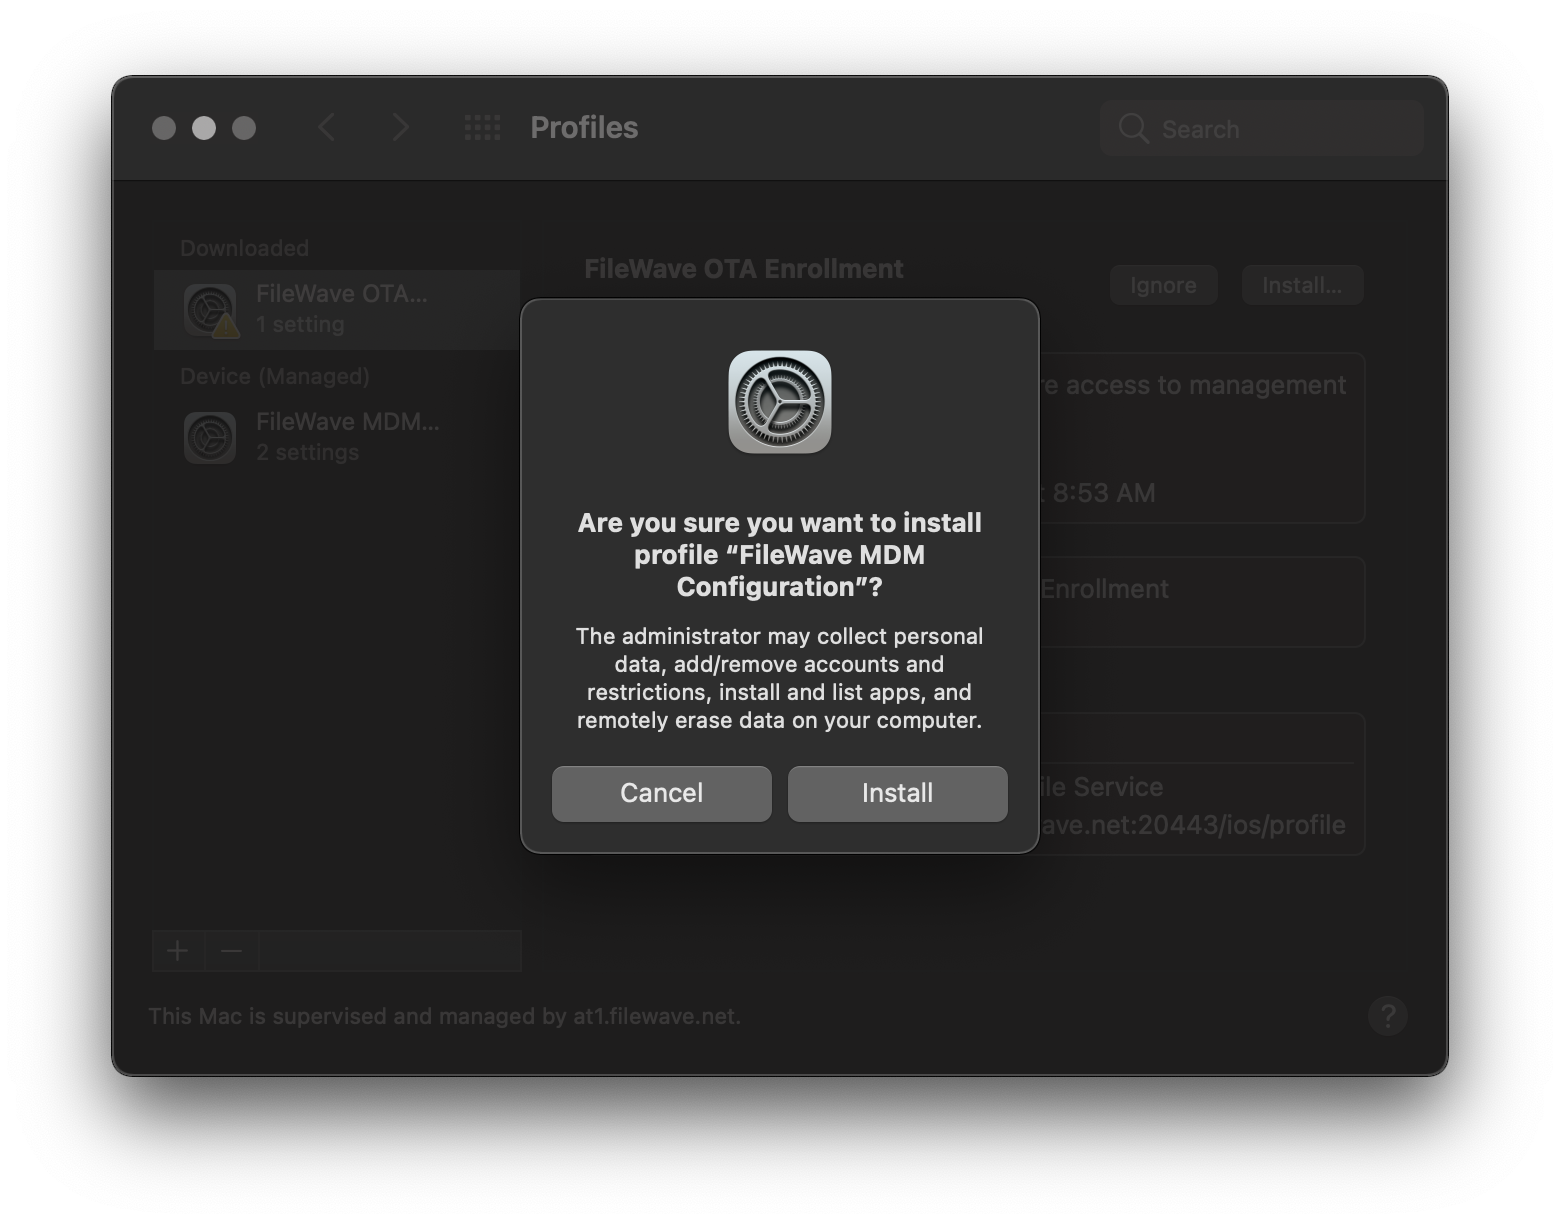
- Open "System Preferences > Profiles" from your macOS menubar.
- Click "Install" next to the "FileWave OTA Enrollment" Profile.
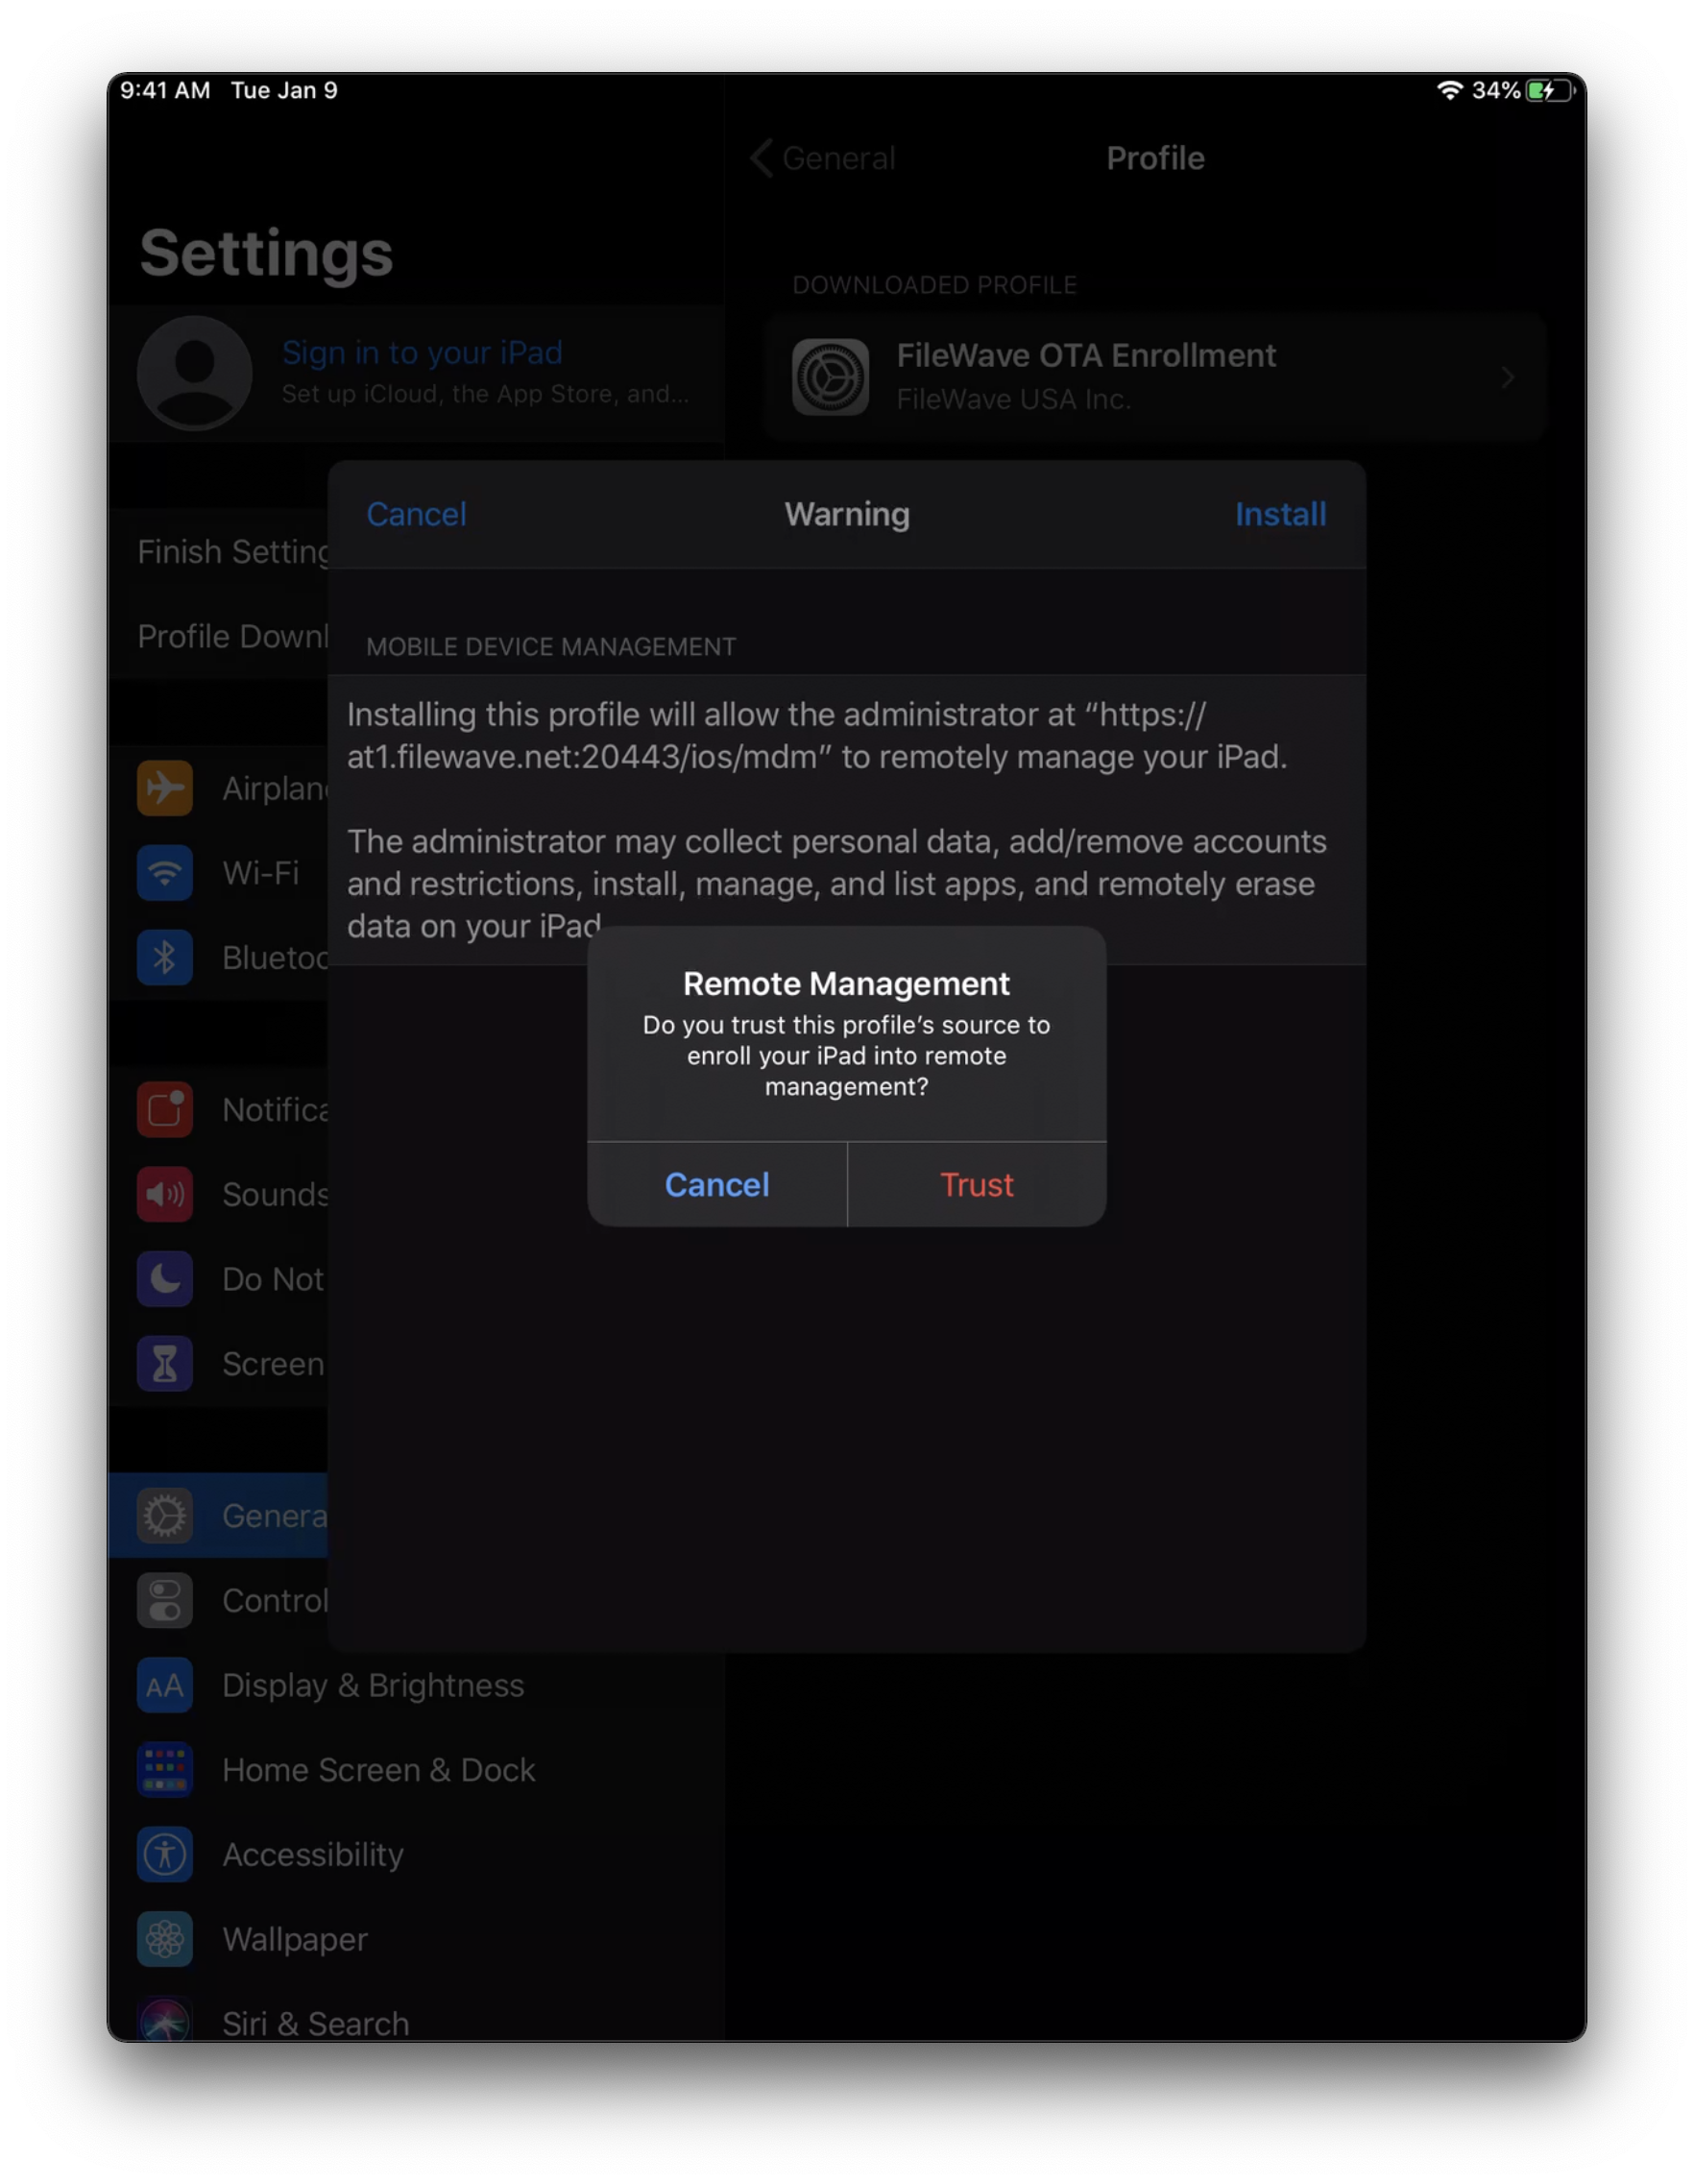
- Click "Install" again at the next prompt and authenticate using your macOS Administrator credentials.
- The MDM Enrollment Profile is now installed and the FileWave Client will be installed automatically.
- If you have not imported your custom macOS FileWave Client, please review the Generate custom FileWave Client for macOS DEP enrollments section.
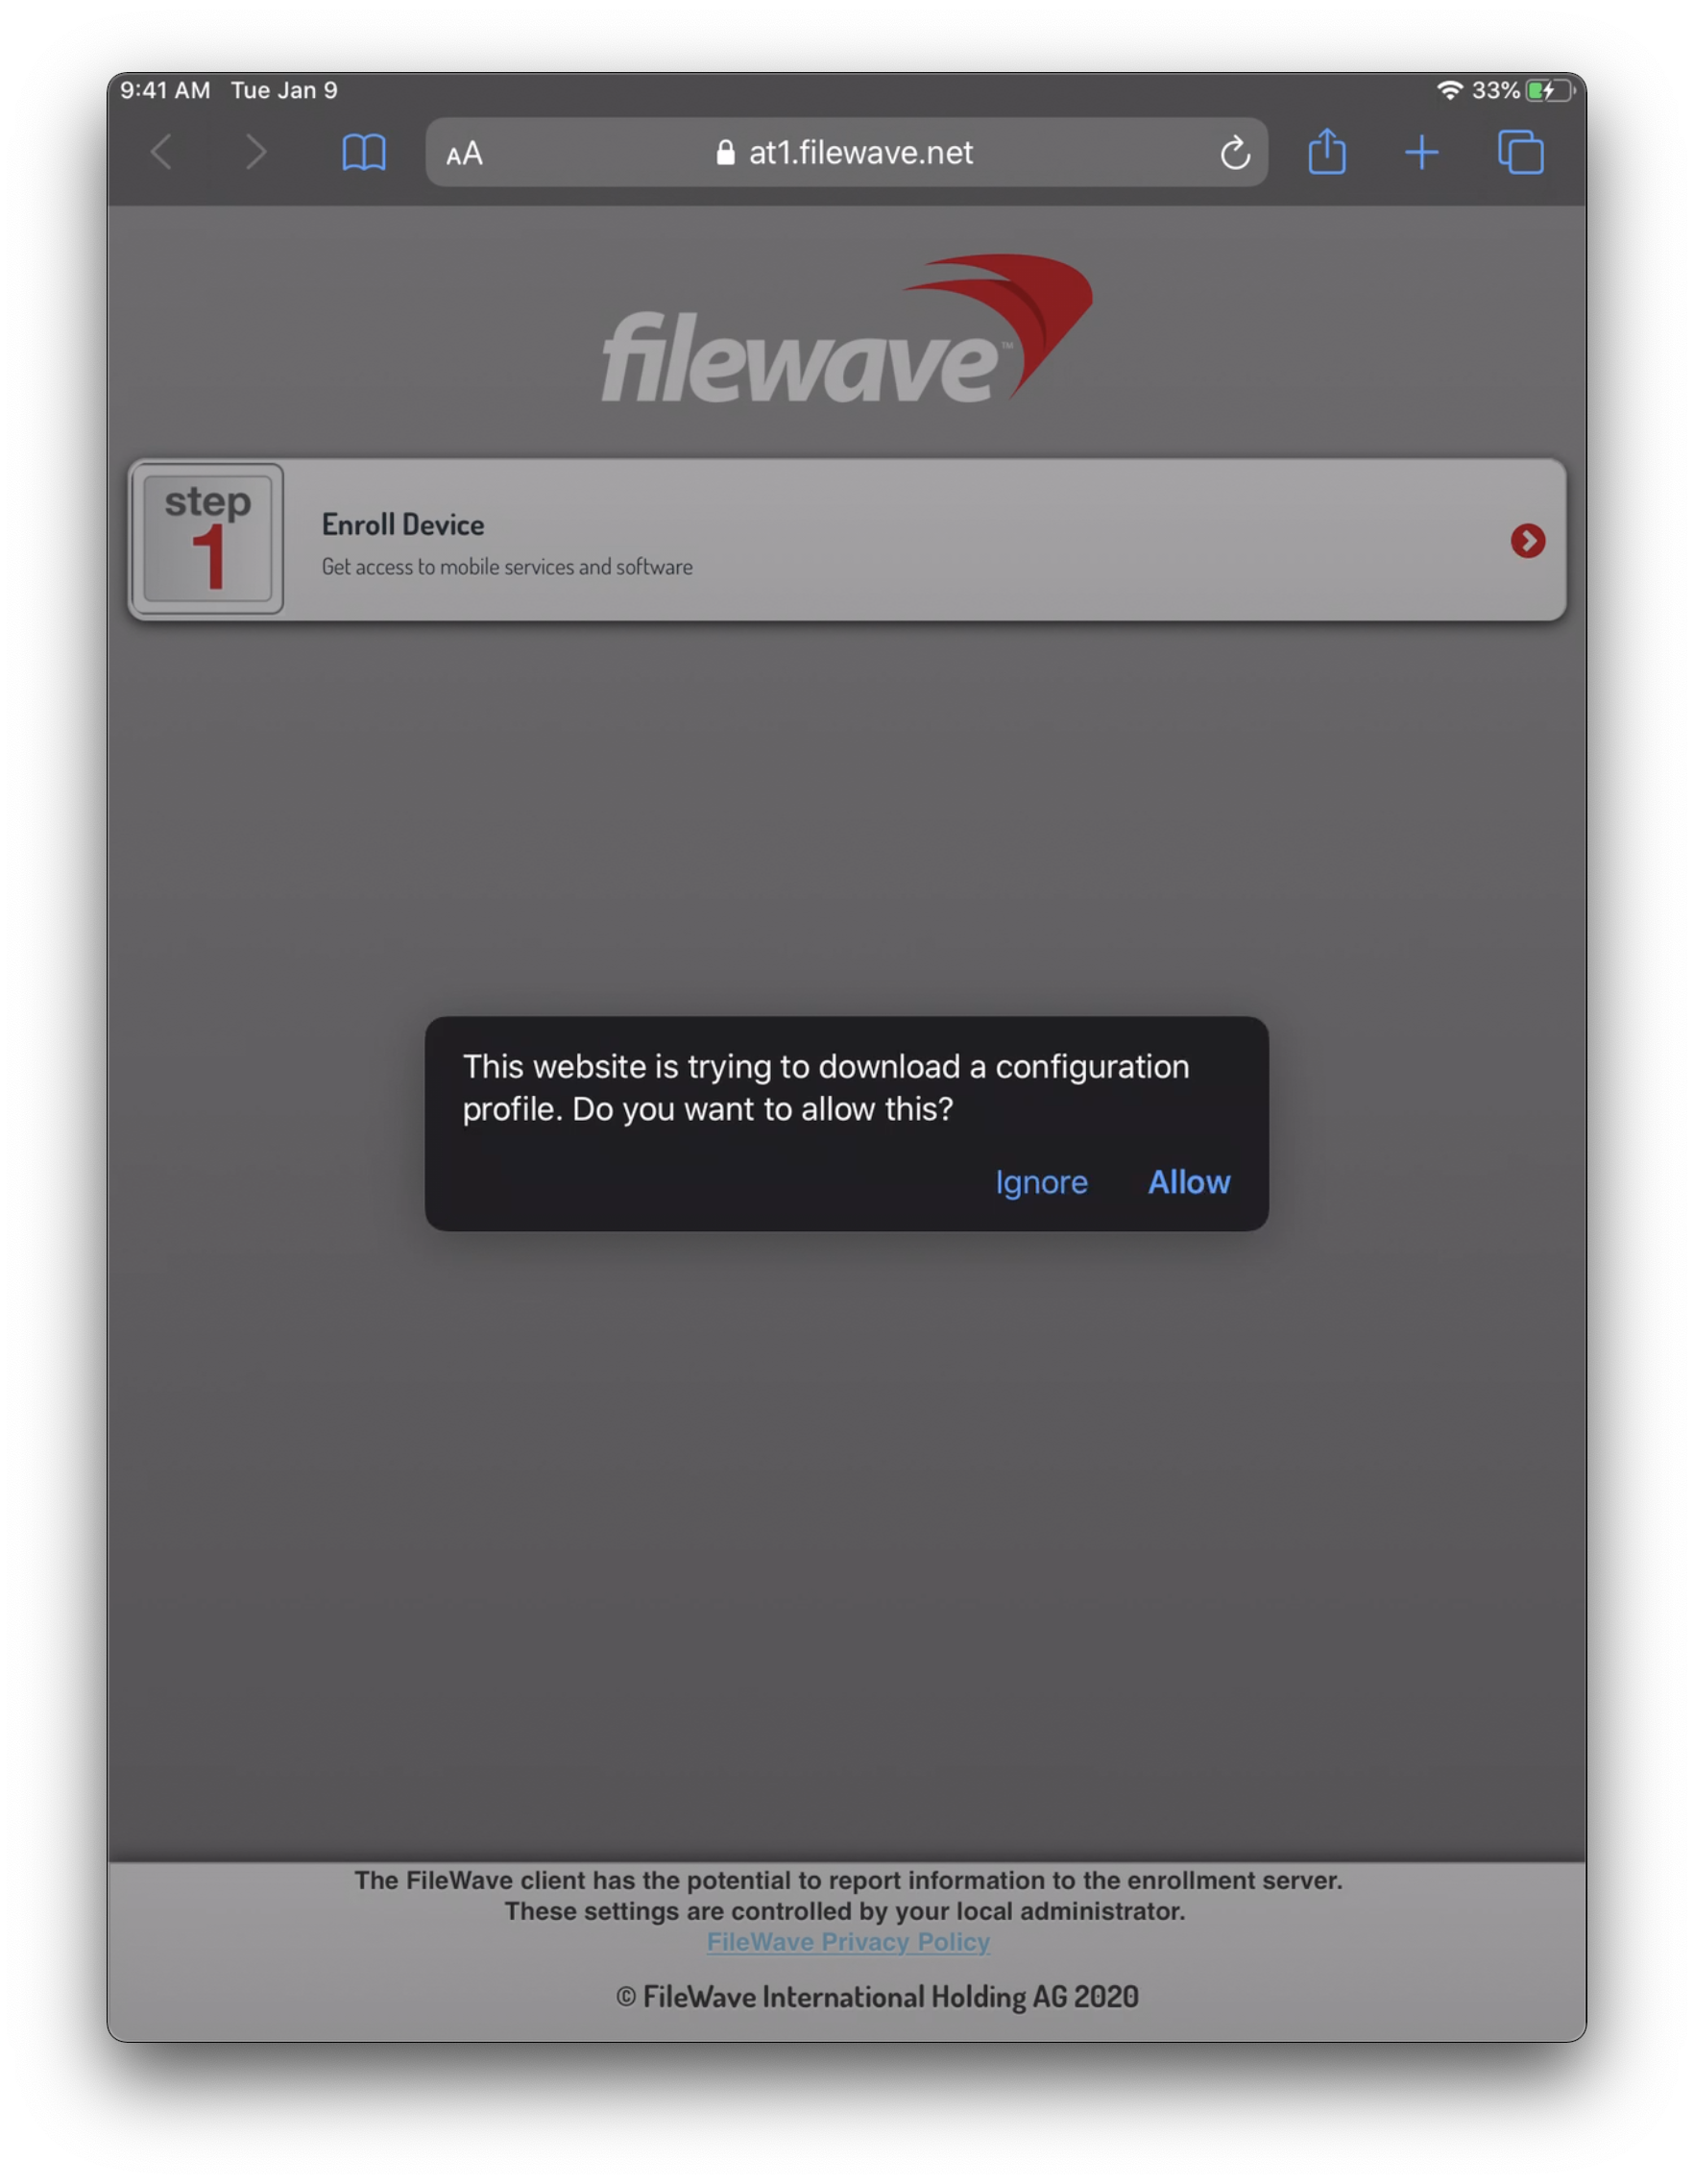
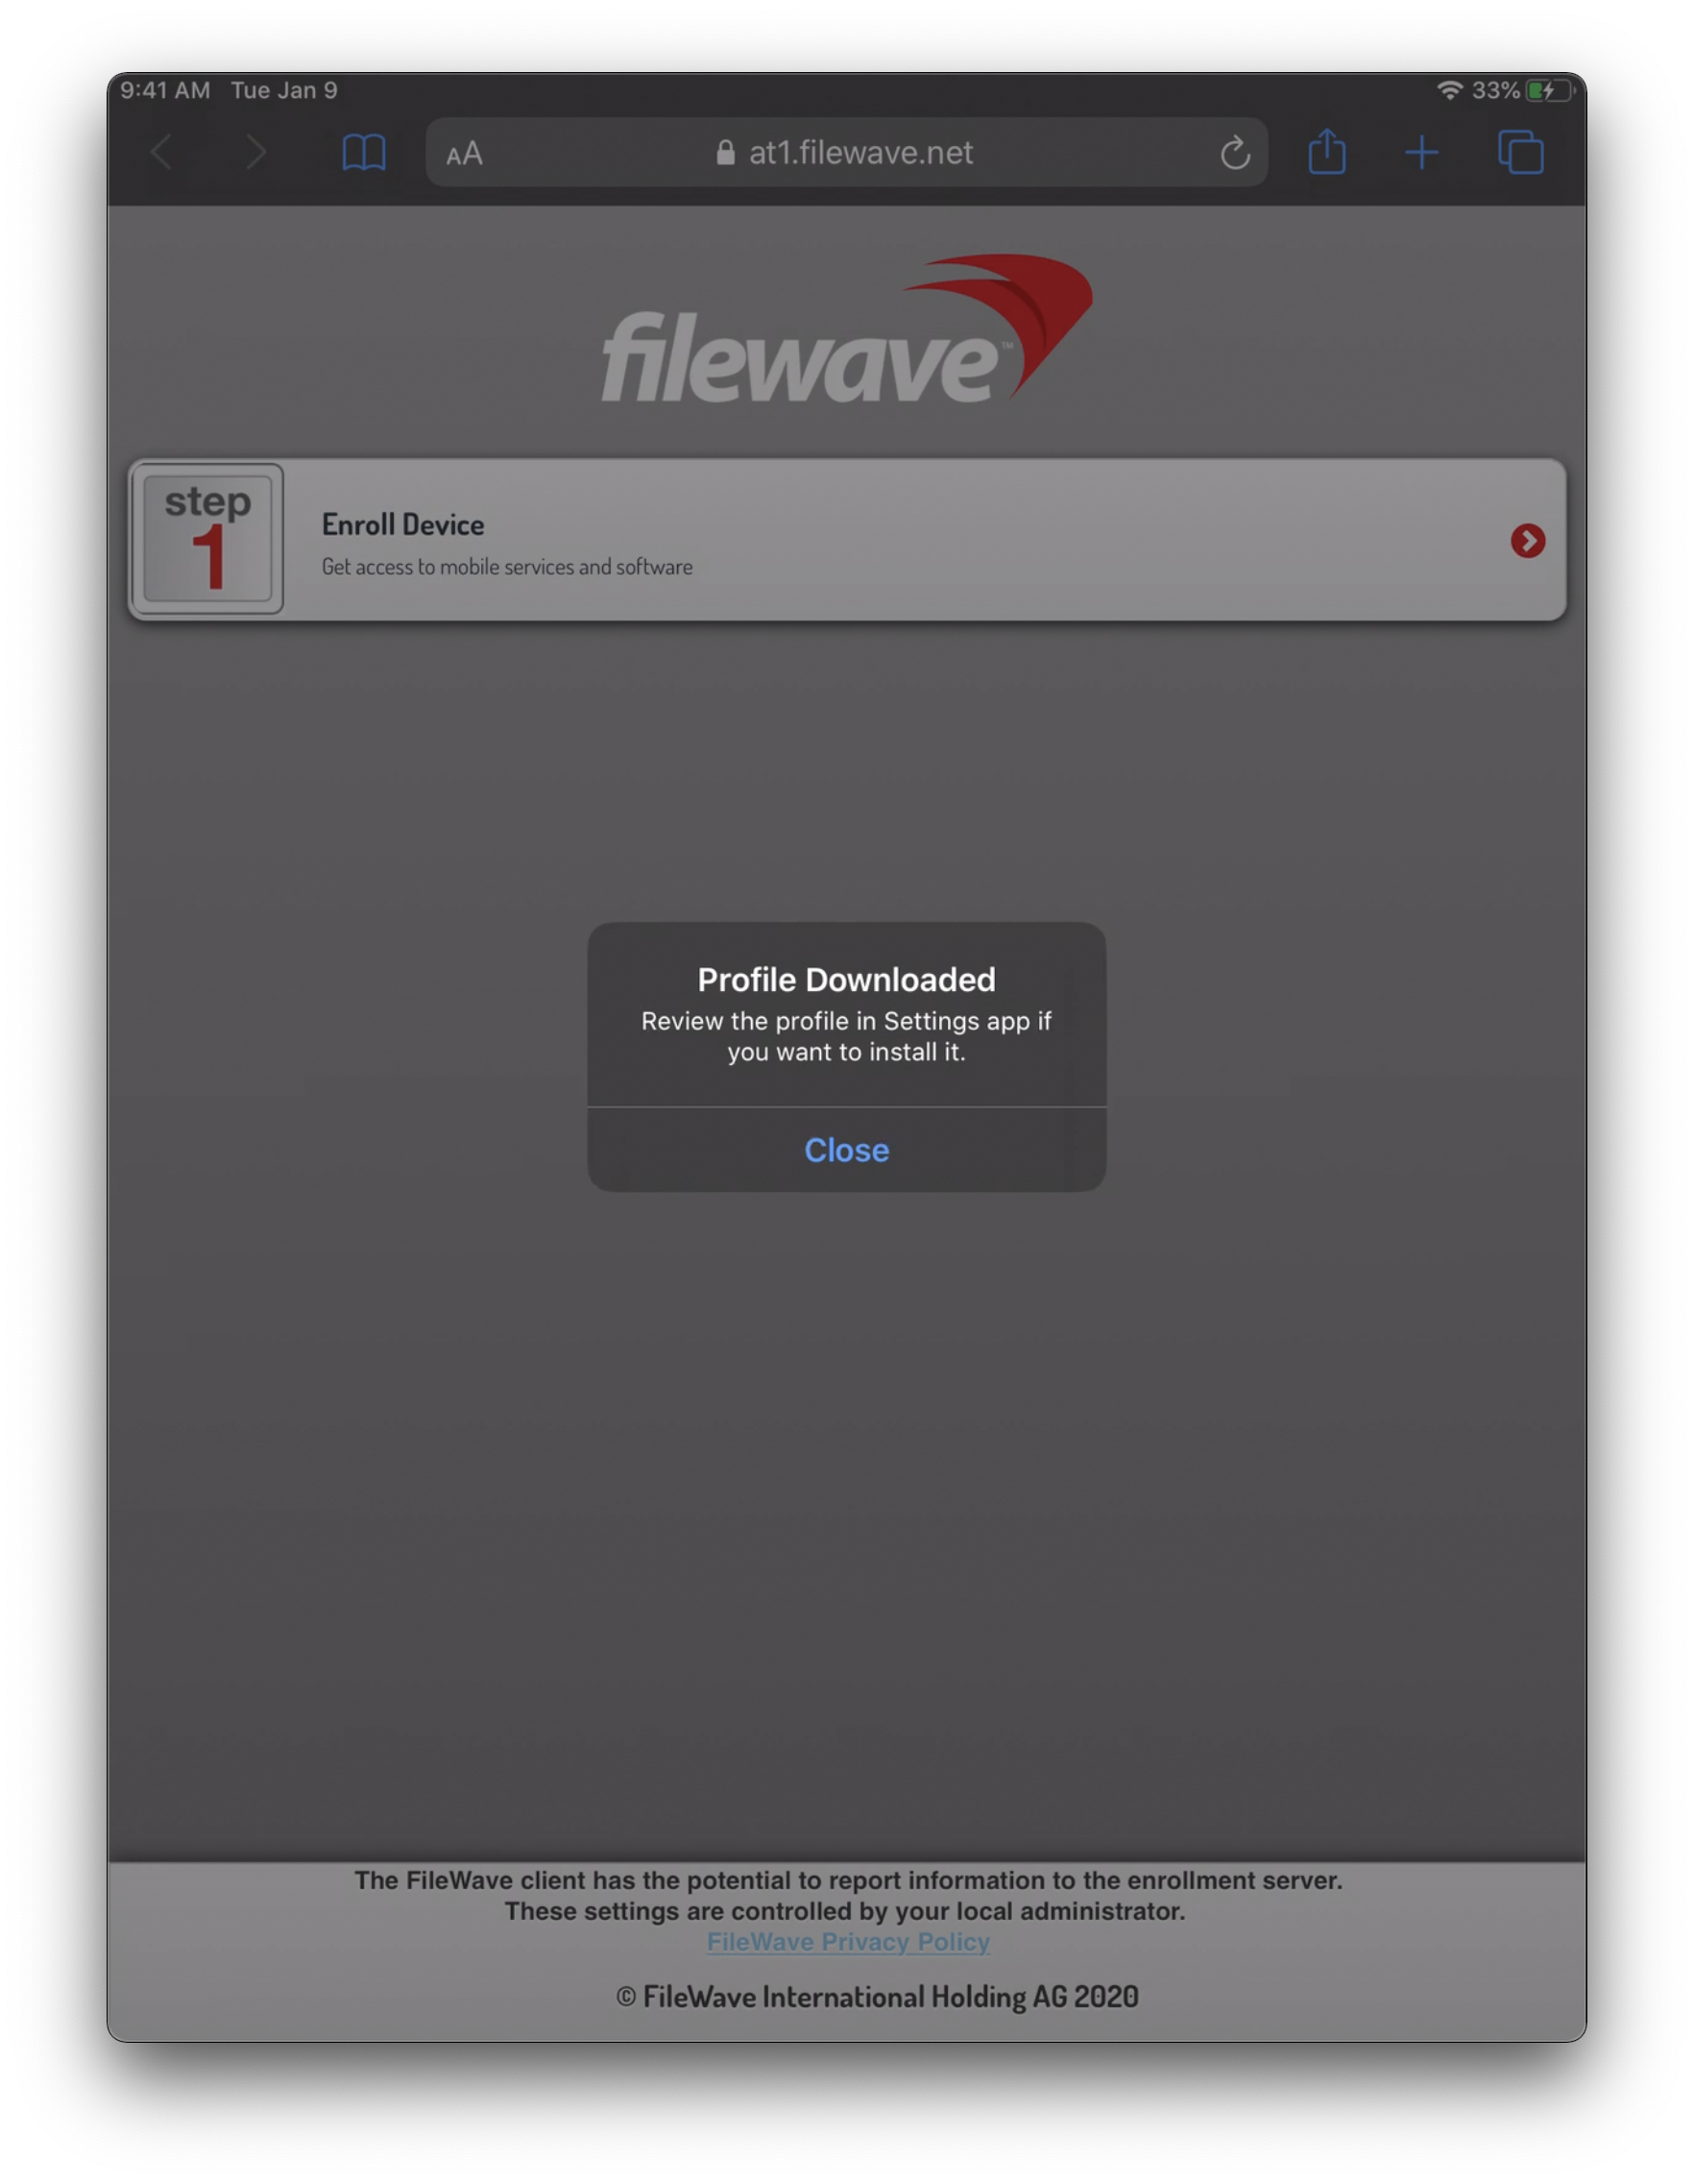
Apple mobile URL Enrollment: iPhone, iPad, and Vision Pro
Use the same FileWave enrollment URL and MDM-profile approval flow on Apple Vision Pro. The exact on-device labels follow the installed visionOS version.
 |
 |
 |
 |
 |
iOS User Enrollment (BYOD)
Starting with iOS 13, FileWave allows your end-users to enroll using User Enrollment. This is a new form of BYOD enrollment that allows your organization to deploy VPP applications to the devices while keeping other end-user data private from the MDM. This method also required the use of Managed Apple IDs configured in either Apple School Manager or Apple Business Manager.
For more in-depth information and setup of iOS User Enrollment, please consult the following FileWave Knowledge Base article iOS BYOD User Enrollment. This article contains a video walk though of the enrollment process along with the limitations of iOS User Enrollment.
Enroll non-MDM macOS Client
Enrolling a macOS device outside of the MDM is possible although it is unrecommended. To enroll a non-MDM macOS device into FileWave, you will need to simply install the FileWave Client PKG using a macOS Administrator account.
|
Features unavailable with non-MDM macOS enrollment
|
Features available with non-MDM macOS enrollment
|
Generate a custom FileWave Client PKG
 Open the FileWave Customer Installer Builder for macOS.
- Fill out the settings accordingly.
- Click the "Build" button and wait for the automatic download.
- Extract ZIP and install the customized FileWave Client PKG.
| Mandatory Settings |
| Product Version = Your FileWave Server Version |
| Sync Computer Name = macOS Hostname will be FileWave Client Name (recommended) |
| Server Name = Fully Qualified Domain Name of your FileWave Server |
| Server Port = 20015 (do not modify) |
| Client Password = Password used to change individual Client Preferences |
Note: The default port setting for Server Port above is 20015. However, SSL is now required, and the system will automatically use port 20017 instead when 20015 is entered. Do not manually set the port to 20017. Always enter 20015, and the system will handle the SSL port change for you.
| Optional Settings |
| Is Tracking = Is Location Tracking Enabled for macOS Clients |
| Monitor Port = Port used for FileWave Client Monitor (do not modify) |
| Overwrite Configuration = Overwrite any existing FileWave Client configuration with settings entered here (recommended) |
| Remotecontrol Enabled = Screen-sharing enabled for macOS Clients |
| Remotecontrol Prompting = Whether or not to Prompt the end-user before starting screen-sharing session |
| Server Certificate = Only upload certificate is using a Self-Signed Certificate; not required for CA-signed certificate |
| Server Publish Port = 20005 (do not modify) |
| Tickle Interval = Idle time for macOS Clients before checking for new Model Update (do not modify) |
| Vnc Relay Port = 20030 (do not modify) |
| Vnc Server Port = 20031 (do not modify) |
| Booster Settings |
| Initially you may want to make an installer that does not include Boosters. Read more about them here: Boosters |
Finalizing adding of clients
FileWave Clients communicating to the FileWave server will not be able to connect until you add them to the model. We will now allow our new client to join the FileWave server.
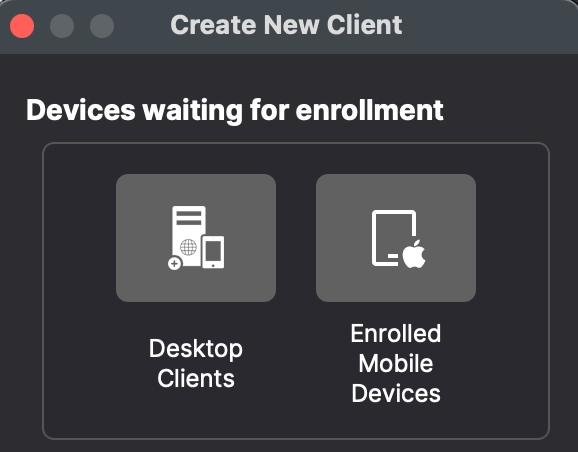
- Open FileWave Central.
- Click on the “New Client” button in the tool bar
- Select Desktop Clients for macOS computers or Enrolled Mobile Devices for iPhone, iPad, and Apple Vision Pro.
- Select your new client from the list presented.
- Click the “Add Clients” button in the lower right.
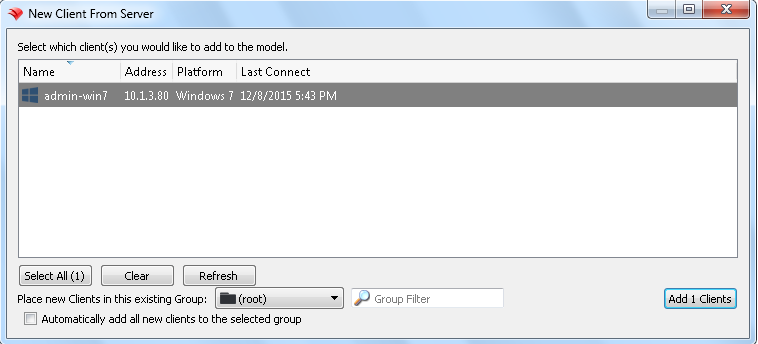
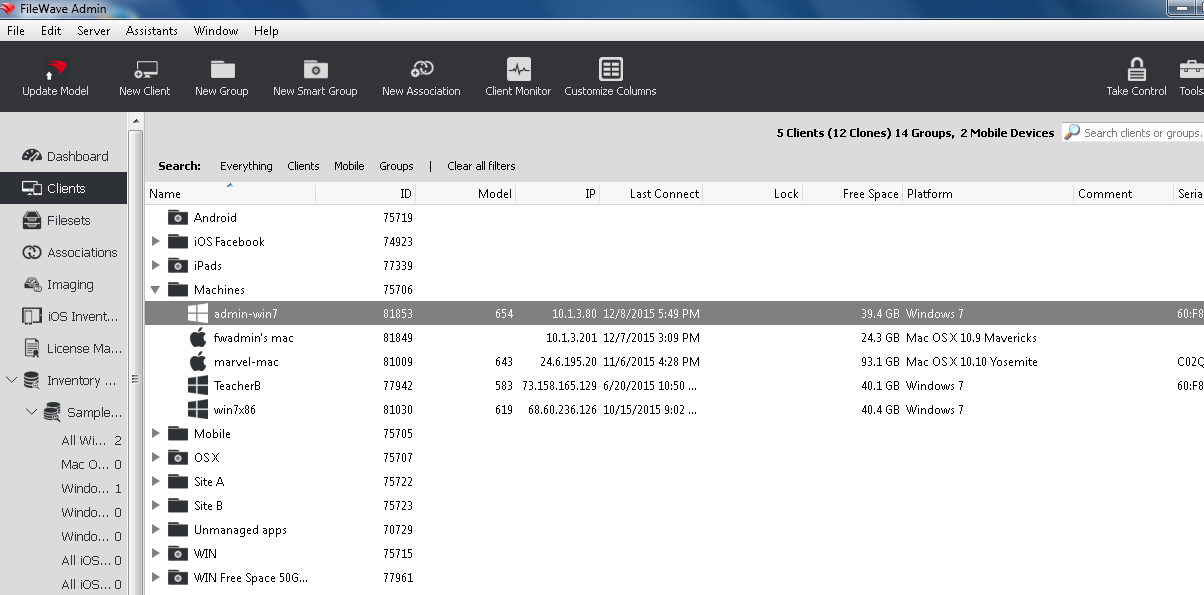
Once you have selected “Add Clients”, you will be taken to the Clients view in FileWave Admin. By adding a client to the server, we have made changes to the model. In order for those changes to take effect, we need to perform a model update.
You can also decide to automatically add new clients to skip the step of adding devices. This is discussed here: Conflict Resolution
Making Changes to the Model
Remember that you will need to update the model anytime that you want to apply changes you have made. You can update the model after a single change or multiple changes (adding multiple clients, creating groups, etc.)
Congratulations! Your FileWave environment is now up and running! From here you can continue to add clients, build and deploy Filesets!
No comments to display
No comments to display