Apple Client Pre-Requisites
Now that we have the FileWave basics taken care of, let us start integrating the Apple services into FileWave. This section covers creating an APNs certificate and synchronizing FileWave with Apple Automated Device Enrollment (ADE) and Apps and Books.
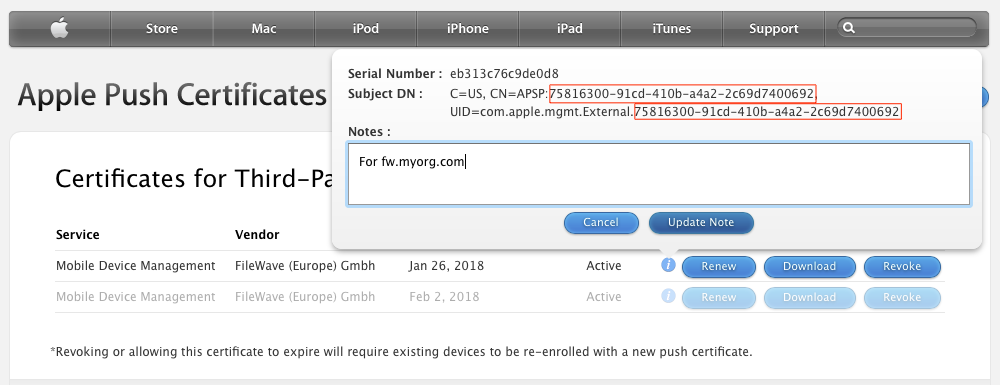
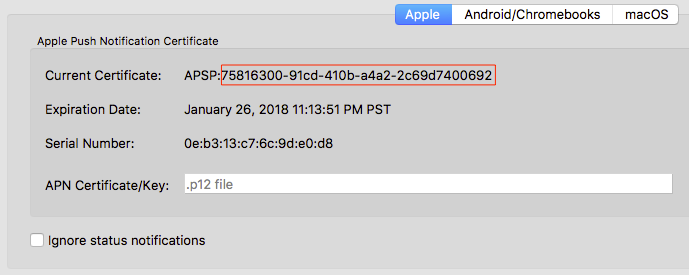
Apple Push Notification Service (APNS) Certificate
The Apple Push Notification service certificate, or APNs certificate, allows FileWave to send push notifications to managed Apple devices, including macOS, iOS, iPadOS, visionOS, and tvOS. This step is critical for Apple device management in FileWave.
To create and upload an APNS certificate follow the instructions at one of the following links depending on your platform macOS or Windows. If you have a macOS machine available, the process is usually found to be easier on the Mac versus a Windows machine since macOS includes the built-in Keychain Assistant.
Since the APNS certificate must be renewed annually, we recommend you create calendar reminders 45, 30, and 15 days before the expiration. The FileWave Admin's Dashboard can also be configured to give you an alert of expiration via email.
When renewing your APNS certificate, be sure to use the same Apple ID that was used to originally create it. Creating a new certificate, or creating a certificate with a different Apple ID, rather than renewing the existing one used by FileWave, will break MDM communication with your mobile devices and require un-enrollment and re-enrollment. Take the following precaution to prevent this.
|
|
Apple Automated Device Enrollment (ADE)
After importing the APNs certificate, use Apple Automated Device Enrollment to automate enrollment for supported macOS, iOS, iPadOS, visionOS, and tvOS devices.
Add new MDM Server to Apple
-
Log into Apple School Manager (ASM) or Apple Business Manager (ABM) using your organization's Administrator account.
-
Navigate to "Settings" in the lower left-hand corner.
-
Select "Device Management Settings" from the middle pane.
-
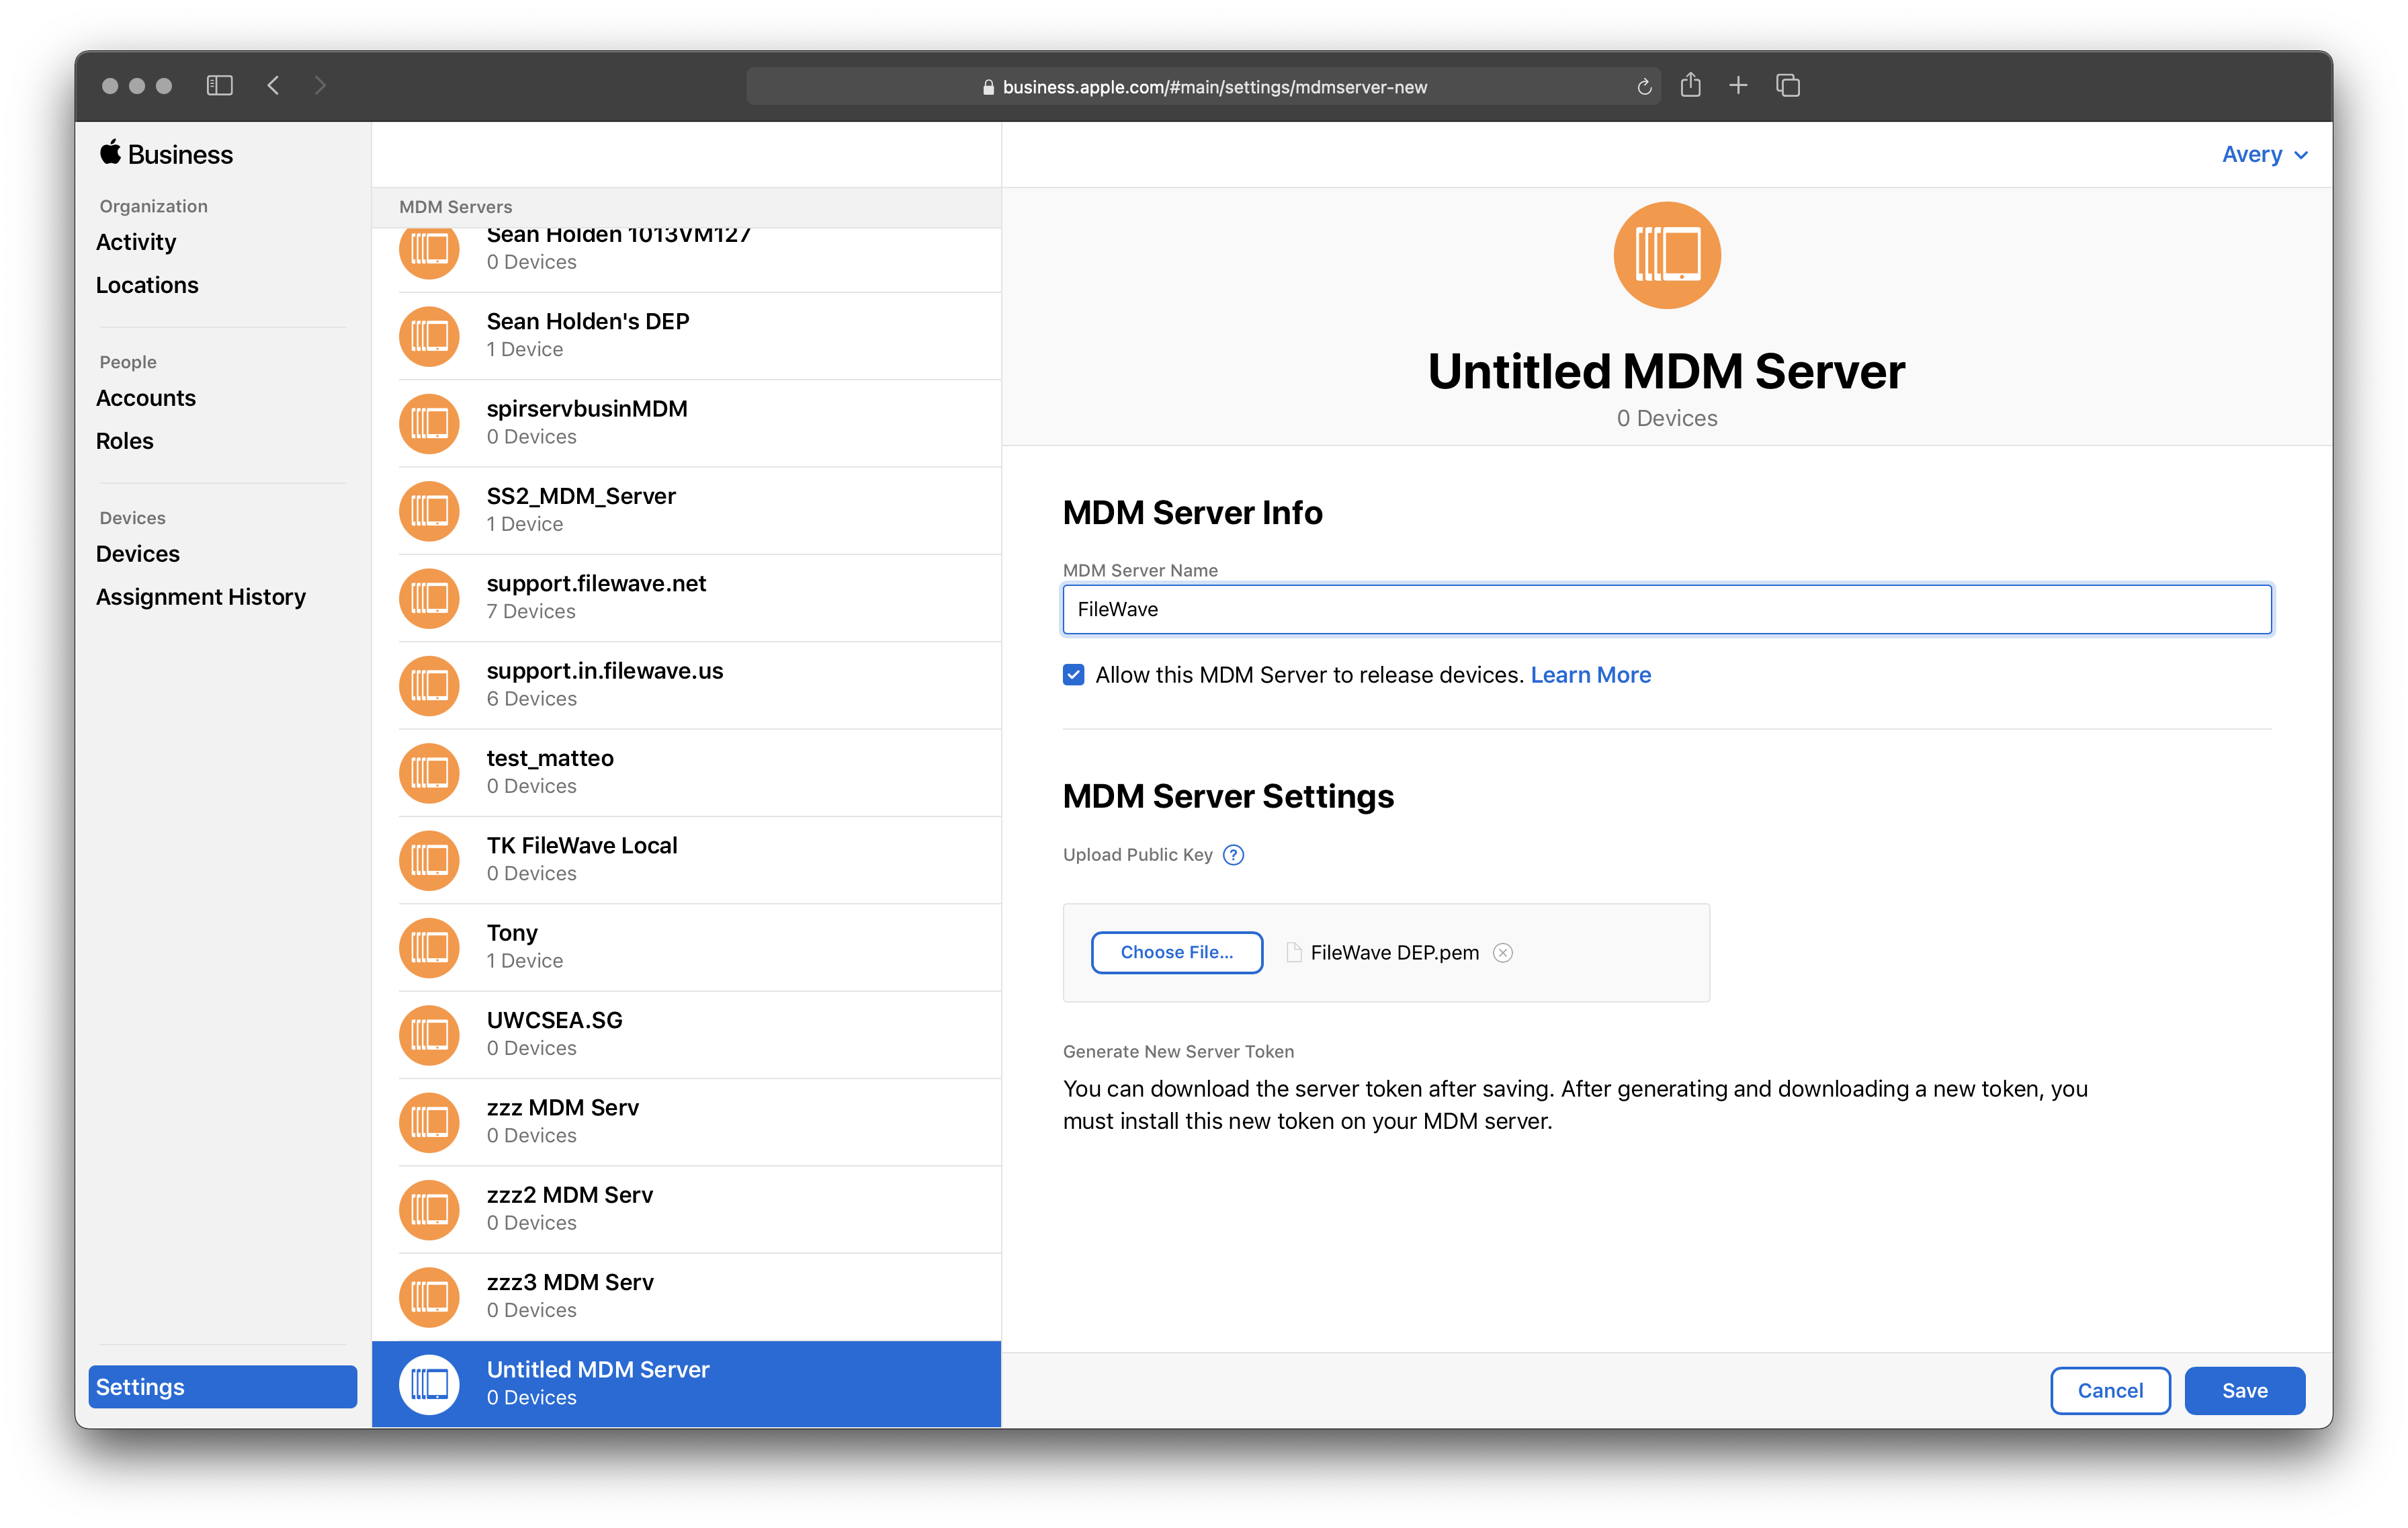
Click "Add MDM Server" from the right pane.
-
Change the "MDM Server Name" to "FileWave" or something distinguishable.
-
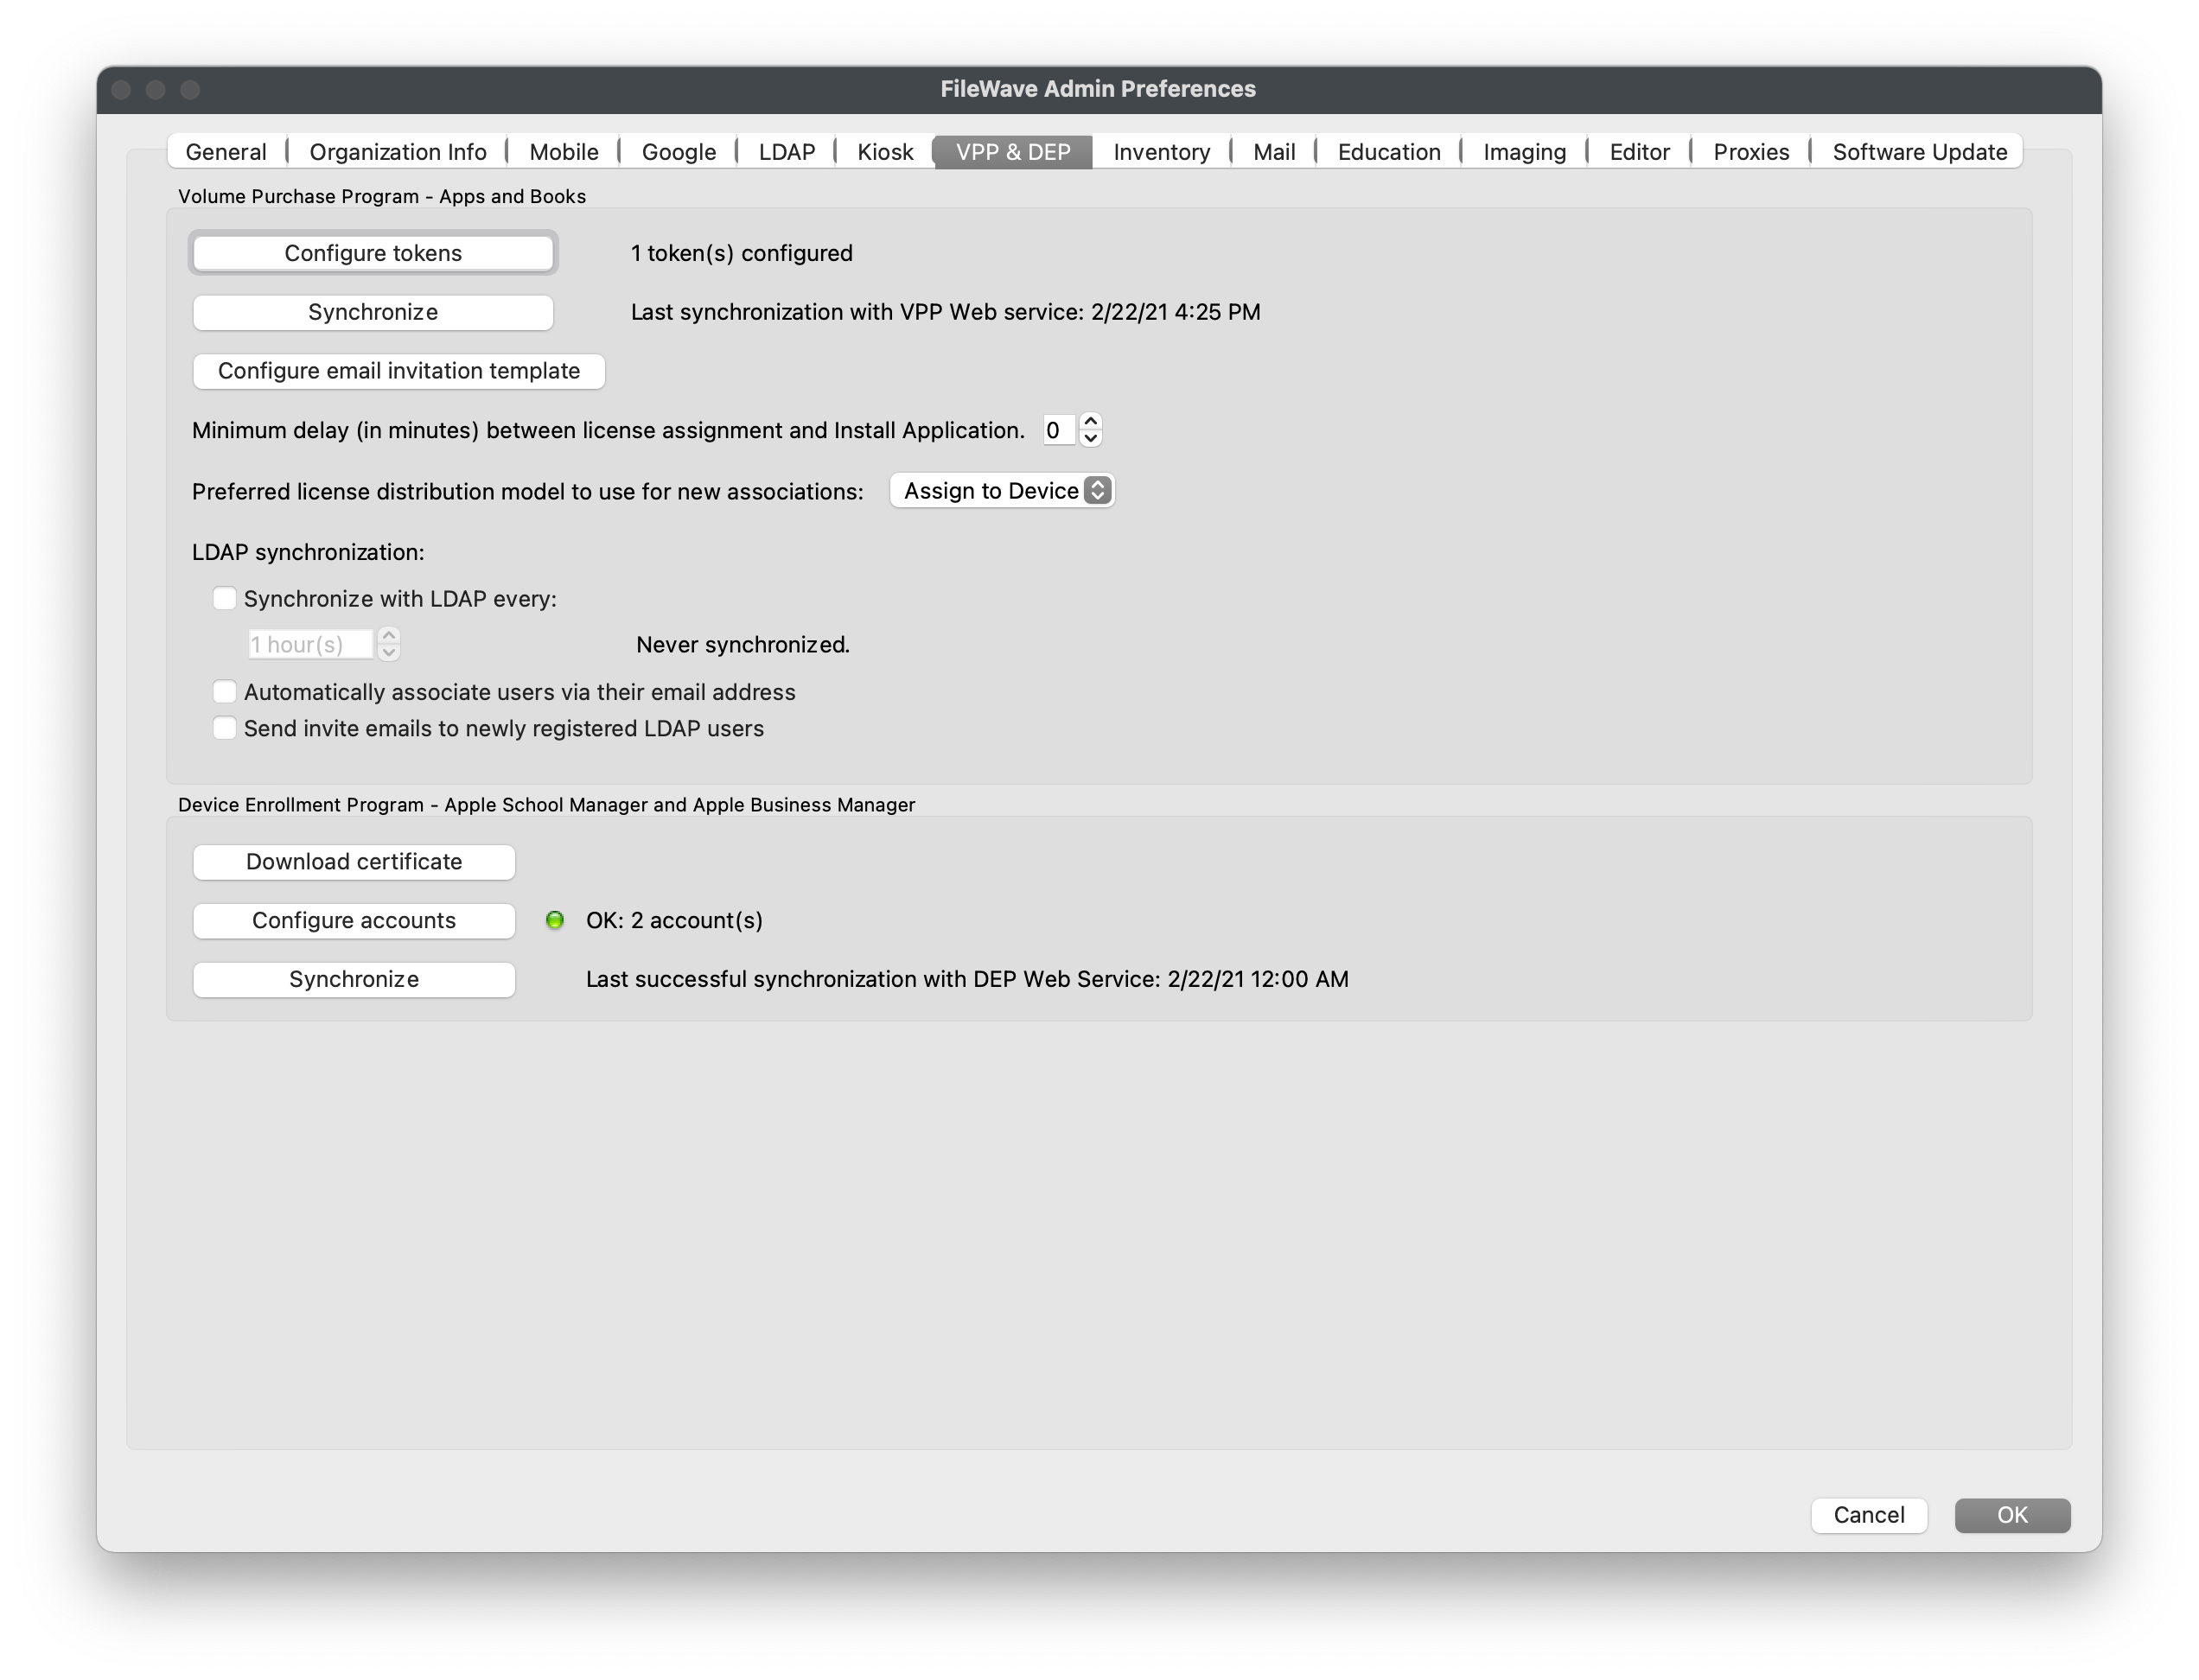
Navigate to "FileWave Admin > Preferences > VPP & ADE", click "Download Certificate" from the bottom "Device Enrollment Program" section, and authenticate.
-
Navigate back to ASM/ABM and "Choose File" to select the recently downloaded "FileWave ADE.pem".
-
Click "Save".
Sync Apple ADE within FileWave
-
After creating new MDM Server, select the new server from the list.
-
Click "Download Token" and accept the warning message.
-
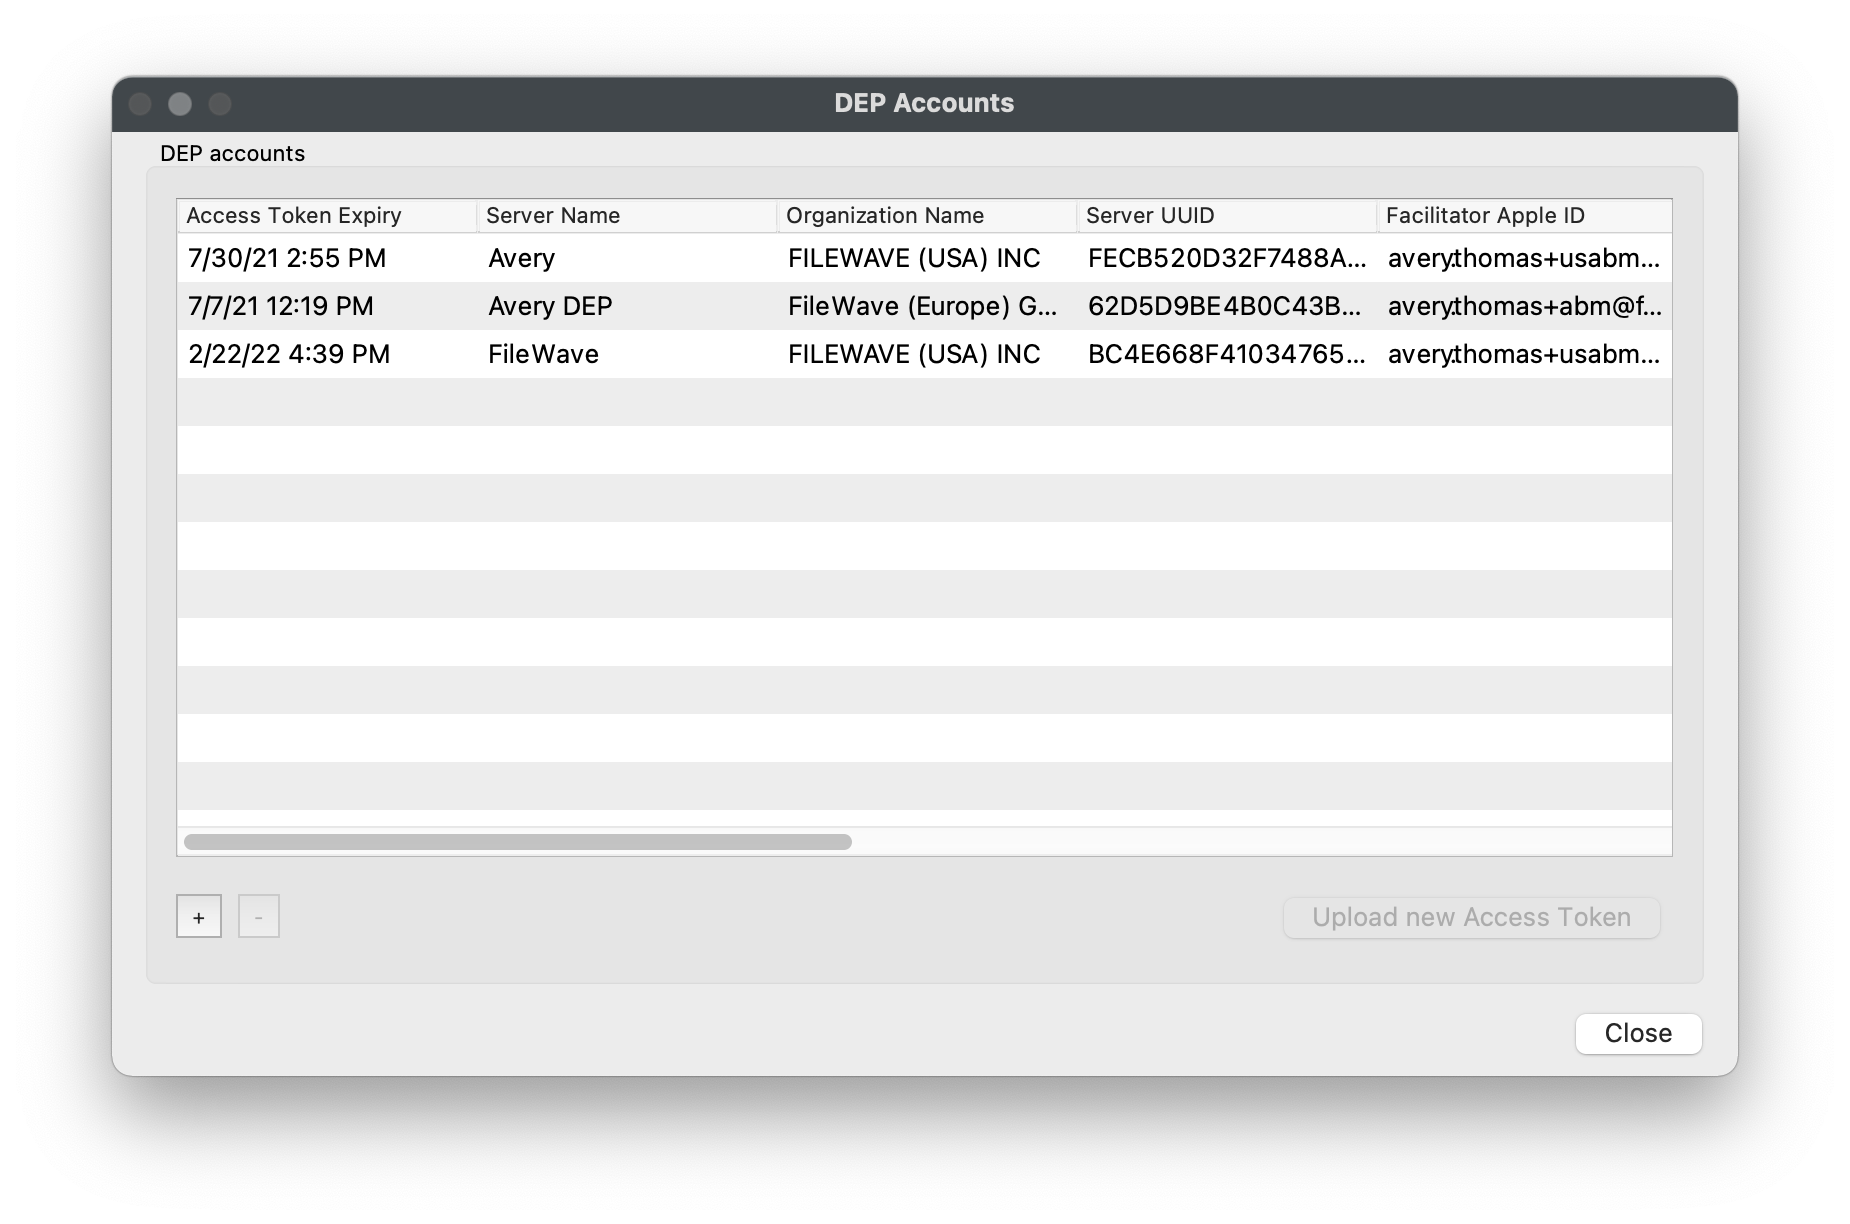
Navigate to "FileWave Admin > Preferences > VPP & ADE", click "Configure accounts" from the bottom "Device Enrollment Program" section, and authenticate.
-
Click the "[+]" button in the lower left-hand corner and select the recently downloaded "FileWave_Token_XXXX-XX-XXTXX-XX-XXZ_smime.p7m" token file.
-
If data is populated in all of the columns of the "ADE Accounts" window, the token import was successful.

Assign devices from ASM/ABM to FileWave MDM Server
-
Select "Devices" from the left-hand pane within ASM/ABM.
-
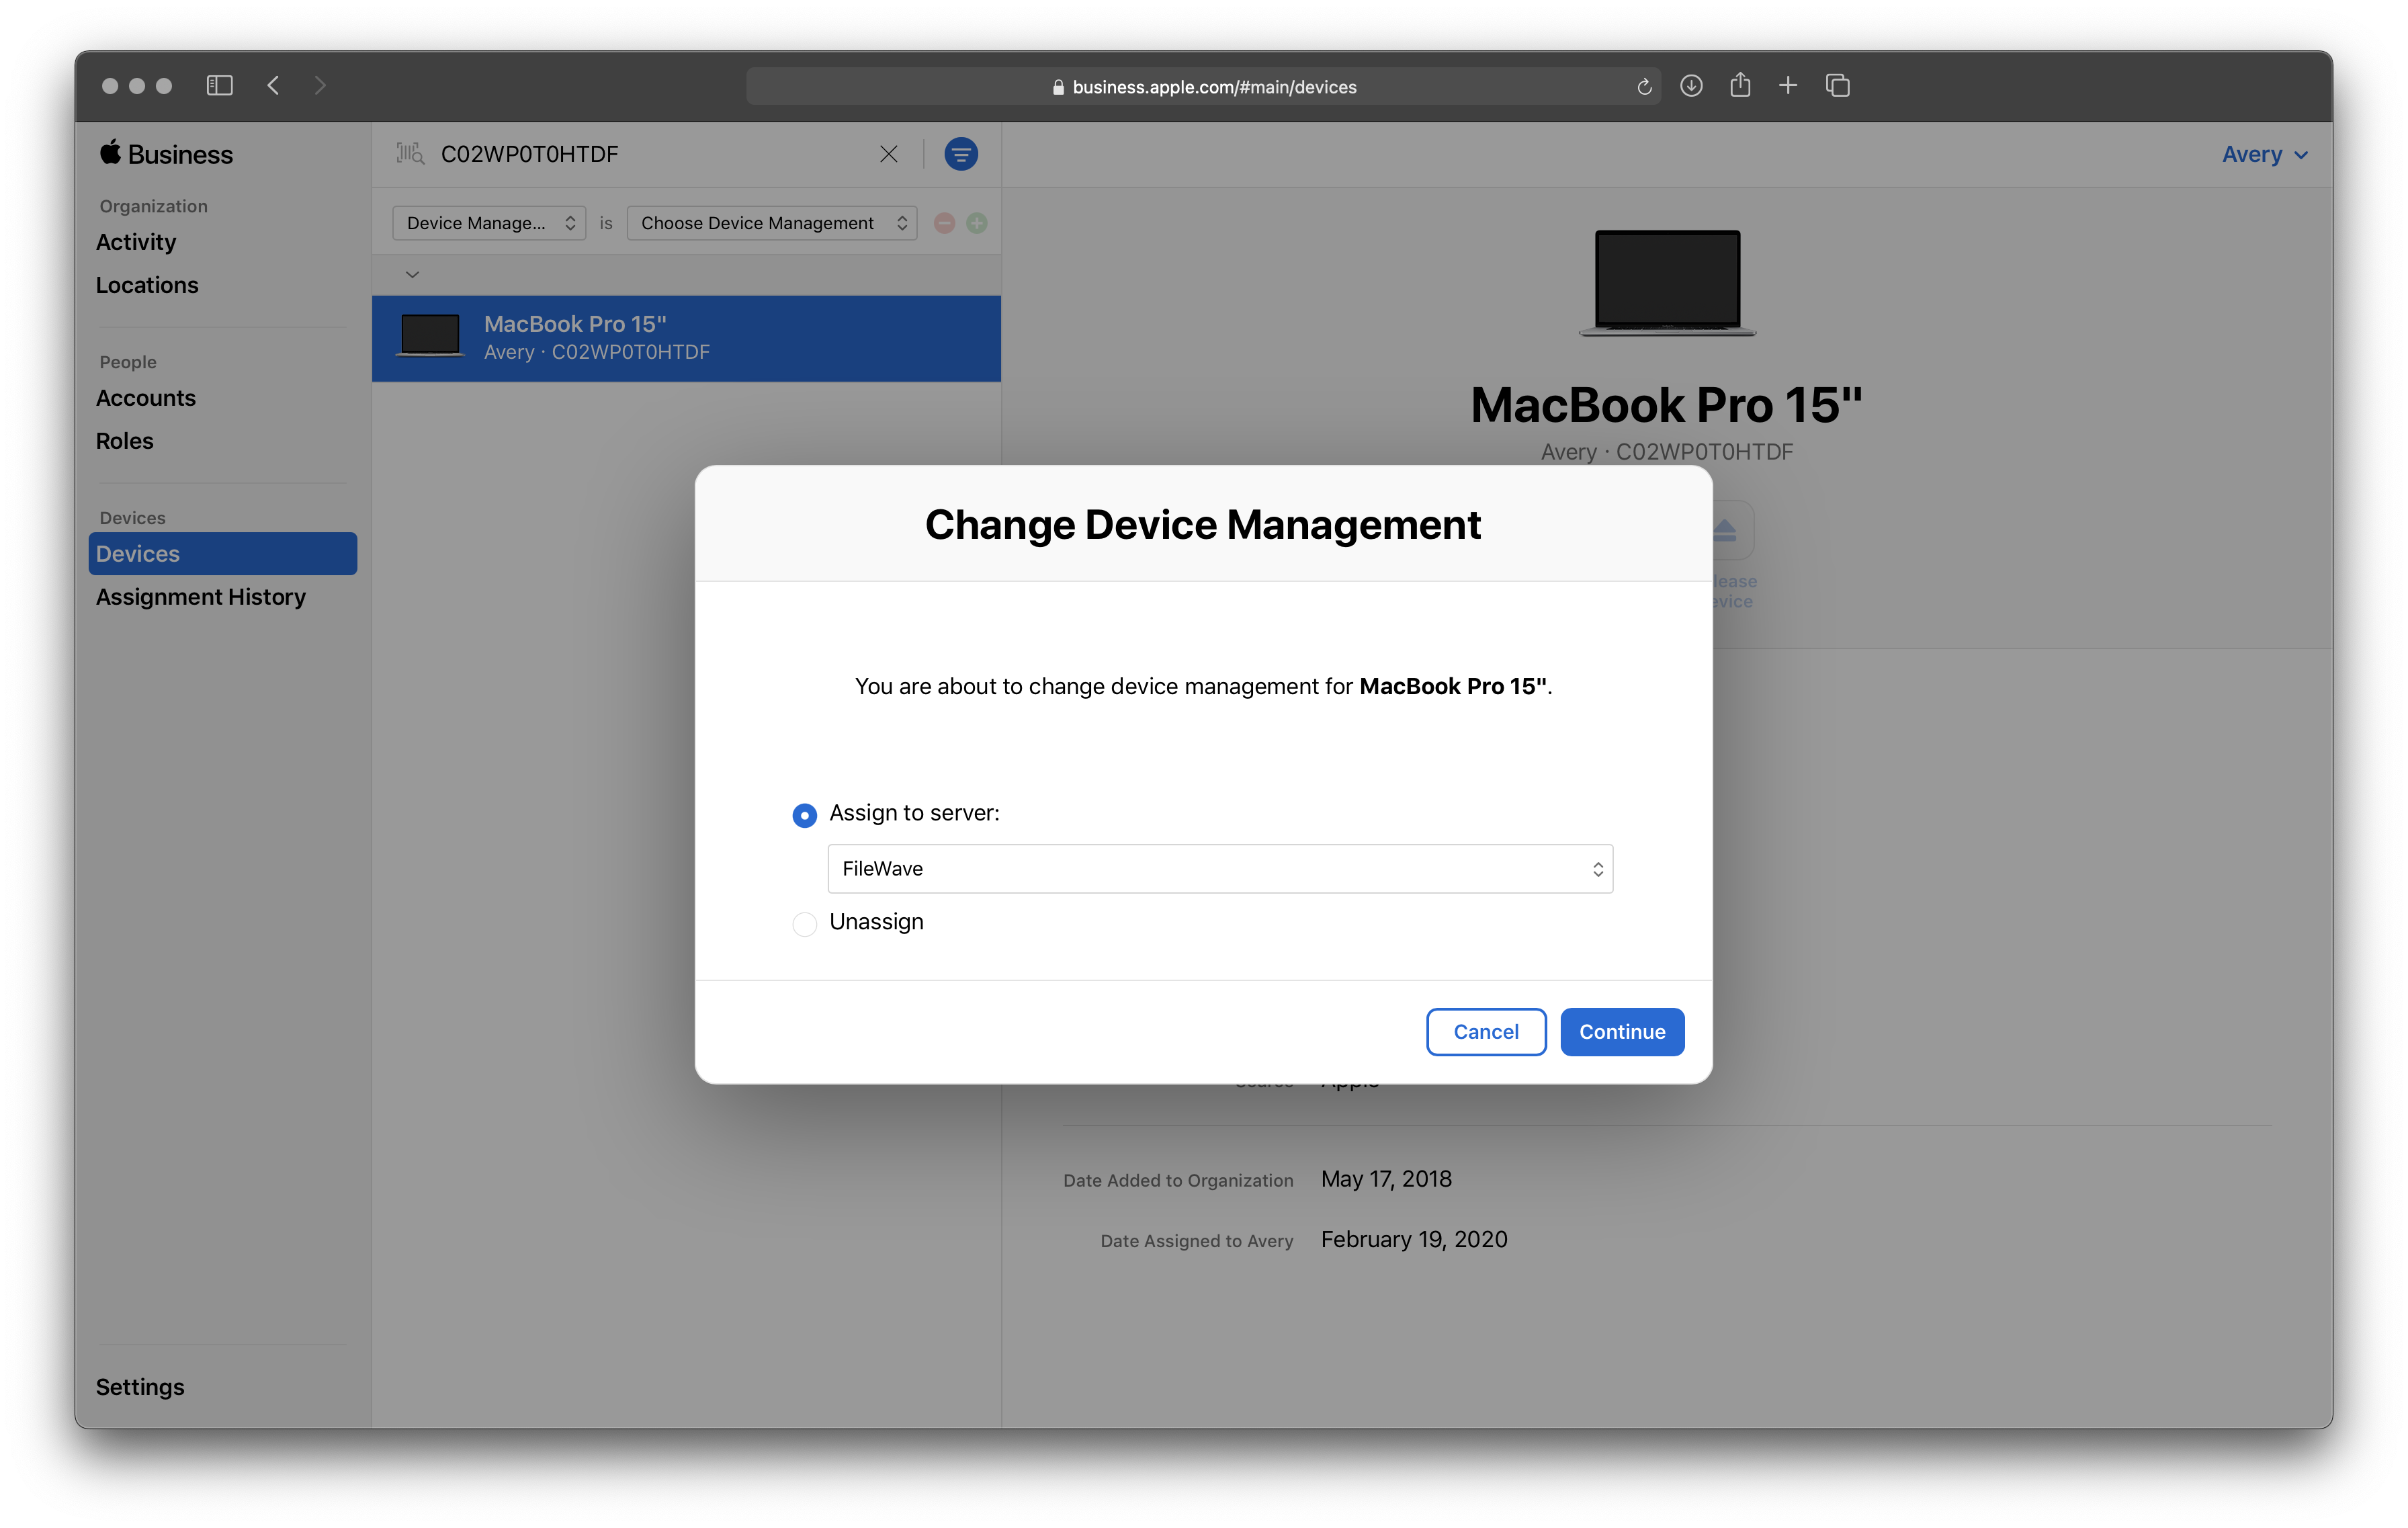
Search for devices by Serial Number (comma separated) or use the Filter icon to choose all "Unassigned" devices.
-
With the device(s) selected, click "Edit Device Management" and select the newly created FileWave MDM Server.
-
Navigate to "FileWave Admin > Assistants > ADE Association Management"
-
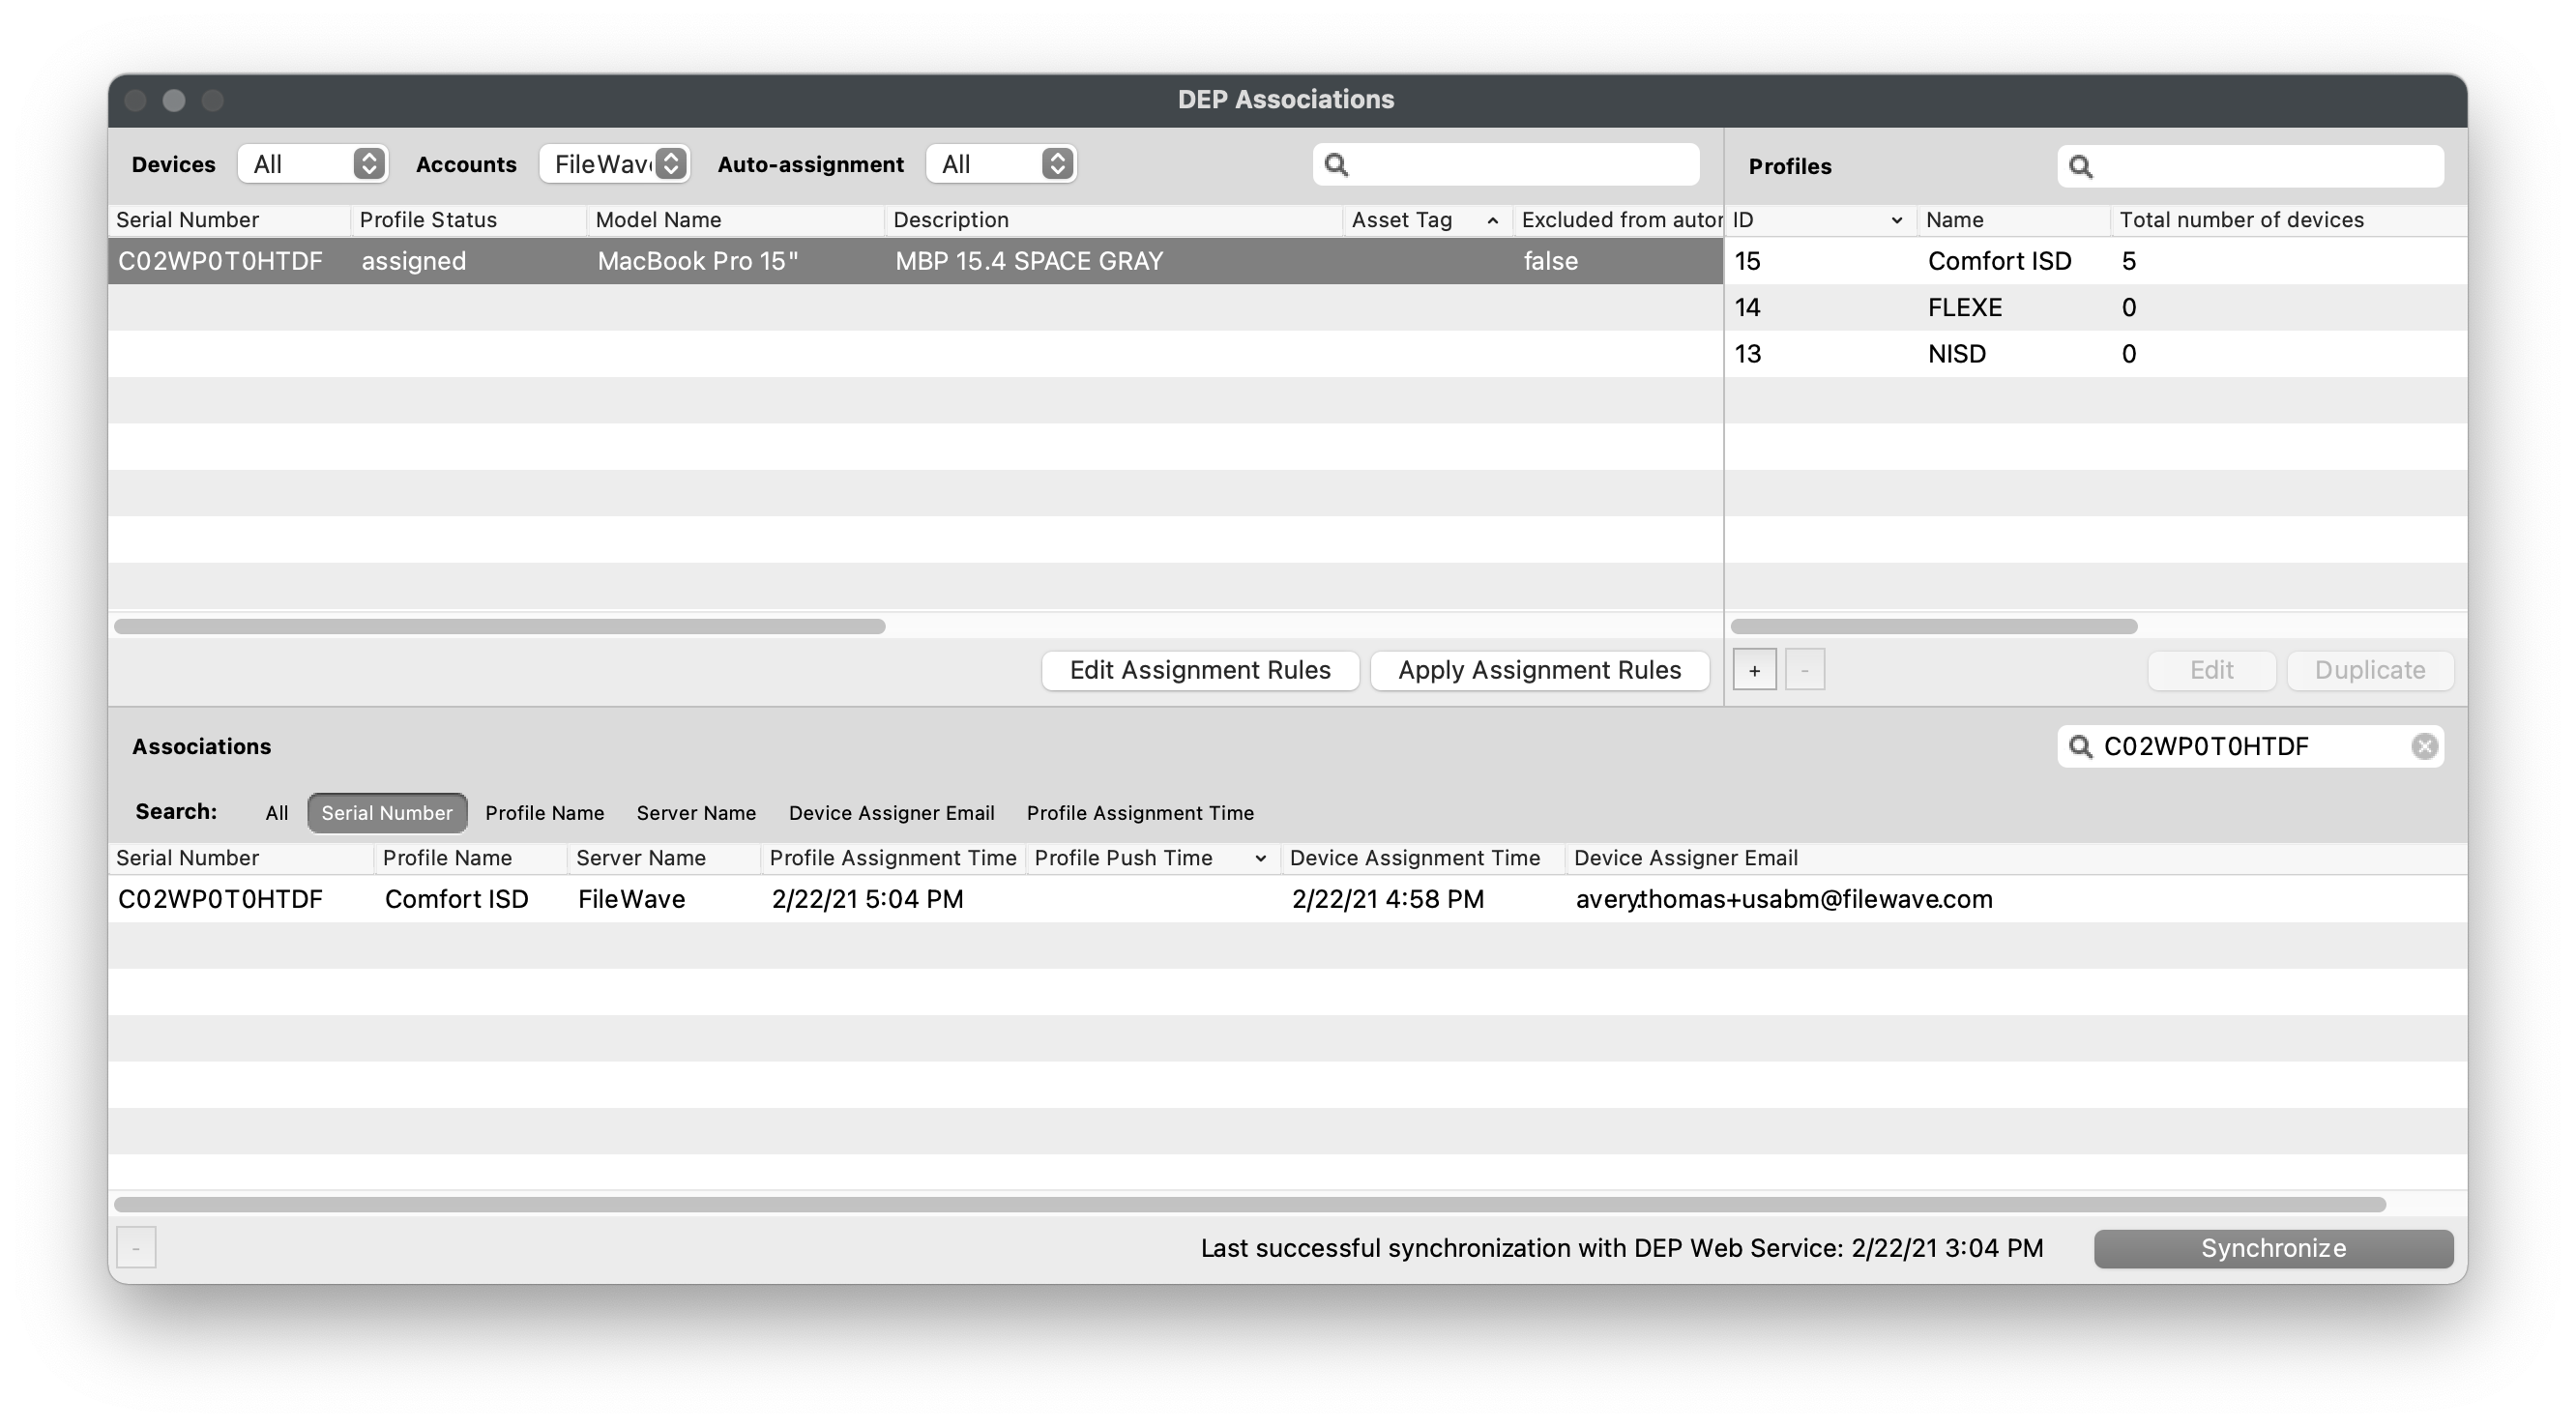
Hold down the Option or Alt key on your keyboard and click the "Synchronize (full sync)" button in the lower right-hand corner.
-
You should now see all devices assigned in Step 3 within FileWave's ADE Associations window.
Create ADE Profile and enroll Apple Devices
- These workflows will be covered in the ADE Enrollment section.
Apple Volume Purchase Program (VPP)
The Apple Volume Purchase Program (VPP) is integrated into Apple School Manager and Apple Business Manager and allows you to purchase and deploy applications from the App Store. When purchasing (free or paid) VPP licenses you will need to assign the licenses to a "Location" within ASM/ABM and each "Location" within ASM/ABM corresponds with a VPP Token. You will import each VPP Token into FileWave to sync the licenses assigned to the particular "Location".
If you are just starting out with ASM/ABM, you'll most likely just have one "Location" and therefore one VPP Token. If you are currently using a VPP Token in another MDM it is recommended to create a new "Location" for the evaluation of FileWave. This is recommended because importing a VPP Token that is used in another MDM will result in the automatic revoking of any deployed VPP licenses from that MDM. If you are not concerned with the licenses being revoked, please feel free to continue to import the existing VPP Token.
This section will not cover creating a new "Location" in ASM/ABM but more information can be found here from Apple School Manager User Guide or found here from Apple Business Manager User Guide.
Download VPP Token from ASM/ABM
- Log into Apple School Manager (ASM) or Apple Business Manager (ABM) using your organization's Administrator account.
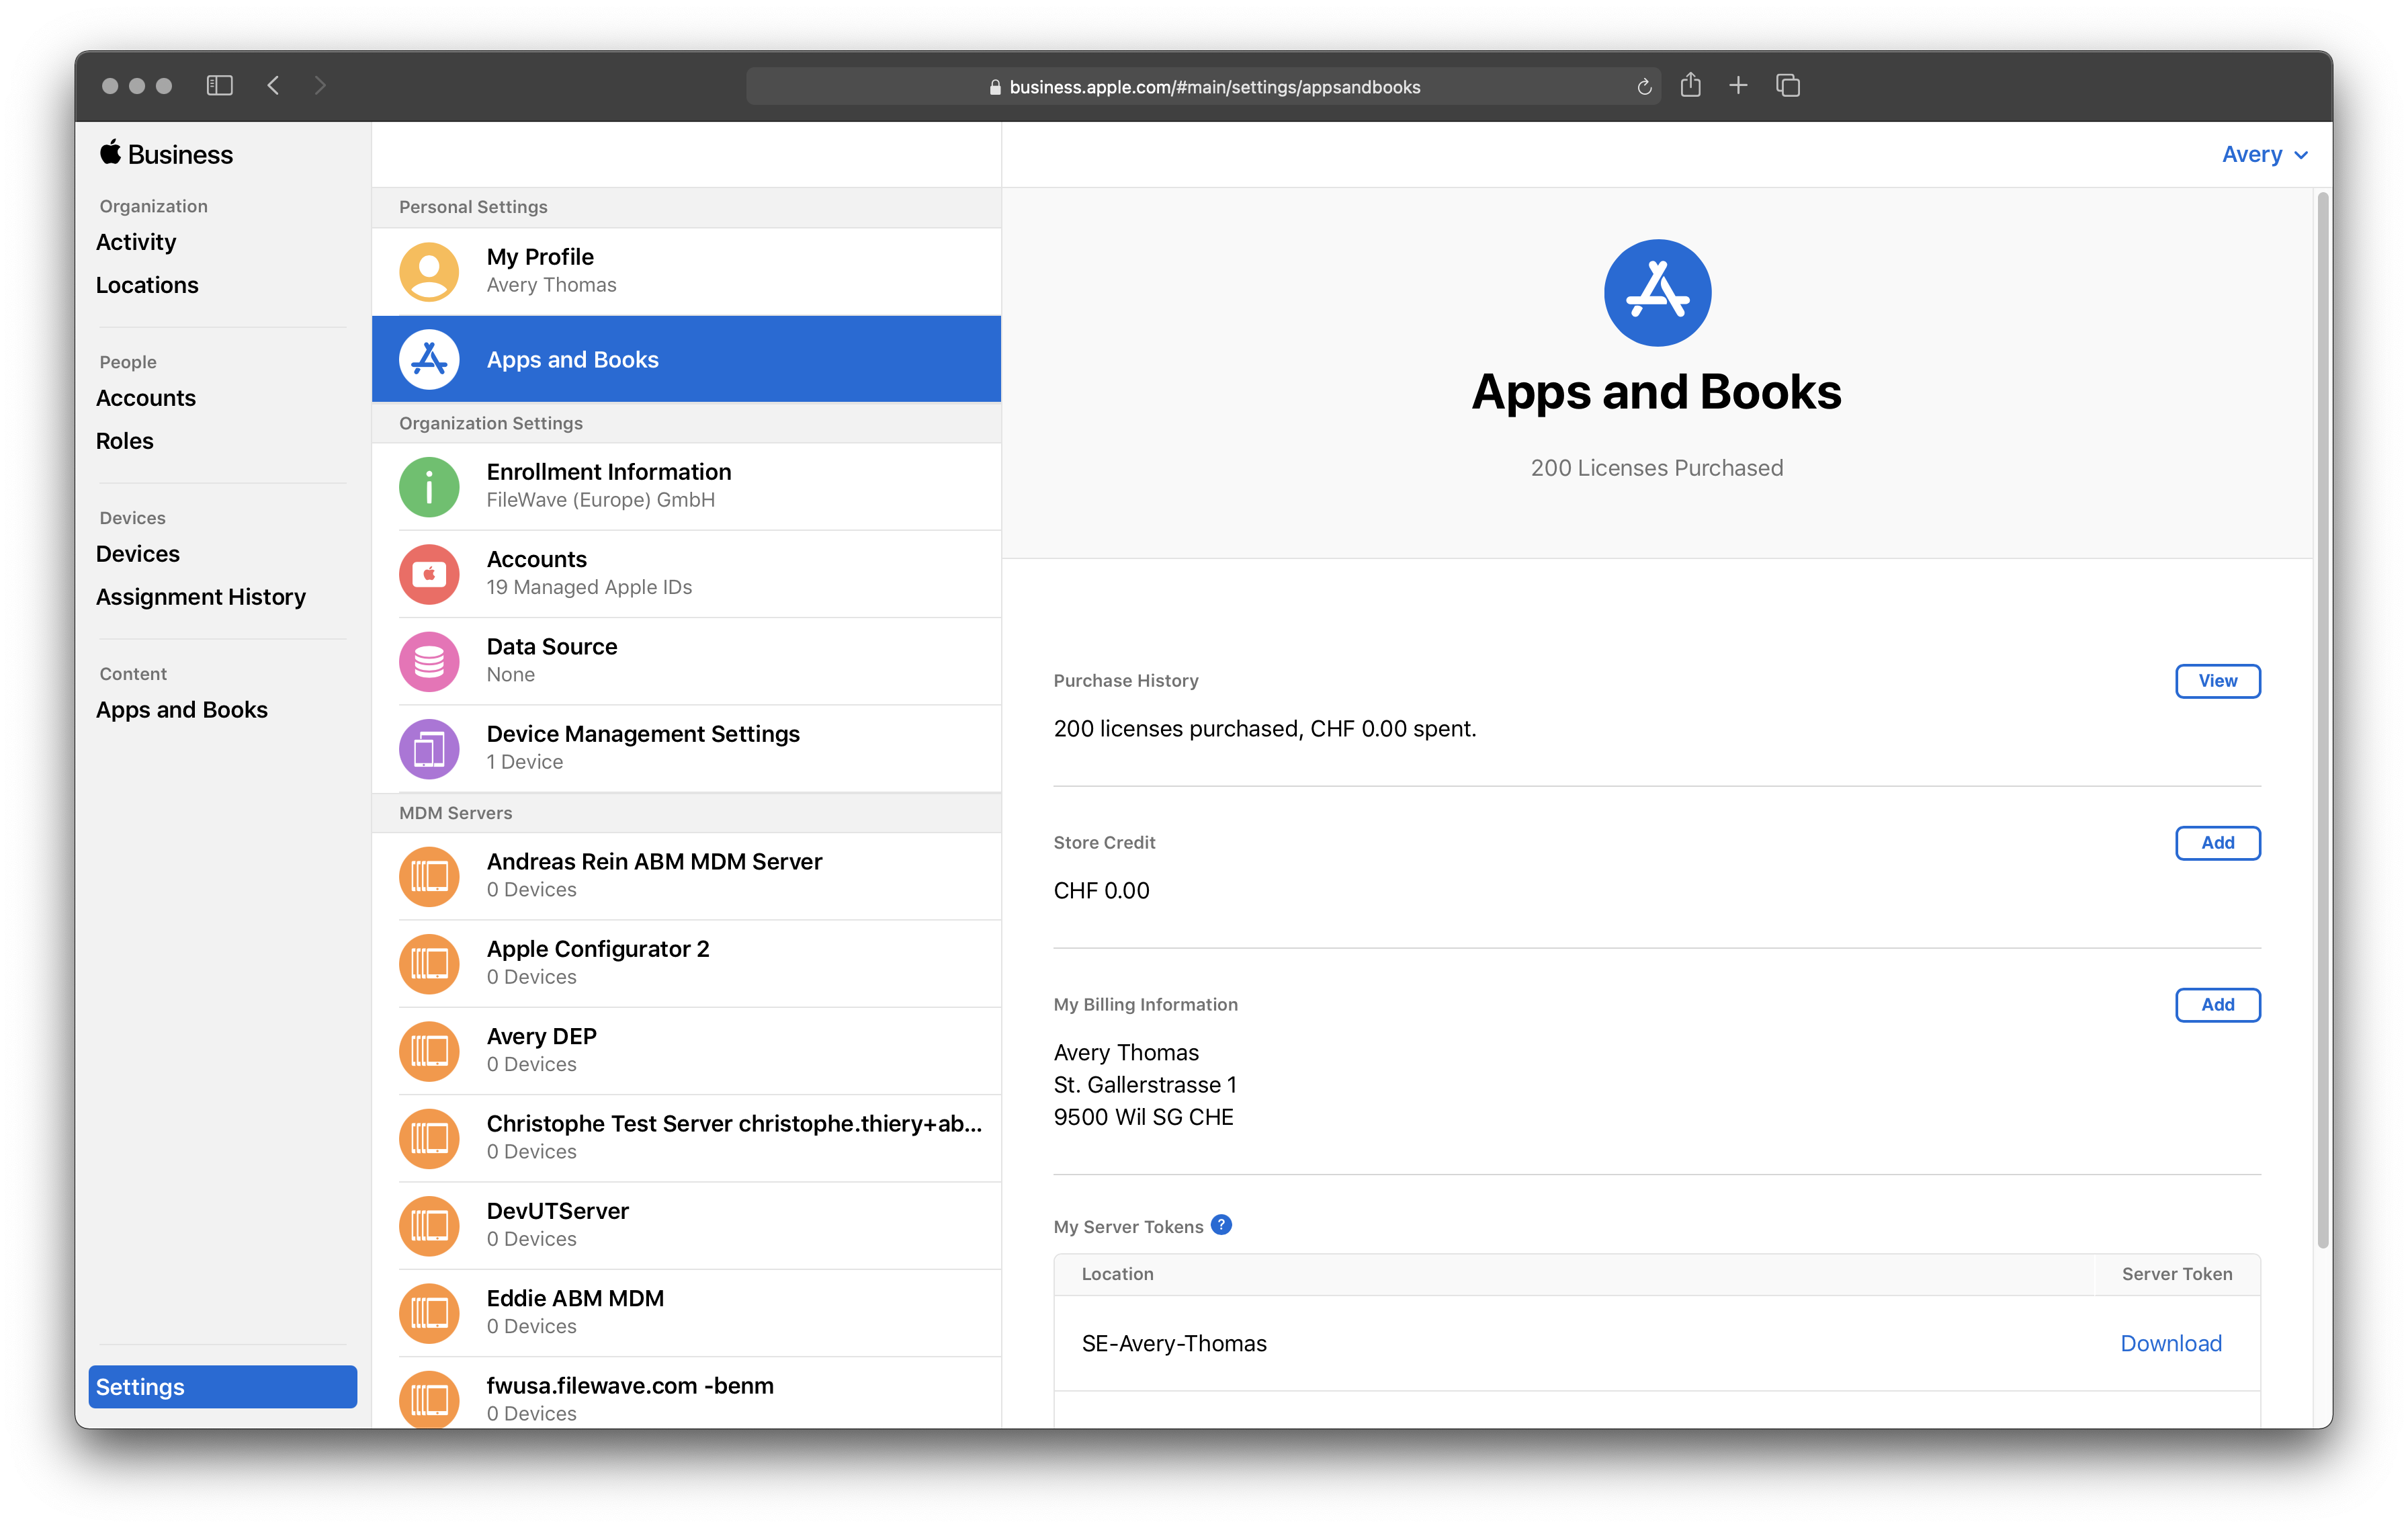
- Navigate to "Preferences" in the lower left-hand corner.
- Select "Payments and Billing" from the middle pane.
- Find the desired "Location" name from the "My Server Tokens" section.
- Click "Download".
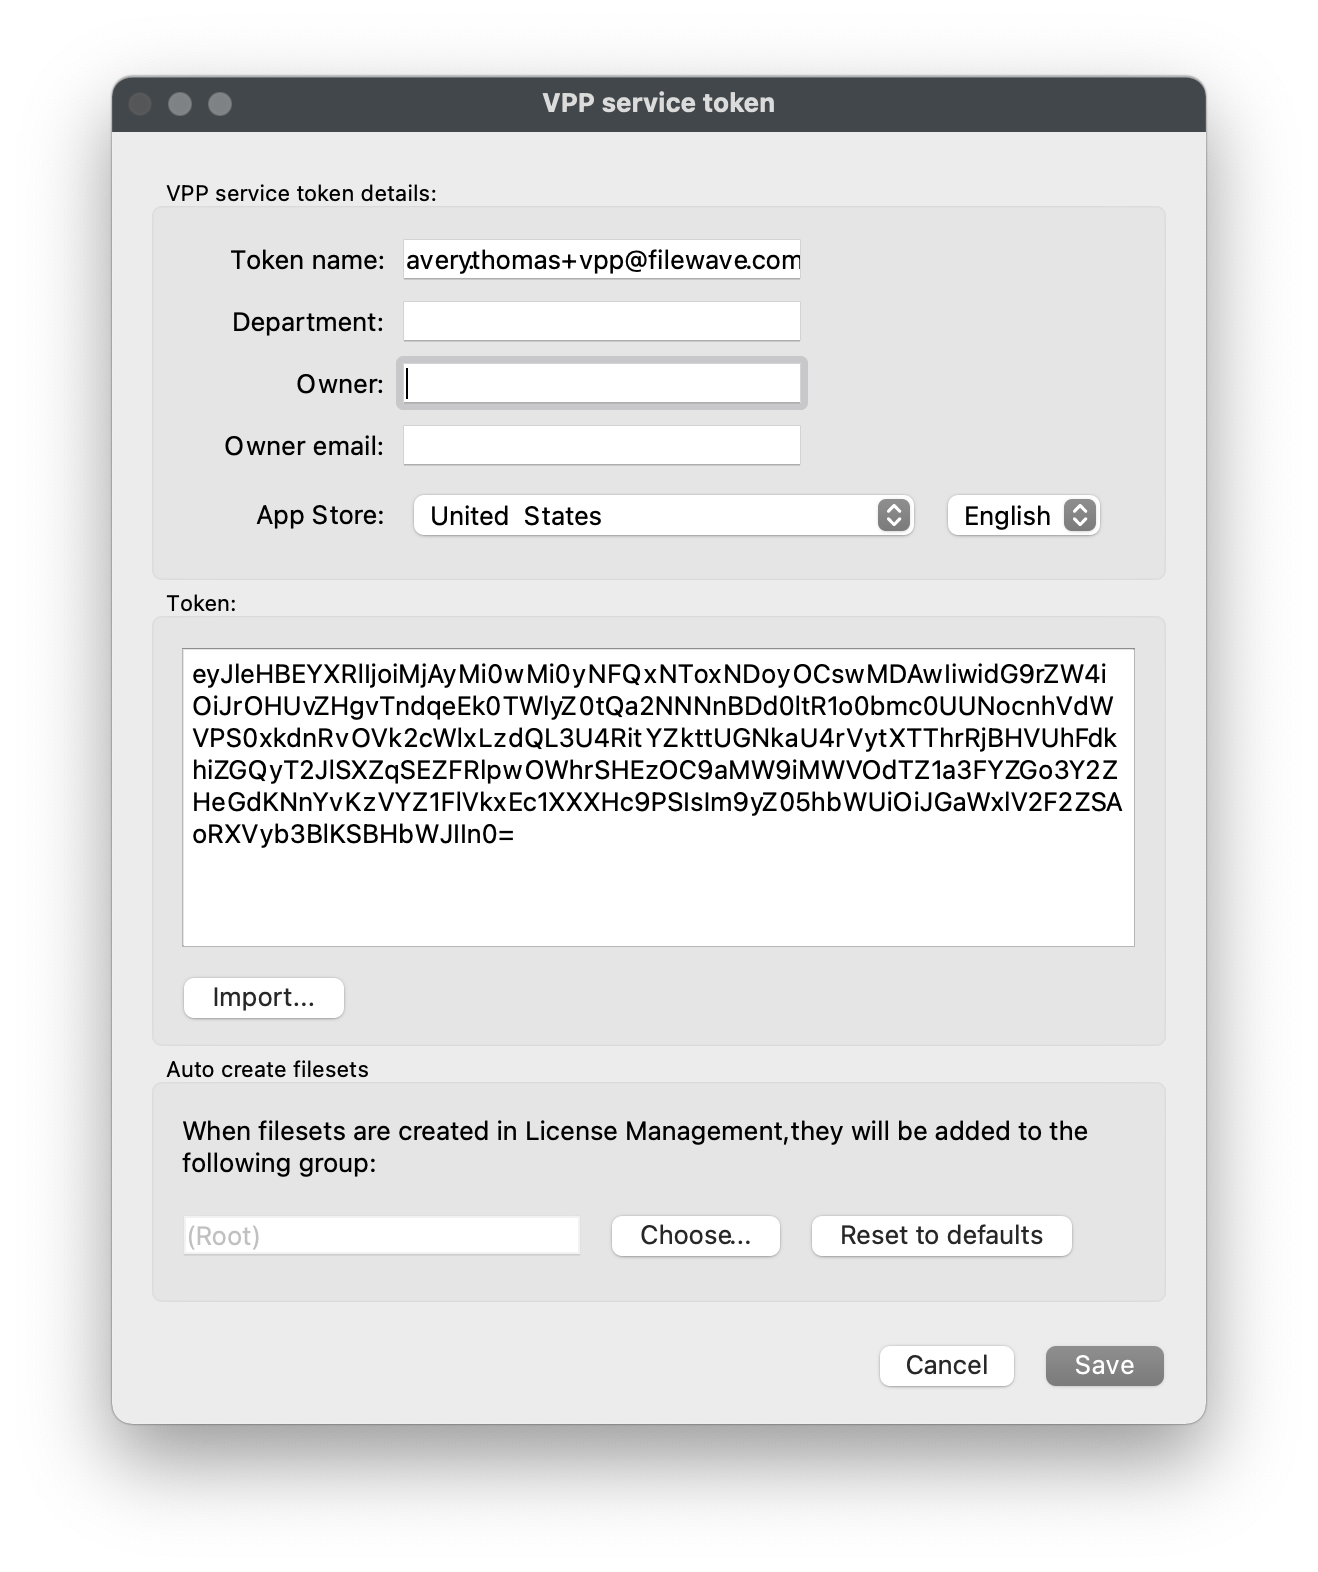
Import VPP Token into FileWave Admin
VPP Token Permission
If you do not see the added VPP Token this is because your FileWave Admin account has not been granted permission to the VPP Token. Please consult the "Allow new users to access existing VPP Tokens" section to grant permission to the VPP Token.
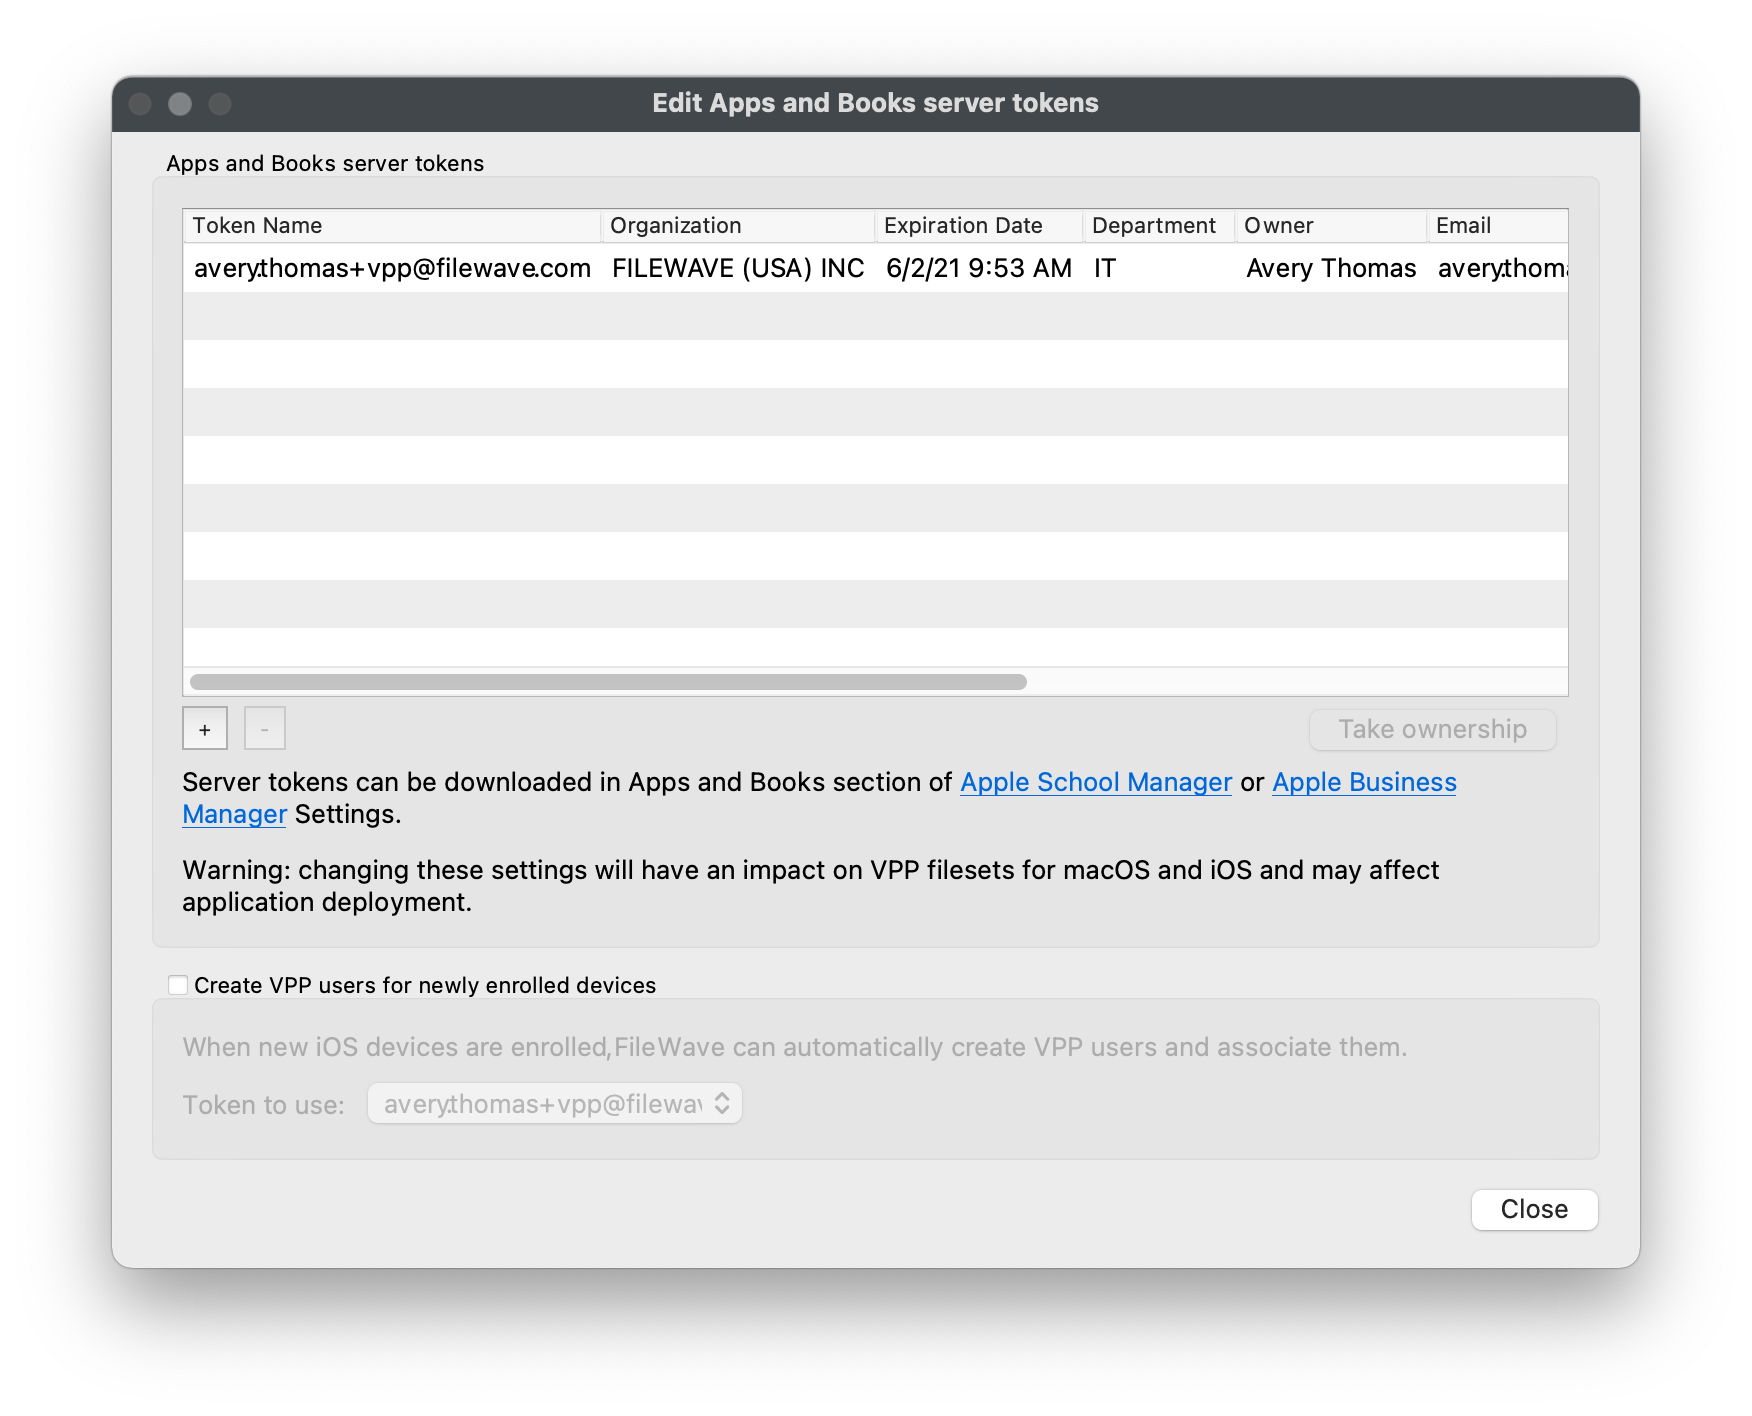
VPP Ownership
If you receive a message about the VPP Token being owned by another VPP tool, please inform your FileWave SE and they can assist in taking ownership of the VPP Token. Taking ownership of the VPP Token will result in the revoking of any previously deployed VPP licenses from another MDM so please proceed with caution. If you want to avoid licenses being revoked, please create a new "Location" within ASM/ABM and purchase new license or assign existing license to the new "Location".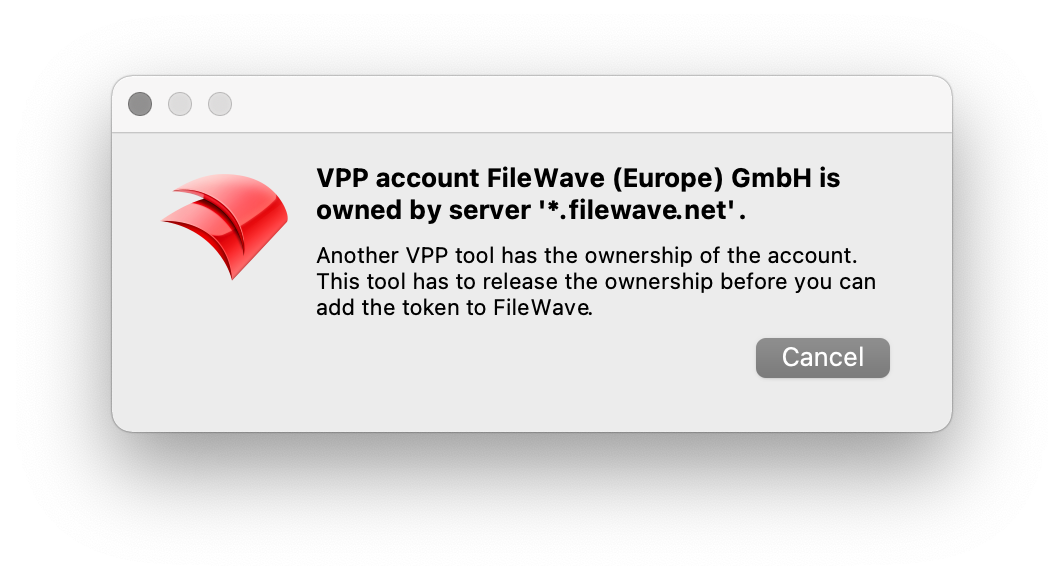
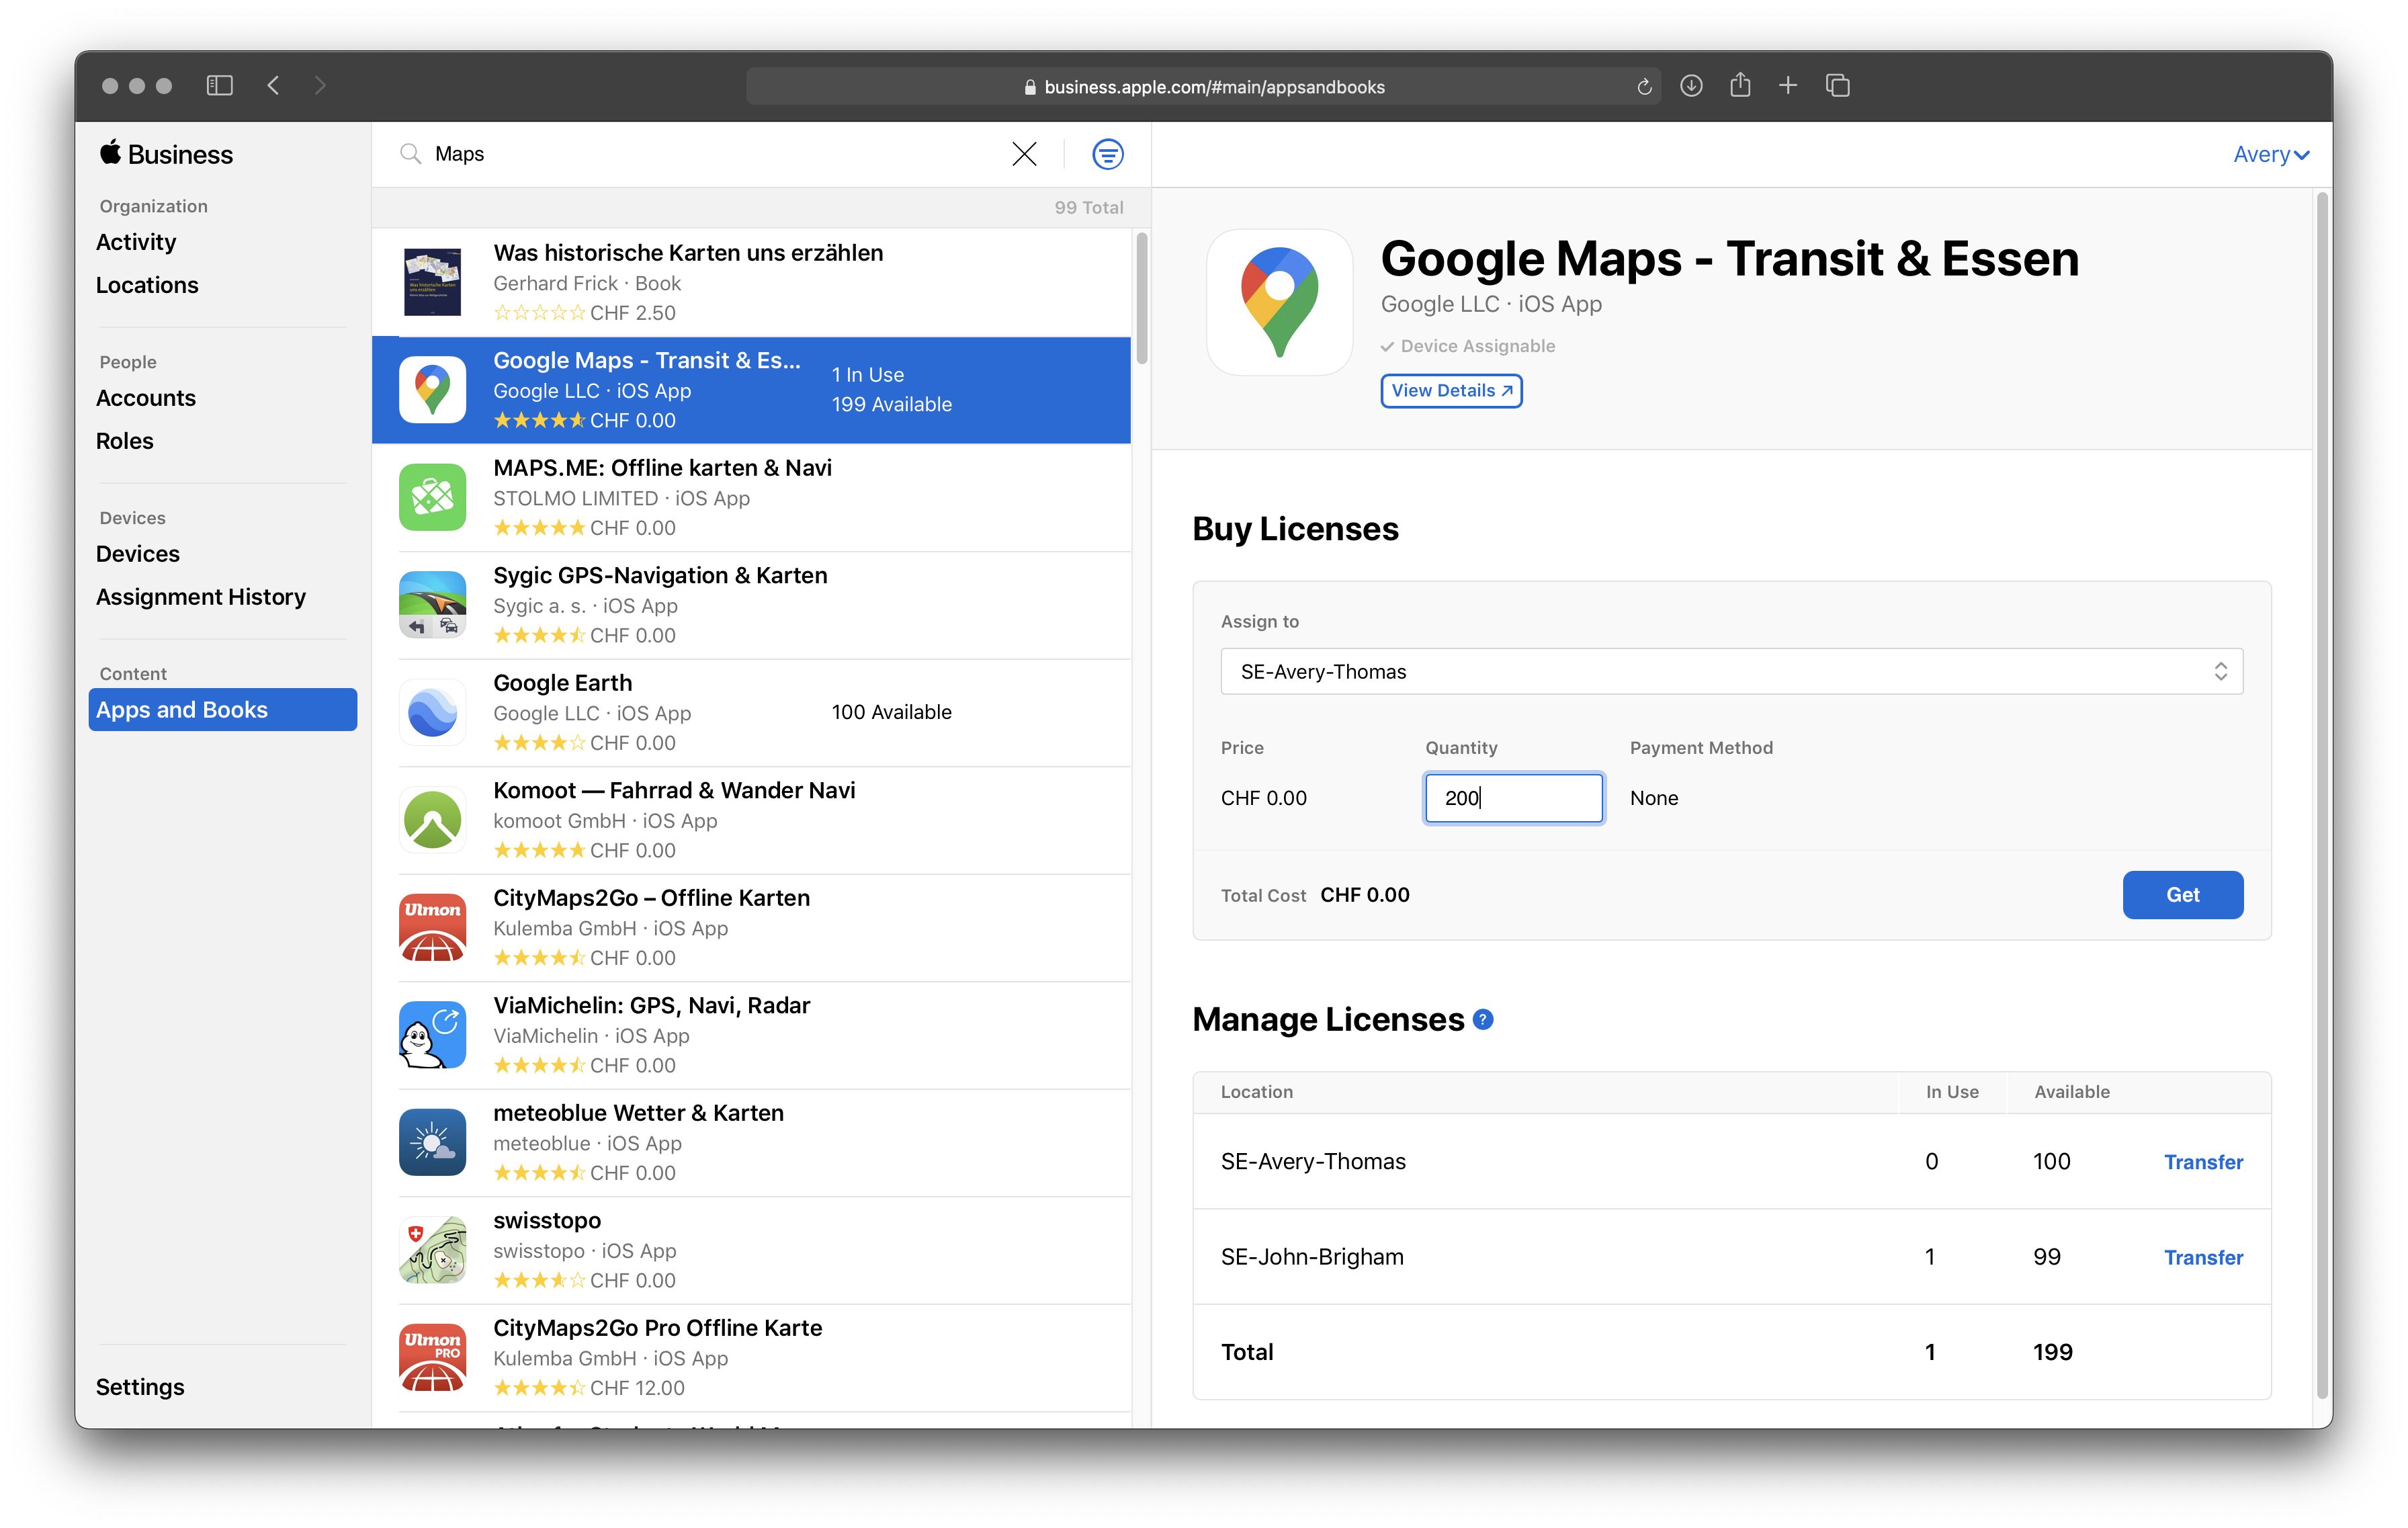
Purchase VPP Licenses from ASM/ABM
Please consult Apple School Manager User Guide or Apple Business Manager User Guide for more in-depth information regarding purchasing Apps and Books.
- Log into Apple School Manager (ASM) or Apple Business Manager (ABM) using your organization's Administrator or Content Manager account.
- Select "Apps and Books" from the left pane.
- Search for the application name you wish to purchase and verify its intended platform (iOS App vs. macOS App).
- Select the desired "Location" from the "Assign to" drop-down menu.
- Specify the quantity of licenses you'd like to purchase.
- Please enter a reasonable amount of licenses to cover your future device population but not too many (100,000+) as it may slow down the VPP sync process.
- Click "Get" button to complete your purchase.
- Licenses will usually be available within 5 minutes of purchase and you will be emailed by Apple when your licenses are available.
Sync VPP Licenses into FileWave
Now that we have at least one VPP Token imported into FileWave and licenses purchased, we can sync VPP within FileWave and automatically create Filesets for each VPP application.
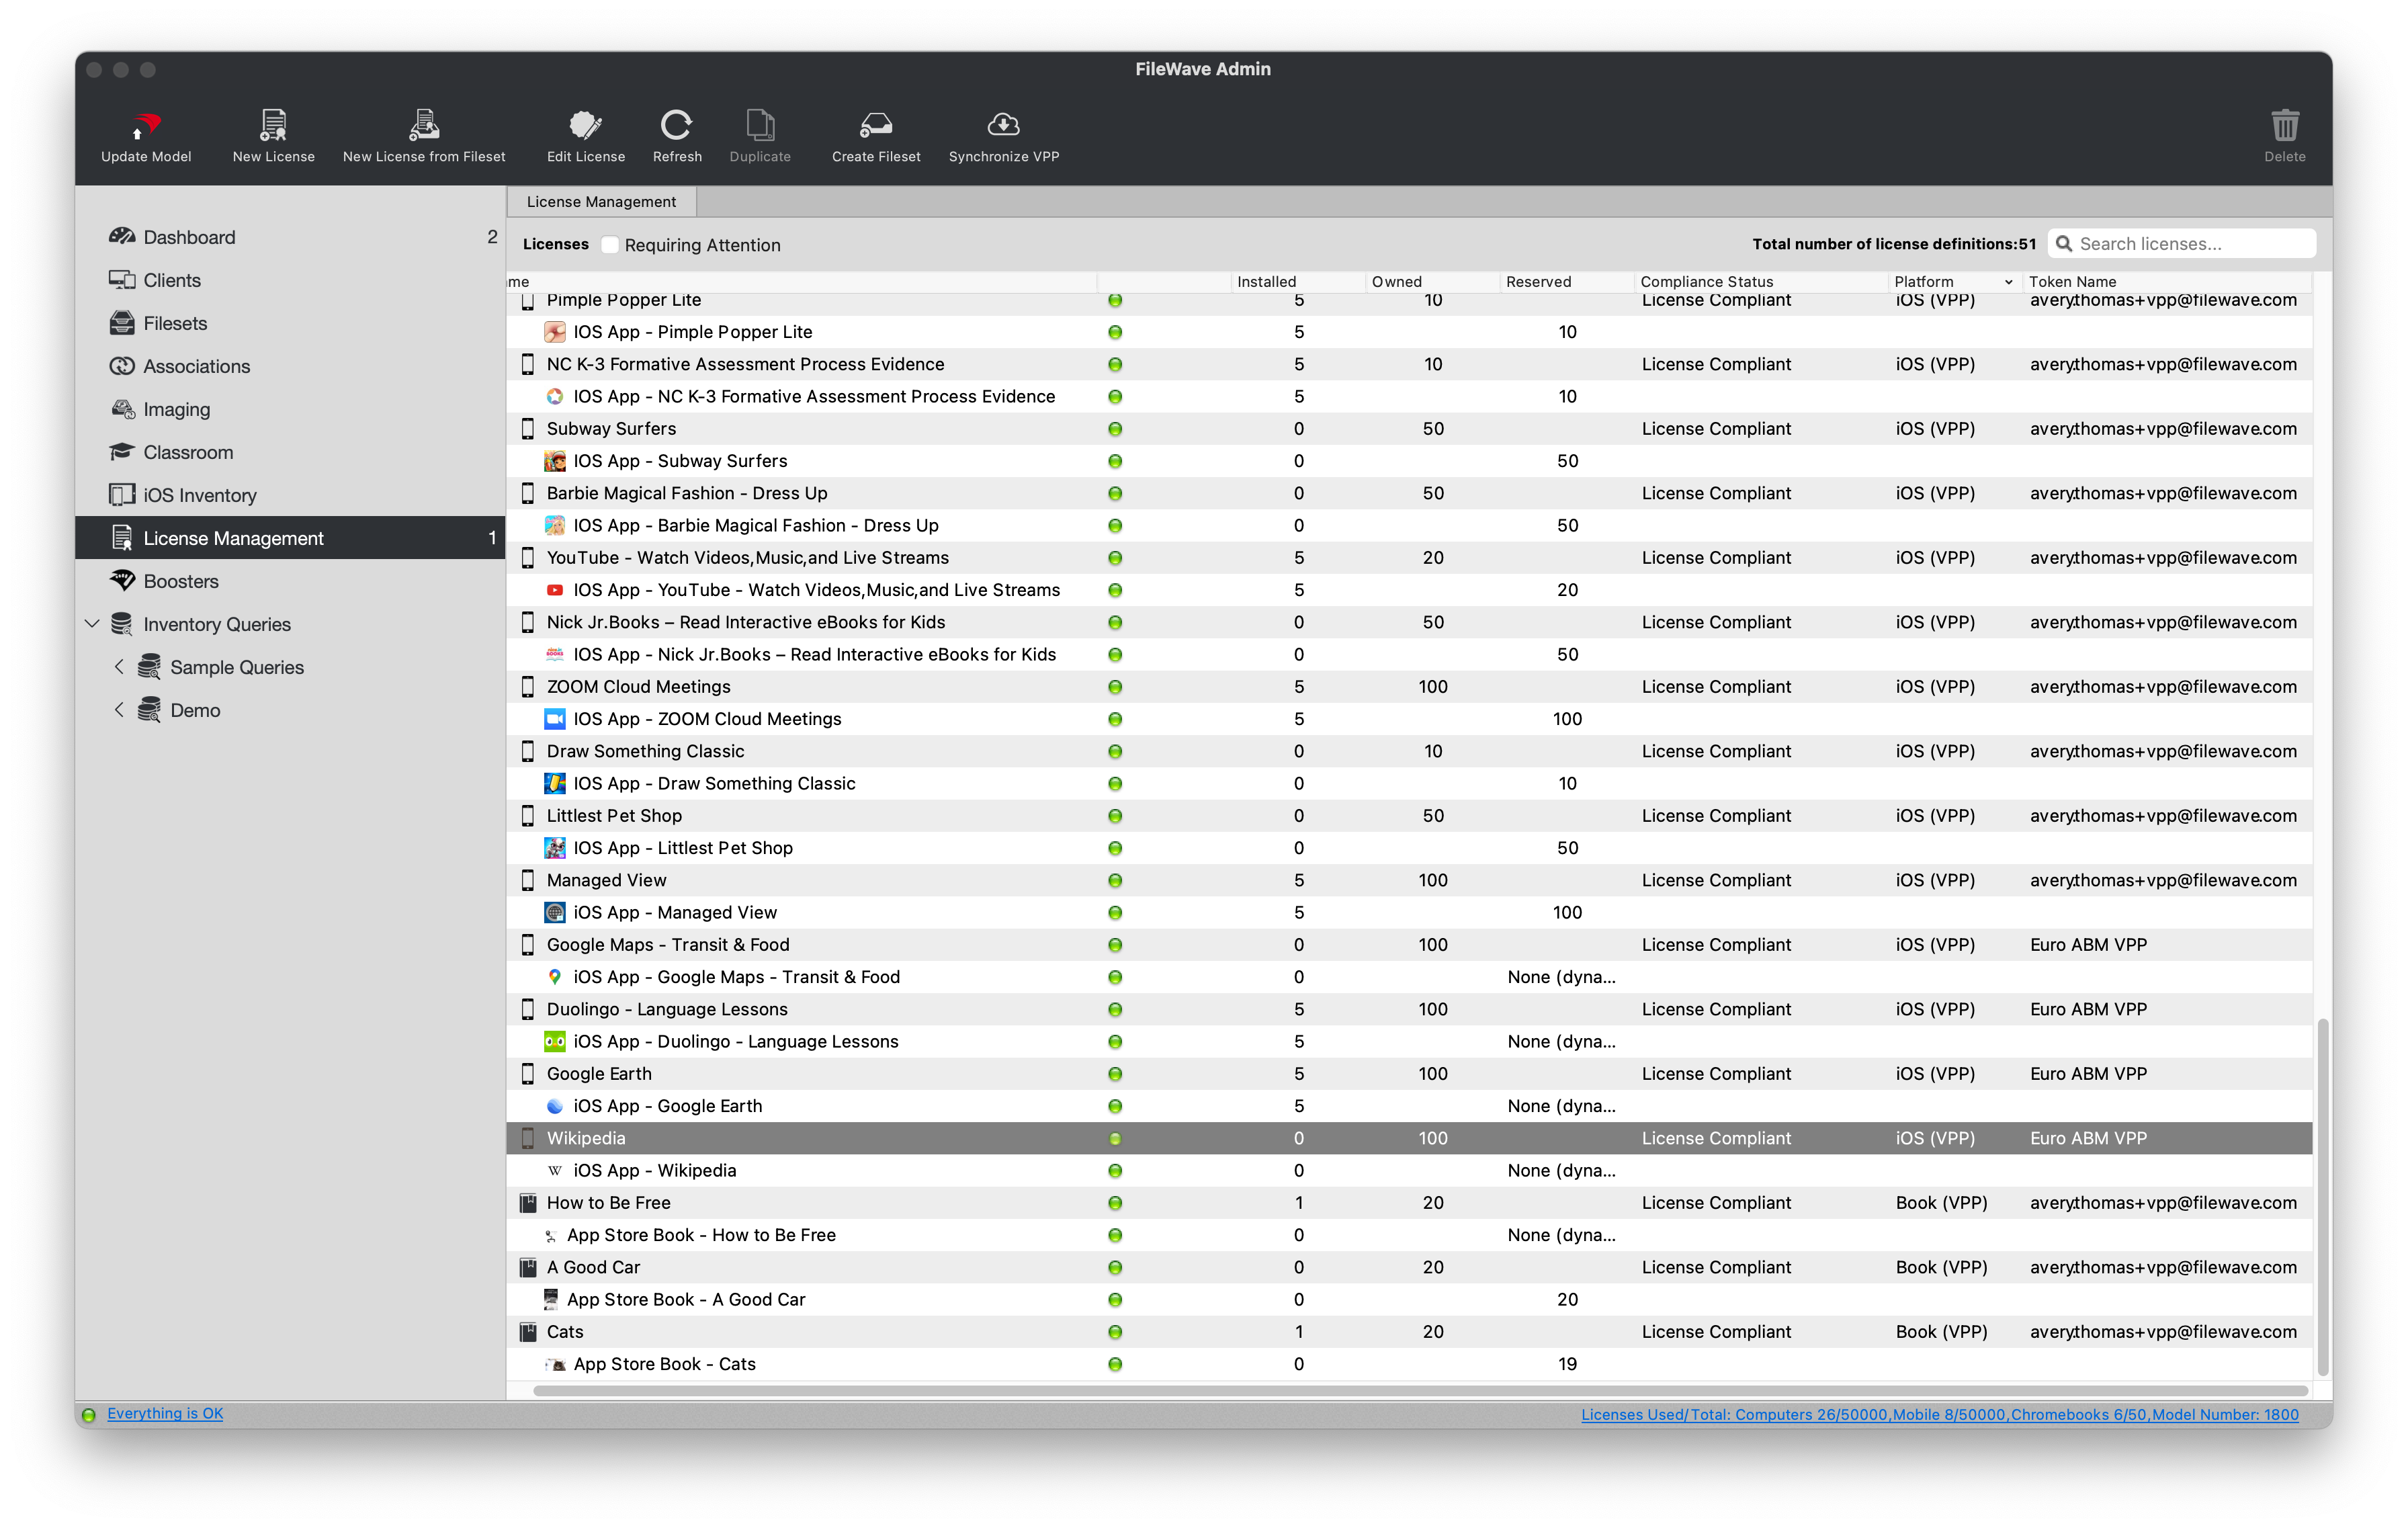
 Open FileWave Admin and navigate to "License Management" from the left pane.
- Click the "Synchronize VPP" button in the black menu bar.
- FileWave syncs with VPP automatically every 5 minutes but this will force a VPP synchronization and "Refreshes" the view.
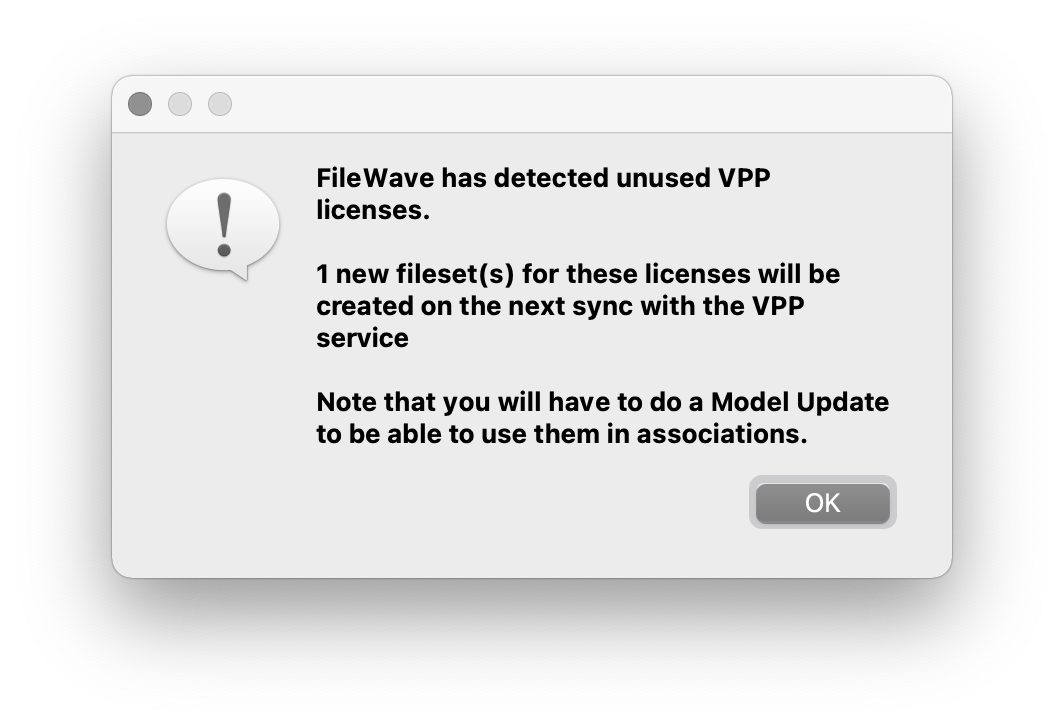
- You should receive a pop up message asking if you'd like to automatically create Filesets for your VPP applications. Click "OK".
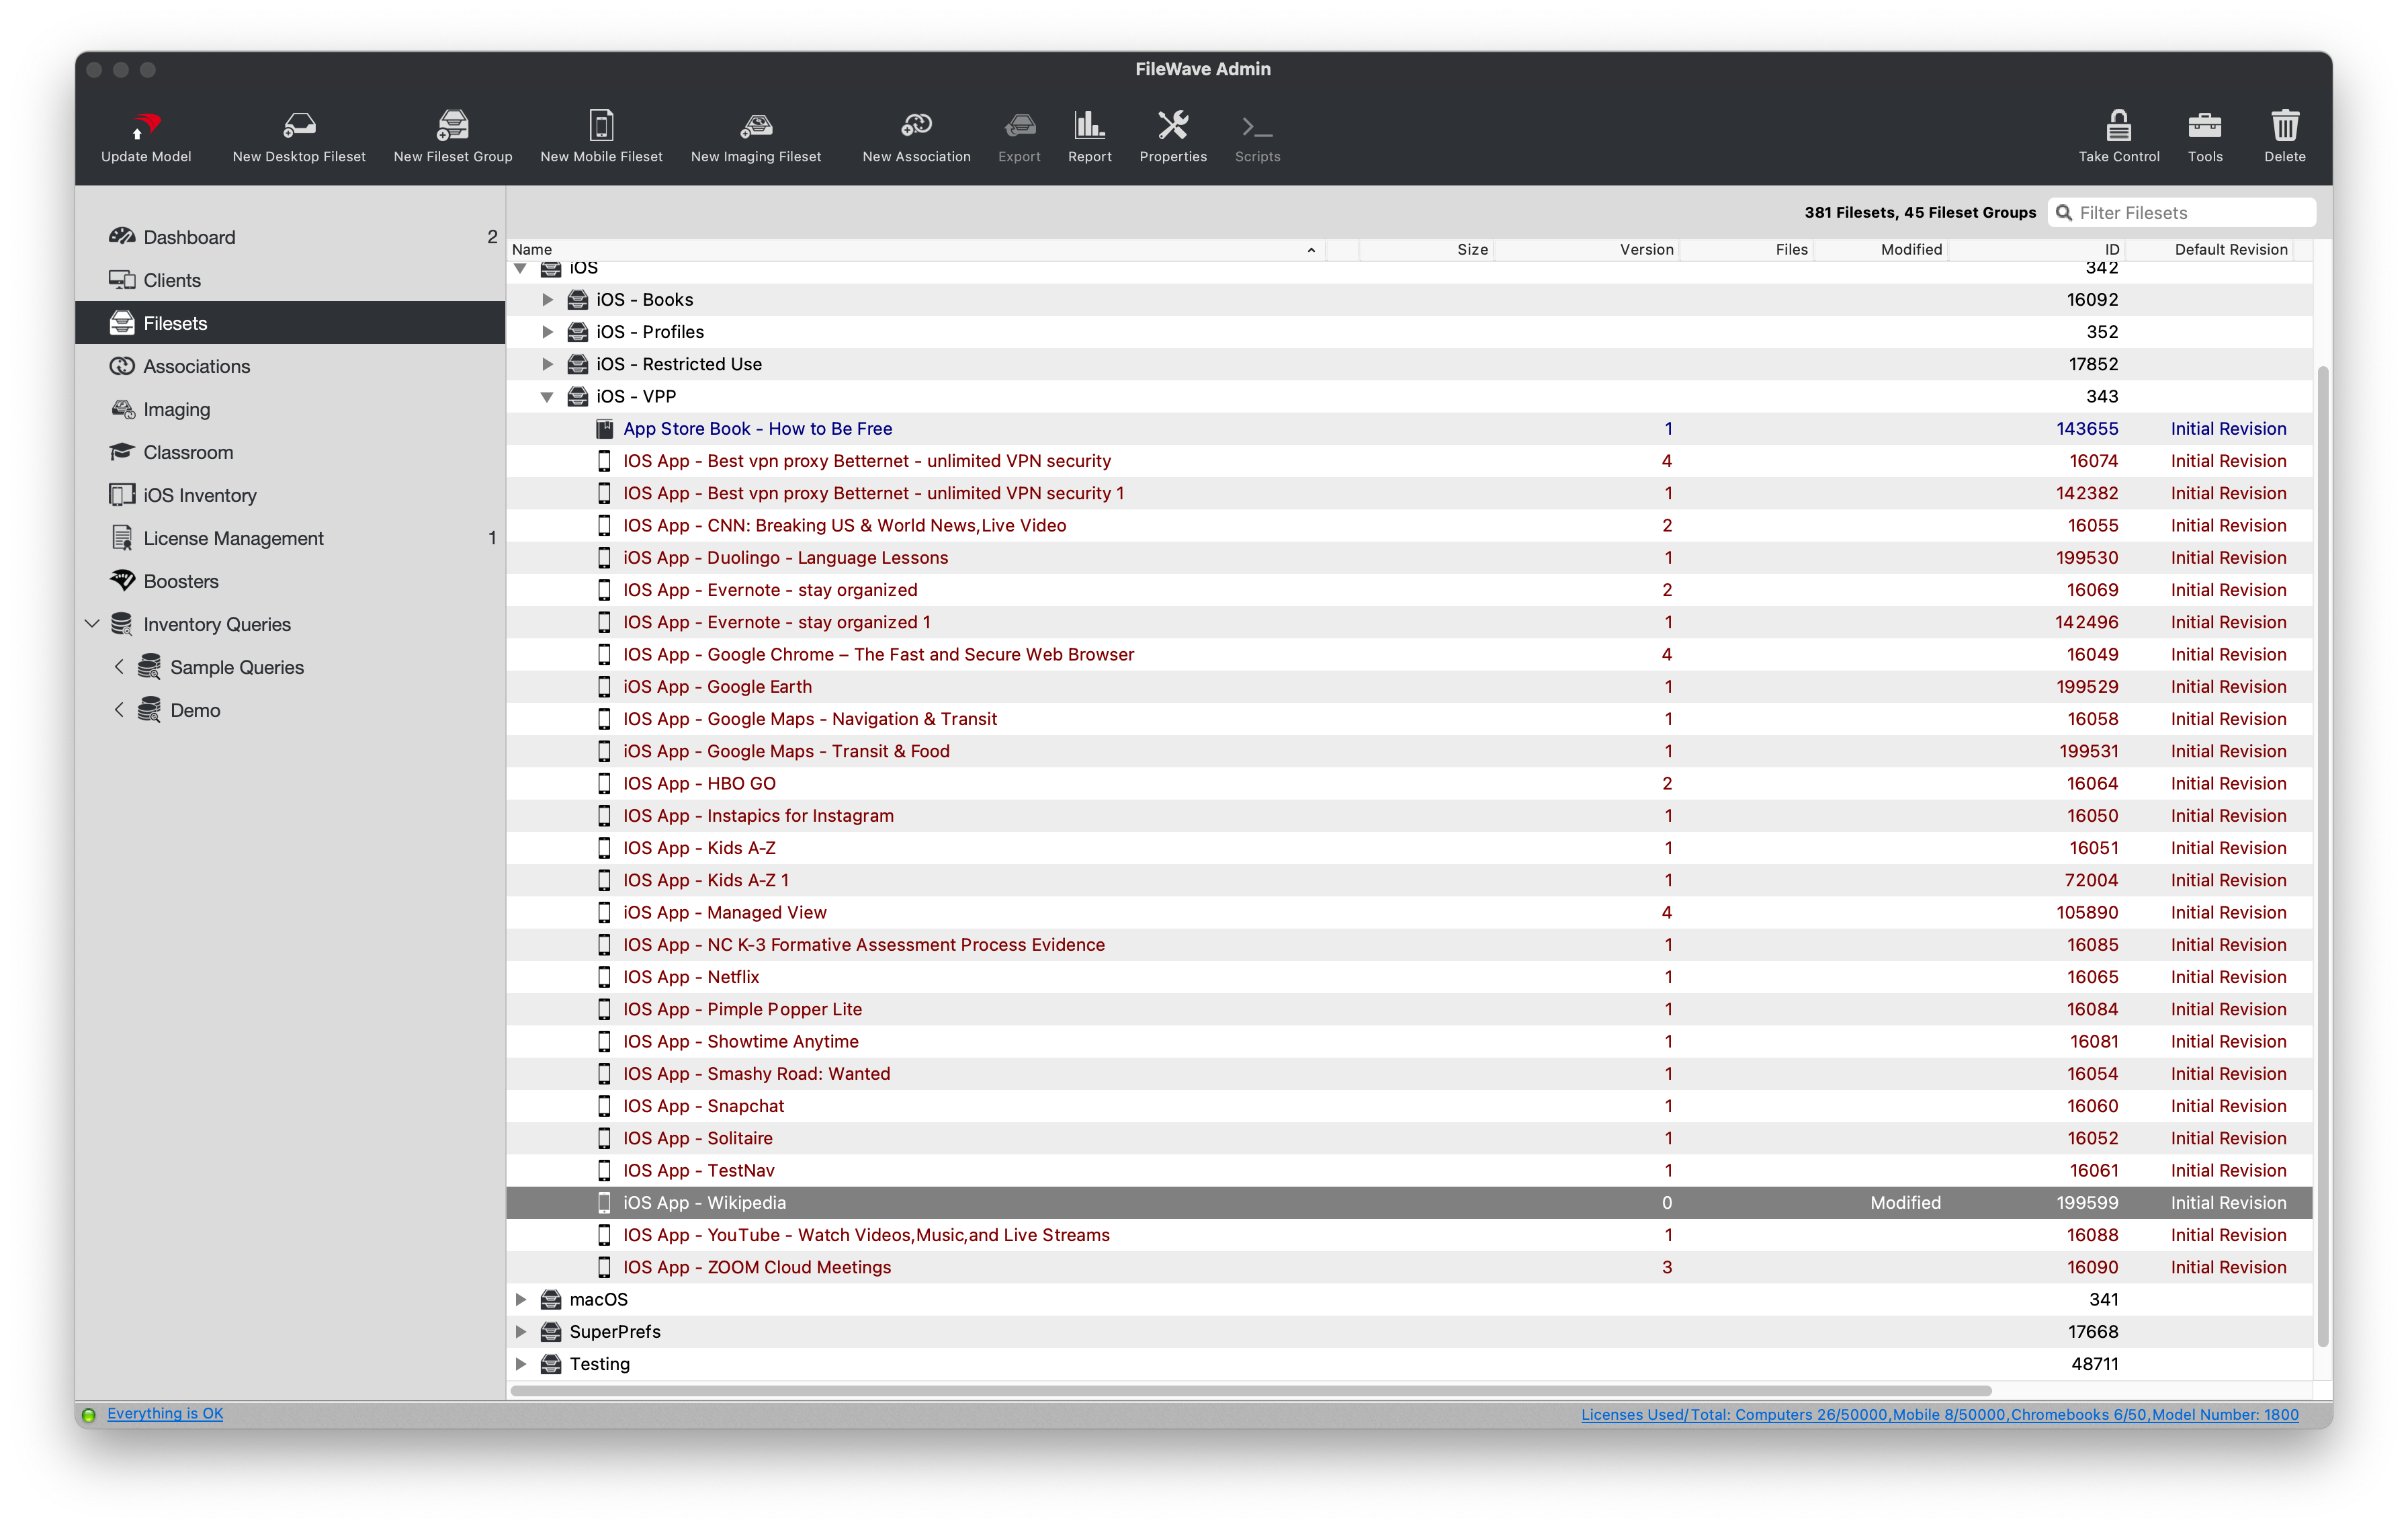
- You should now see the VPP License information in the "License Management" section and a new Fileset in the "Filesets" section.
- If you'd like to change where the VPP Filesets are imported to, please refer to this section of "Software Group Structure".
Enrollment Credentials
If you choose, you can prompt the user to authenticate the enrollment with a generic account name and password or with your AD/Okta/Google Credentials. You can also turn off authentication completely if you want a more streamlined process.
- Okta Credentials:IdP Setup: Okta
- Google Credentials:IdP Setup: Google
- Microsoft Entra AD: IdP Setup: Microsoft Entra ID
- LDAP Credentials: Using LDAP to enroll macOS/iOS/Android devices
Generic Username/Password:
-
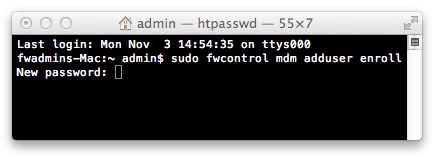
From the server type one of the following, depending on your enrollment strategy:
Manual Enrollment(OTA)sudo fwcontrol mdm adduser [name]Automated Device Enrollment (ADE):
sudo fwcontrol mdm adddepuser [name]Where [name] is the name of the account
-
Enter your server’s root password
-
Enter a password for this account
No Authentication:
-
From the server type the following:
cp /usr/local/filewave/apache/conf/mdm_auth.conf.example_no_auth /usr/local/filewave/apache/conf/mdm_auth.conf -
When asked to overwrite the original, enter 'y' for yes
-
Restart the apache service to put the new configuration into place
/usr/local/filewave/apache/bin/apachectl graceful
No comments to display
No comments to display