
Android Enrollment
Enroll one Android device in FileWave
First complete Configure Android Enterprise in FileWave, or confirm that the intended enterprise is already bound. Use one approved device, a supported Android version and a network that can reach the required Google and FileWave services. This is Android Enterprise enrollment, not installation of a Windows/macOS FileWave Client.
Choose ownership and management mode before you begin
| Your test | Route | Device state |
|---|---|---|
| Organization-owned spare device for work-only use | Fully managed: QR code or afw#setup |
New or factory-reset, at initial setup. Reset erases data; use only an authorized, expendable device. |
| Approved personal device | BYOD work profile | Already set up for personal use. Do not factory-reset it for this route. |
| Eligible organization-owned device registered by a reseller | Zero-touch enrollment | Follow the separate portal/configuration workflow, then return to the verification below. |
A work profile separates work apps and data from personal apps and data. Fully managed enrollment manages the organization-owned device. Do not treat a company-owned work profile or dedicated/single-app device as the same mode as personal BYOD; arrange those additional evaluations with your SE.
Before enrolling, review automatically applied policies, group memberships and enrollment rules with the FileWave administrator. Get the device owner's agreement to the management scope. For a reset, back up needed data and confirm that the organization can satisfy any Factory Reset Protection or other account/recovery lock. Do not reset a production or personally owned device to work around a setup error.
Enroll while Android is running normally, not in Safe Mode. If the device is in Safe Mode, resolve that state before proceeding.
Create a token for this test
In FileWave Central, open Assistants → Enroll Android Device… and use + to prepare a new token. In Details, choose its reuse and duration settings, add a recognizable evaluation comment, then select Create. Use the resulting token's QR Code tab for enrollment.
| Control | One-device choice |
|---|---|
| Reusable | Choose Single-use only for one device. Multiple enrollments is available when you deliberately need a reusable token; it is not required for an evaluation. |
| Duration | The dialog defaults to 2 Years and lets you enter a number of years. Choose a validity period that fits your test; do not assume the default is a short test window. Android enrollment tokens are no longer limited to 30 days. |
| WiFi Profile | Leave this unselected to set up the network manually, or use only an approved lab Wi-Fi configuration as described below. |
| Comment | Identify the test purpose without including passwords or personal data. |
The token and provisioning method must be suitable for the chosen management mode. If you're unsure whether the token supports the intended fully managed or personal work-profile route, confirm with your SE before scanning it. Do not substitute a different mode when setup fails.
Treat enrollment tokens and QR codes as secrets, including the codes listed in Central's token table. Share them only with the person performing the enrollment. Do not include them in public screenshots or tickets. A QR code with Wi-Fi configuration also contains that network's password in plain text; use a lab network, not a broadly shared production credential.
Optional: include Wi-Fi in the QR code
If an approved Google Policy Fileset already contains the required Wi-Fi configuration, select it in WiFi Profile before creating the token. FileWave includes the network configuration in the QR code to simplify initial setup. Creating a network policy is not required for this exercise.
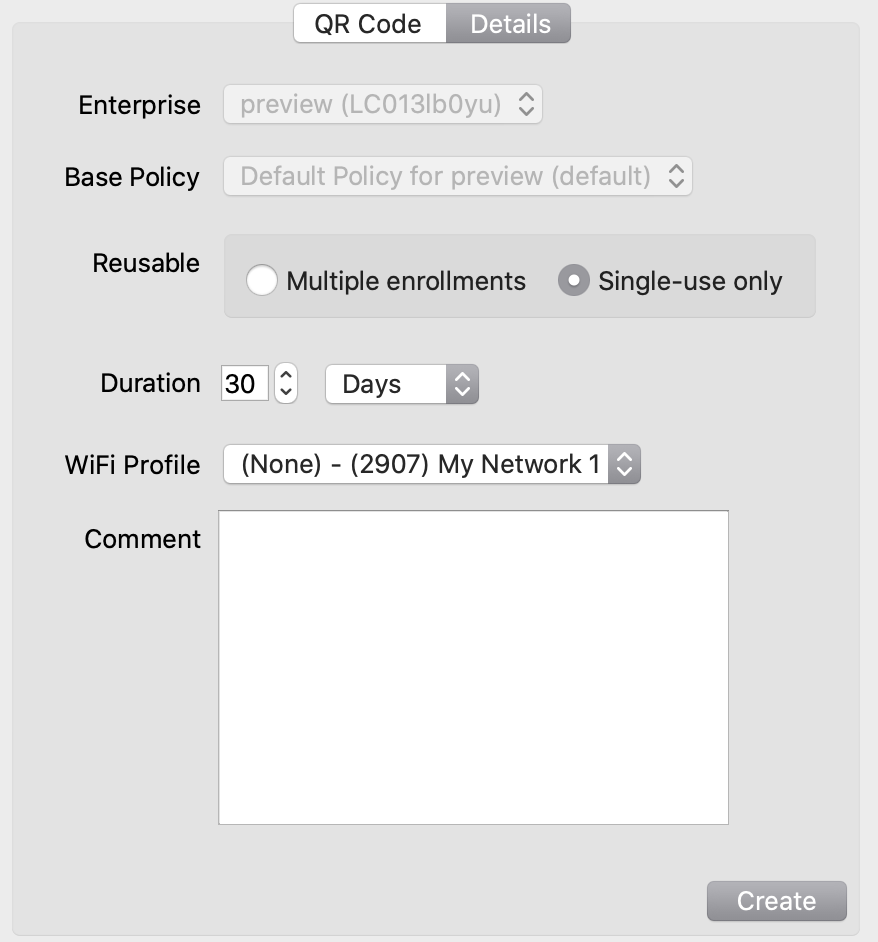
Older Wi-Fi selection example. Its 30 Days value is not the current default or a token-duration limit; use the current 2 Years guidance above.
The QR code contains the Wi-Fi password in plain text when Wi-Fi credentials are included.
Close the QR display when enrollment is finished and remove unnecessary exported or printed copies from shared locations. Deleting an image is not token revocation. If a reusable token was exposed, contact the FileWave administrator/SE to invalidate it using the controls supported by your version; do not unlink the enterprise or wipe a device as token cleanup.
Route A: fully managed QR code or afw#setup enrollment
Use only the organization-owned spare device approved for full management. It must be new or factory-reset and still at initial setup. Complete the backup and recovery-account checks above before any reset. Have Central ready so you can admit the enrolled device promptly.
Choose one setup method:
- QR code: At the initial setup screen, tap the same spot six times, then follow the prompt to scan the FileWave enrollment QR. Google's QR method applies to new or factory-reset Android 7.0+ devices with QR support; also check your FileWave release's supported Android versions. Manufacturer screens can differ. See Google's device setup methods.
afw#setupalternative: Follow initial setup, connect to Wi-Fi and enterafw#setupwhen prompted for a Google account. This downloads Android Device Policy. Scan the FileWave QR code or enter the enrollment token when prompted. This is an alternative to the initial six-tap route, not an additional required step.
Follow the network and management prompts. Android Device Policy receives and enforces the Android management policy. If setup offers Install Work Apps, review the listed apps and continue; that prompt alone is not proof that the separate FileWave companion app was installed.
Complete the setup summary, choosing Setup if shown, then continue to Accept and verify the device below. If setup requests an unexpected organization, management mode or destructive action, stop and contact your SE rather than accepting it.
Route B: personal-device work profile (BYOD)
Use this route only with the owner's informed agreement and a token suitable for a personal work profile. Android places managed work apps and data in a separate profile. Most management policies apply to the work profile; review the actual enrollment disclosure and any app permissions rather than assuming all optional features have the same privacy implications.
The owner can keep personal apps while the organization distributes and configures work apps. That separation is the benefit to verify in this test, not a guarantee against every possible data-sharing action.
Create the work profile
Before you begin, confirm that the enterprise binding and token preparation above are complete. No factory reset is needed for personal BYOD work-profile enrollment. If the device already has another organization's work profile or management, stop and resolve that with its owner before proceeding.
- On the personal device, install and open Google's Android Device Policy.
- From the app, scan the FileWave enrollment QR code. Confirm the expected organization and follow the prompts to create the work profile.
- Complete the work-profile setup and any approved work-app prompts. Do not accept a factory reset as part of this personal-device exercise.
- Continue to the Central acceptance steps below. On the device, look for work-badged apps and the work Play Store, separate from personal Play Store content. The launcher may show a Work tab rather than a separate app named “Work Play Store.”
Accept and verify the device
For either route, open New Client → Enrolled Mobile Devices in Central. Refresh the list if needed and match the device using its identifying information and enrollment/check-in times. Select only the approved test device, choose its intended existing test group, then use Add 1 Clients (the displayed count must be one). Leave Automatically add all new clients to the selected group unchecked for this manual test.
Before choosing Update Model, review the selected device and group, and coordinate with other administrators about their pending changes. A Model Update can commit their changes too. The Update Server Model dialog is a confirmation, not a pending-change preview; review first, then choose Update Model to confirm. See How FileWave turns your changes into device work.
If automatic admission was already configured, the record may already be in Clients. Verify that record and its assignments instead of adding it again. Do not enable broad automatic admission just for this exercise.
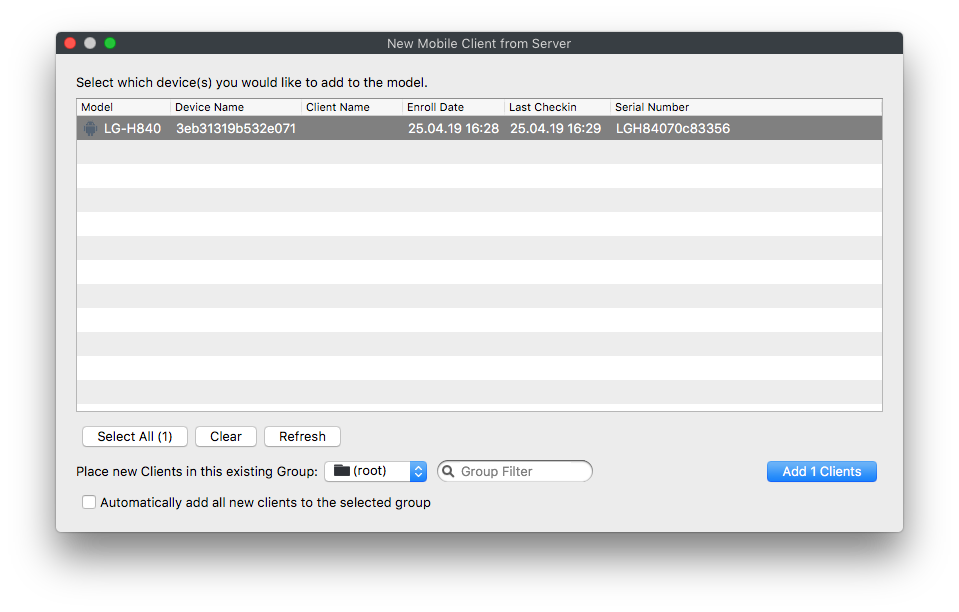
Older admission example. Choose your intended test group rather than copying the example's root-group selection.
The Android icon in Central does not distinguish these modes. Inspect Is User-Owned in inventory, or add it as a Clients-view column: True identifies personal BYOD; the fully managed test should not report True. Check that field alongside the actual device setup, not as a substitute for it.

Before continuing, confirm all of the following:
- The intended device appears once in the expected FileWave group, with recent enrollment/check-in information. Confirm that the record matches the physical device; do not rely on its friendly name alone.
- Android Device Policy shows the expected organization and no unresolved enrollment error.
- For BYOD, the work profile and work Play Store are present and Is User-Owned is True. For full management, setup completed as an organization-managed device and ownership agrees with the chosen route.
- The device is online and its applicable policy does not unexpectedly restrict access or change networks.
If a record is missing or its ownership is wrong, stop before deploying content. Check the enterprise/token, network reachability, admission list and existing automatic rules with your SE. Do not repeatedly reset, re-enroll or update the model to guess at a fix. Some Samsung devices report two serial numbers; Android EMM Known Issues and Historical Notes explains where to check them. Use historical workarounds only if they apply to your version.
Next, follow Android Software and Policies to deliver one harmless app and verify it on this device. Keep the device enrolled for that exercise. Retiring it afterward is a separate, mode-specific action: agree on the removal procedure with its owner/SE; do not use a full-device wipe to clean up a personal work profile.
Optional later test: location reporting
Location reporting is not an enrollment prerequisite. The Force Location for EMM Android Devices workflow uses a FileWave companion application, server configuration and location permission on fully managed devices. Evaluate it separately with authorization and user notice; do not apply it to BYOD by analogy. Hosted-server changes go through your SE/Support, not customer shell commands.
No comments to display
No comments to display