Adding Devices
What
This page shows devices awaiting enrollment and lets you create placeholders. You can also specify Actions, such as which group to add devices to, which fields to set, and what should happen after import.
When/Why
Use this dialog when automatic import is not enabled for new clients, or when you want to create placeholders for devices that do not exist in FileWave yet. For example, you can create a placeholder for a Windows device before imaging it, or assign content ahead of enrollment so the device receives it as soon as it checks in.
Use the Plus and Upload icons in the Devices view to add devices:
![]()
How
From the devices view press the plus ( ) to enter the UI on the Selected Devices screen. See articles listed below to get details on the individual tabs within the dialog.
Actions
Fields, destinations, and other actions to take once a devices is brought in
"Actions" is where you can set data for inventory fields, manually assign a DEP profile, and set destinations for the imported devices/copies (aka "clones") after a device has been enrolled.
You would use the import actions listed above typically only when you don't have "automatic" import turned on. These actions are only preformed after everything has been saved.
How
- Select the action dropdown and choose one of the following:
- Assign Field Value - Allows you to set inventory values fields
- Then select a Device Field (like "Comment")
- Then Select a Value for that field (like "Front Desk Checkin Station")
- (Optional for string/text fields) Select "Replace" (overwrite any value the device currently has), or "Append" (add your text to the end of the value)
- Import/Move to group - Specify the group where the original device will go
- Then select the group you want the original sent to
- Create Copies in Group(s) - Specify where clones/alias/copies of the original will be created
- Then select any groups you want copies created in
- Copy in the same group - Copy your incoming devices to that of an already existing device (i.e. mirror its groups)
- Then select an existing placeholder or device
- Associate DEP Profile - Manually assign a specific DEP profile for this device
- Then select the specific DEP profile
- Assign Field Value - Allows you to set inventory values fields
- If you need more than one action taken, press "Add Action" and start from 1 again
Assign Field Value can be added many times. The other Actions can only be selected once.
If you select "Import/Move to group" you can't also select "Copy in the Same Group".
Similarly, if you select "Copy in the Same Group" you can't select "Import/Move to group"
Add Placeholder
A placeholder is a temporary item that represents a device you intend to enroll at a later date.
You can use placeholders for a device that you will be adding eventually. Placeholders allow you to specify the connections from payloads to the device through deployments so that when a device is ultimately enrolled, it will immediately get all assigned content.
How
- From the Selected Devices interface, press the "Add placeholder" button
- Enter text into the fields
- Name (required)
- Comment (optional)
- Platform (required)
- Serial / MAC (Serial number for Apple devices, MAC address for Windows devices)
- Press "Add Placeholder"
Related Content
Digging Deeper
- Keep in mind that you can also create a clone by doing a Copy to Group thereby creating many instances of your original. These groups can also have associations/deployments on them. Use this to create a layered structure.
Selected Devices
These are devices pending enrollment. They can be devices checking-in with a client already installed or from a service such as Apple DEP/ Android EMM
Shows a list of pending devices that are either clients checking-in or devices in your pending DEP/EMM list. You will select devices from the list for import whenever you are ready for them to be a part of the managed environment. You do not have to import all devices that show in this list (you can pick and choose individuals).
How
Once you have started the Adding Devices process, Select Devices is the first tab showing what can be added.
- From the Pending Requests section you can select devices or DEP/EMM placeholders for import
- Select the checkbox to the left of each device you wish to include
- Press the Move to Selected Devices button
- (Observe) that device moves to the lower list
- (Optional) Add Placeholder devices
- Select "Next" to move onto Actions
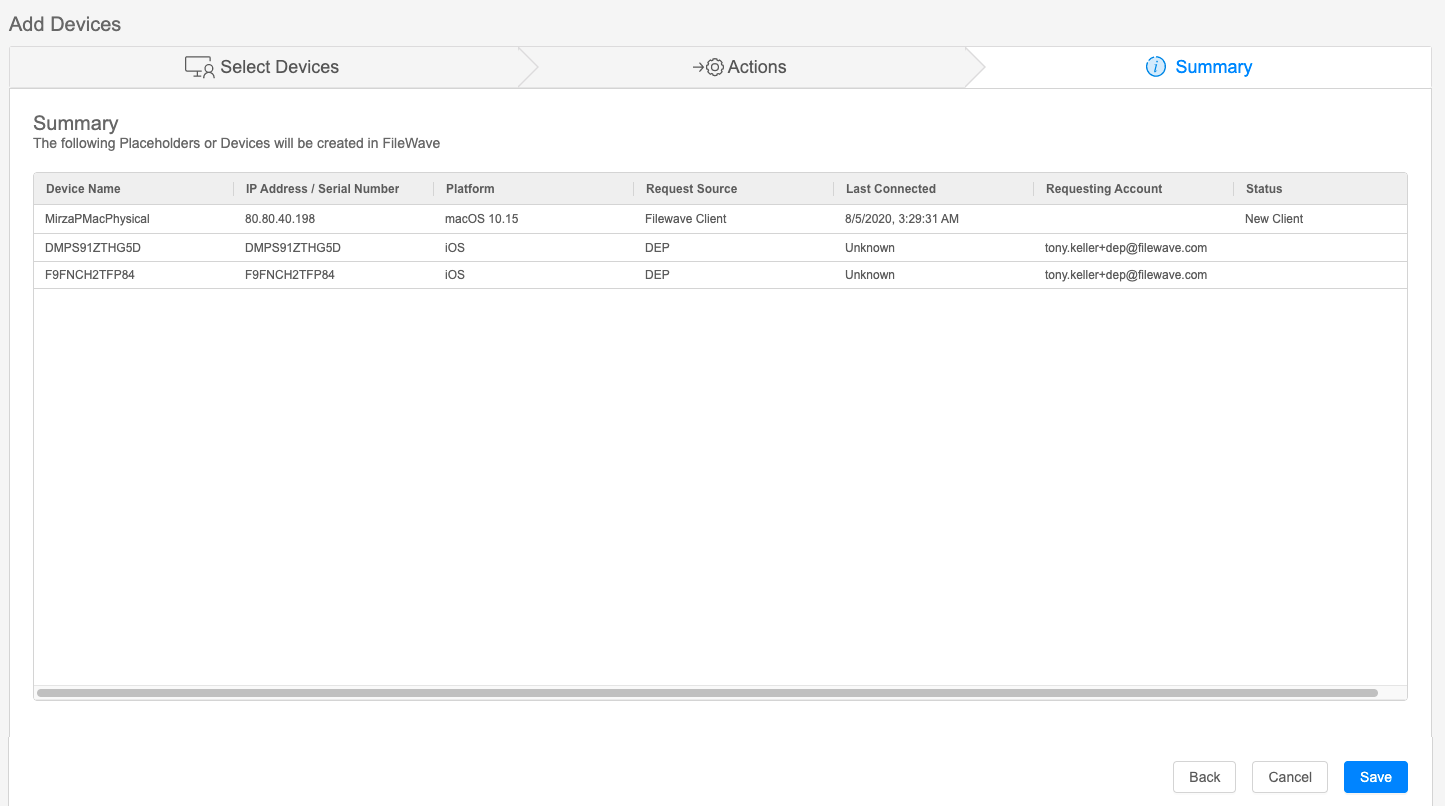
Summary
Preview the results of your changes
The summary tab view will show a preview of the action you are about to perform.
Some views, Like the Summary in Mass import Upload Devices and/or Data will have check boxes for confirmation of changes.
Use this view to verify what you want to happen.
How
- If everything look correct, hit "Save"
- If there are issues select "Back" and change them
- If you want to stop the process, or perhaps start over, select "Cancel"
No comments to display
No comments to display