
Configure Windows Imaging Associations
What
A Windows imaging association links a captured image, any required driver packs, and the devices or groups that should receive that image.
When/Why
Review these properties when you create an association and whenever you change its image, drivers, or targets. This is Windows operating-system imaging, not an ordinary software Deployment: applying the image can overwrite existing data. Confirm the target device’s identity and Imaging MAC Address, and back up needed data before starting imaging.
How
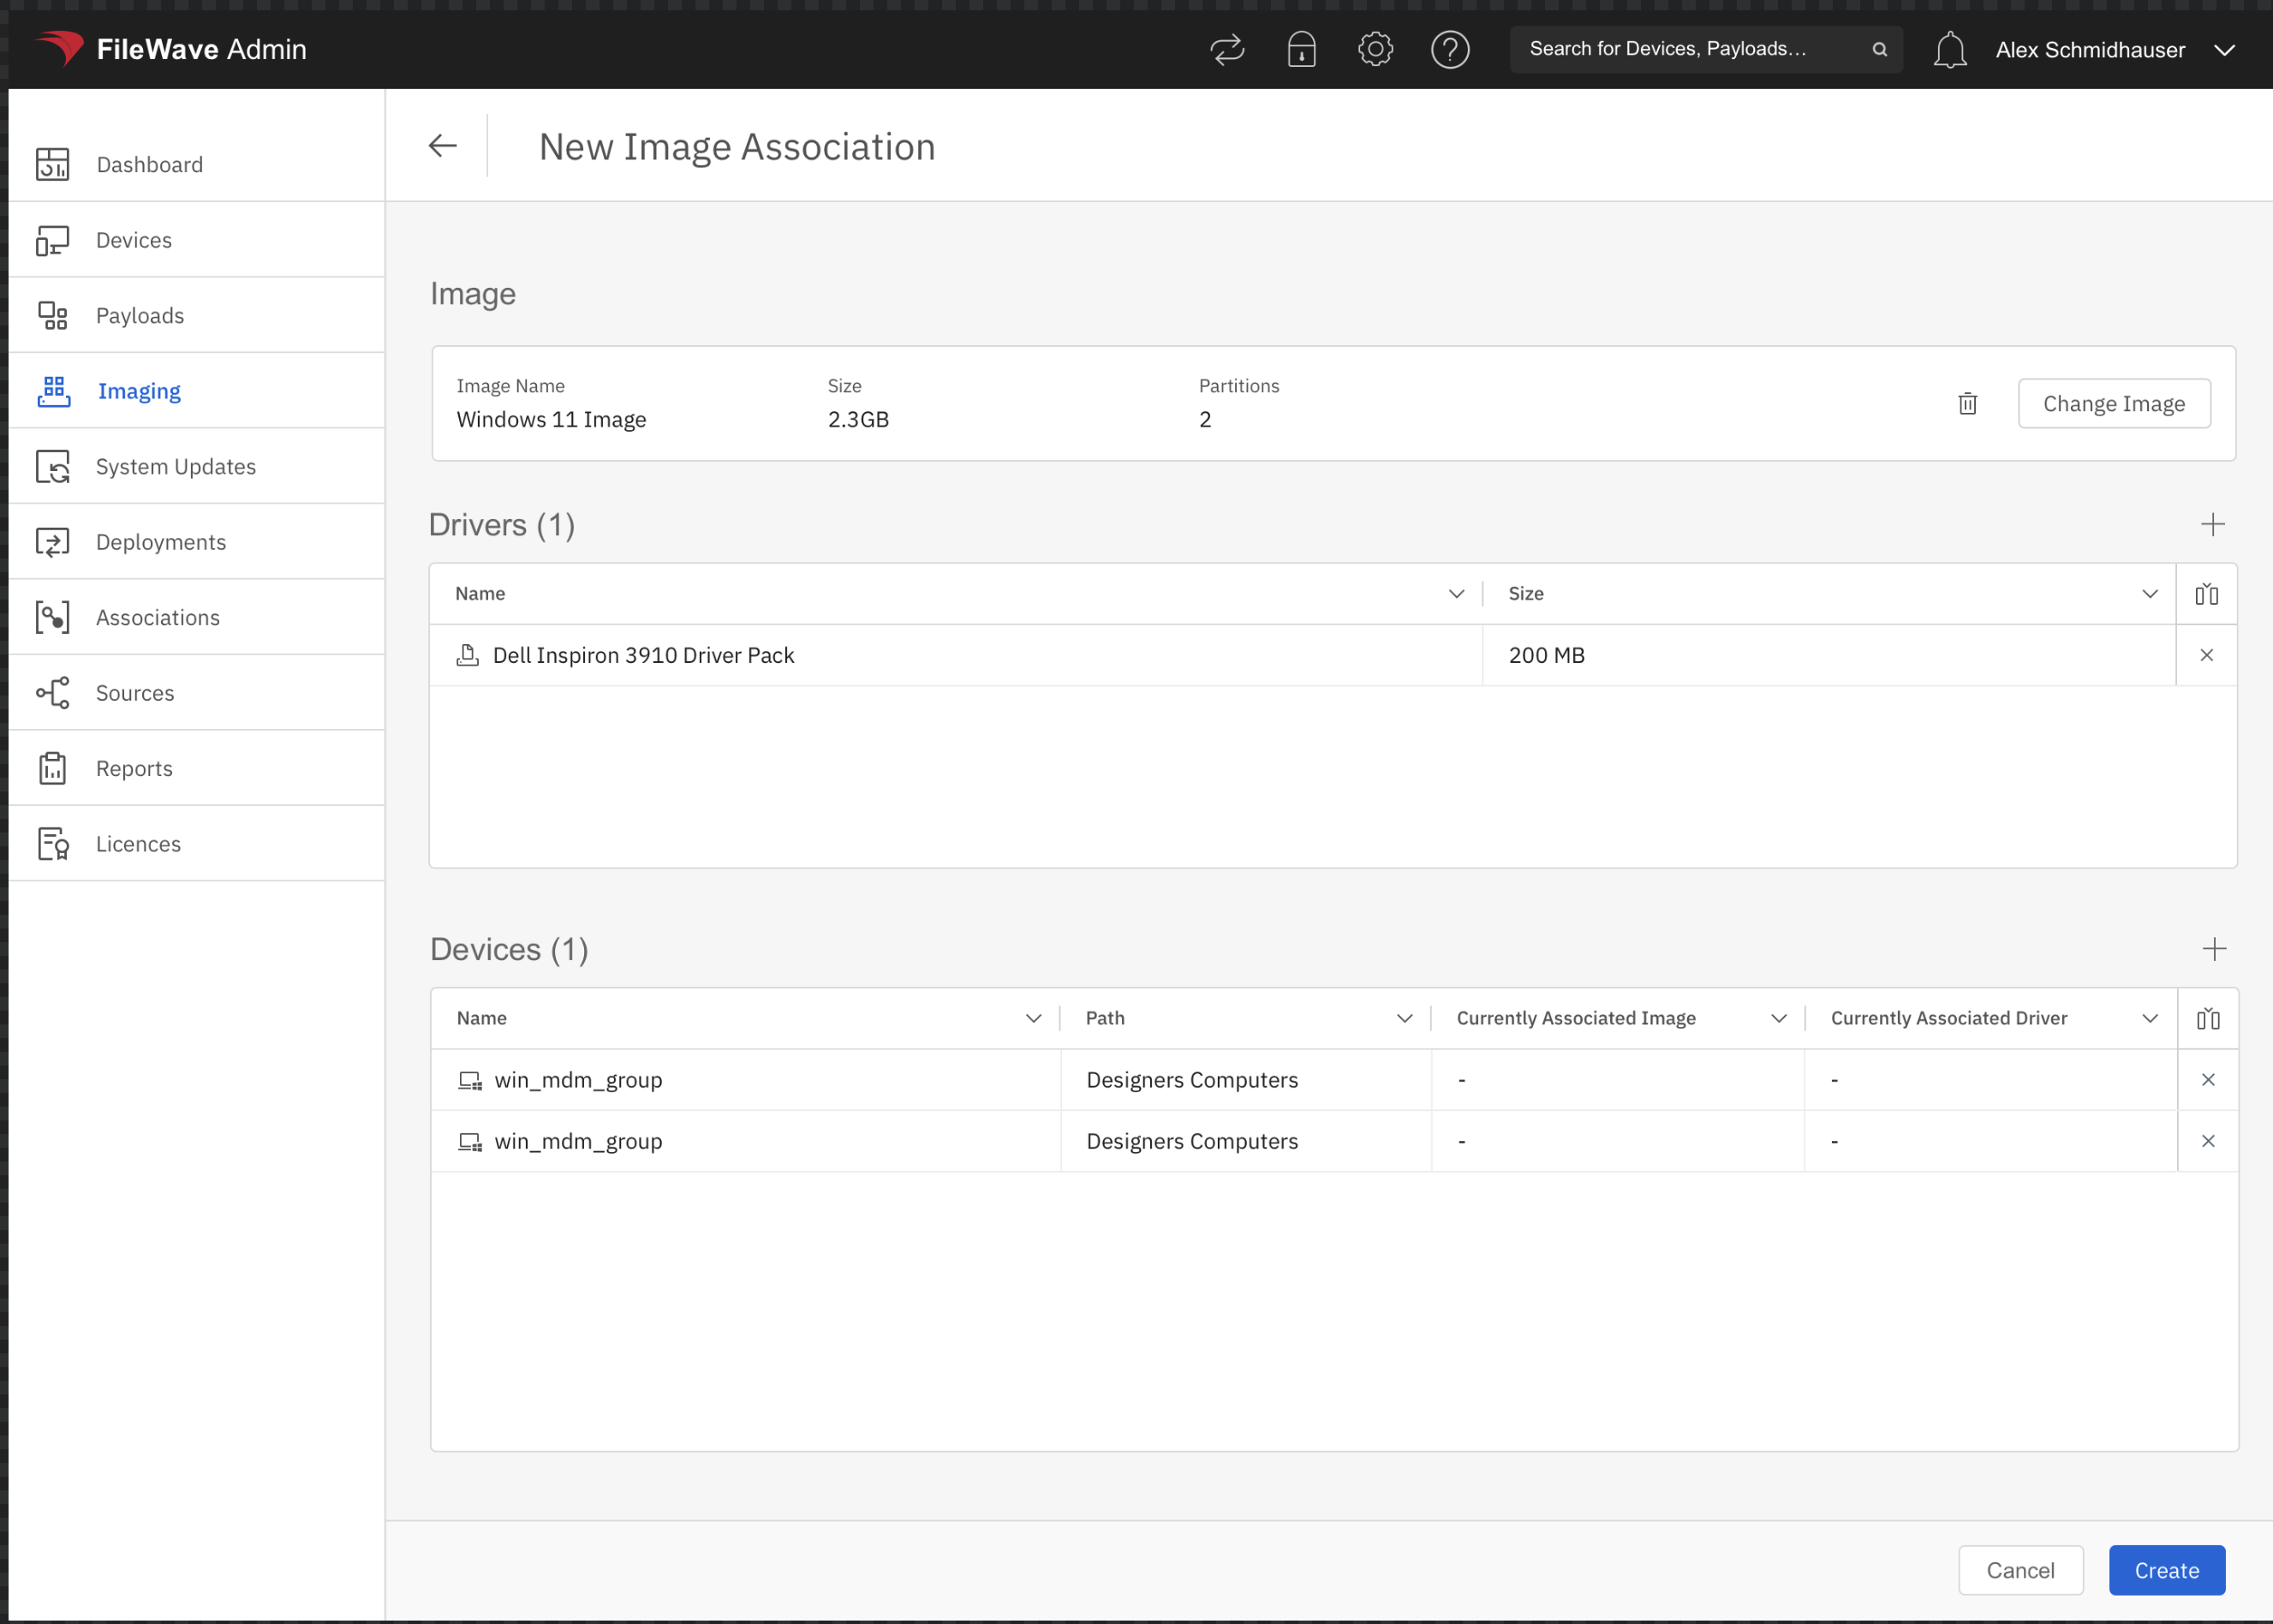
In FileWave Anywhere, begin with Create Imaging Association to open the image, driver, and device selection workflow. Review any existing image and driver assignment before replacing it.
Choose from images already created in FileWave Central. Keep separate images when your Windows release, hardware, or boot mode (UEFI or legacy MBR) requires different content.
Add a driver pack when the target hardware needs model-specific drivers. If the pack is not yet available, follow Creating Windows Driver Filesets in Central to import the manufacturer’s extracted driver files. The example below pairs a Windows 11 image with a Dell driver pack; it is not a recommendation for other device models.
You can add multiple devices or groups while creating the association. FileWave then stores the resulting targets as individual imaging associations. For the first test, select one expendable device rather than a broad group.
After saving, return to the imaging association list and confirm the image, drivers, target, and enabled/disabled state. A saved association is not proof that the image has reached the IVS or that imaging has completed. Continue with Deploy a Windows Image with FileWave IVS for the Model Update, IVS download, PXE boot, and post-imaging checks; its step-by-step console instructions use Central.
No comments to display
No comments to display