OS Software Updates - Automation Rules
What
OS update management often means tracking frequent Apple and Microsoft updates, creating Filesets, and assigning them to the right groups. FileWave 16.2.0 introduced Automation Rules to generate update Filesets from updates reported by managed devices. FileWave 16.4 adds platform and category suggestions, richer policy previews, and a Windows preview option that can focus on updates currently requested by devices.
When/Why
Apple and Windows devices report relevant OS updates back to FileWave Server. Client Info for an individual device lists the updates that device has reported:

The Software Updates view in FileWave Central shows updates reported across Apple and Microsoft devices, with additional filter options. As devices report into FileWave, this view continues to update.
The 'Is New' value drives Automation Rules.

Freshly reported entries automatically have 'Is New' set to 'Yes'.
Automation Rules target updates marked as new and generate Filesets for the updates you include. Exclusion rules keep unwanted updates out of the automation flow, such as Windows driver packs you do not want to deploy automatically.
Automation Rules can also apply to updates that do not exist yet. When devices report matching updates later, the rules can pick them up.
When Automation Rules run, FileWave creates one Fileset per included update and ignores excluded updates. The 'Is New' flag changes to 'No' when a Fileset is generated, so excluded updates remain marked as new.
You can manually change the 'Is New' flag for one or more updates from the right-click contextual menu:

Resetting the 'Is New' flag to 'Yes' makes the update eligible the next time Automation Rules run. Setting it to 'No' keeps that update out of rule processing, regardless of matching rules.
Once rules are configured, run them with the Run Automation button. At the time of writing, this is a manual action.
The 'Is New' flag changes from 'Yes' to 'No' only when a rule causes a Fileset to be generated.
How
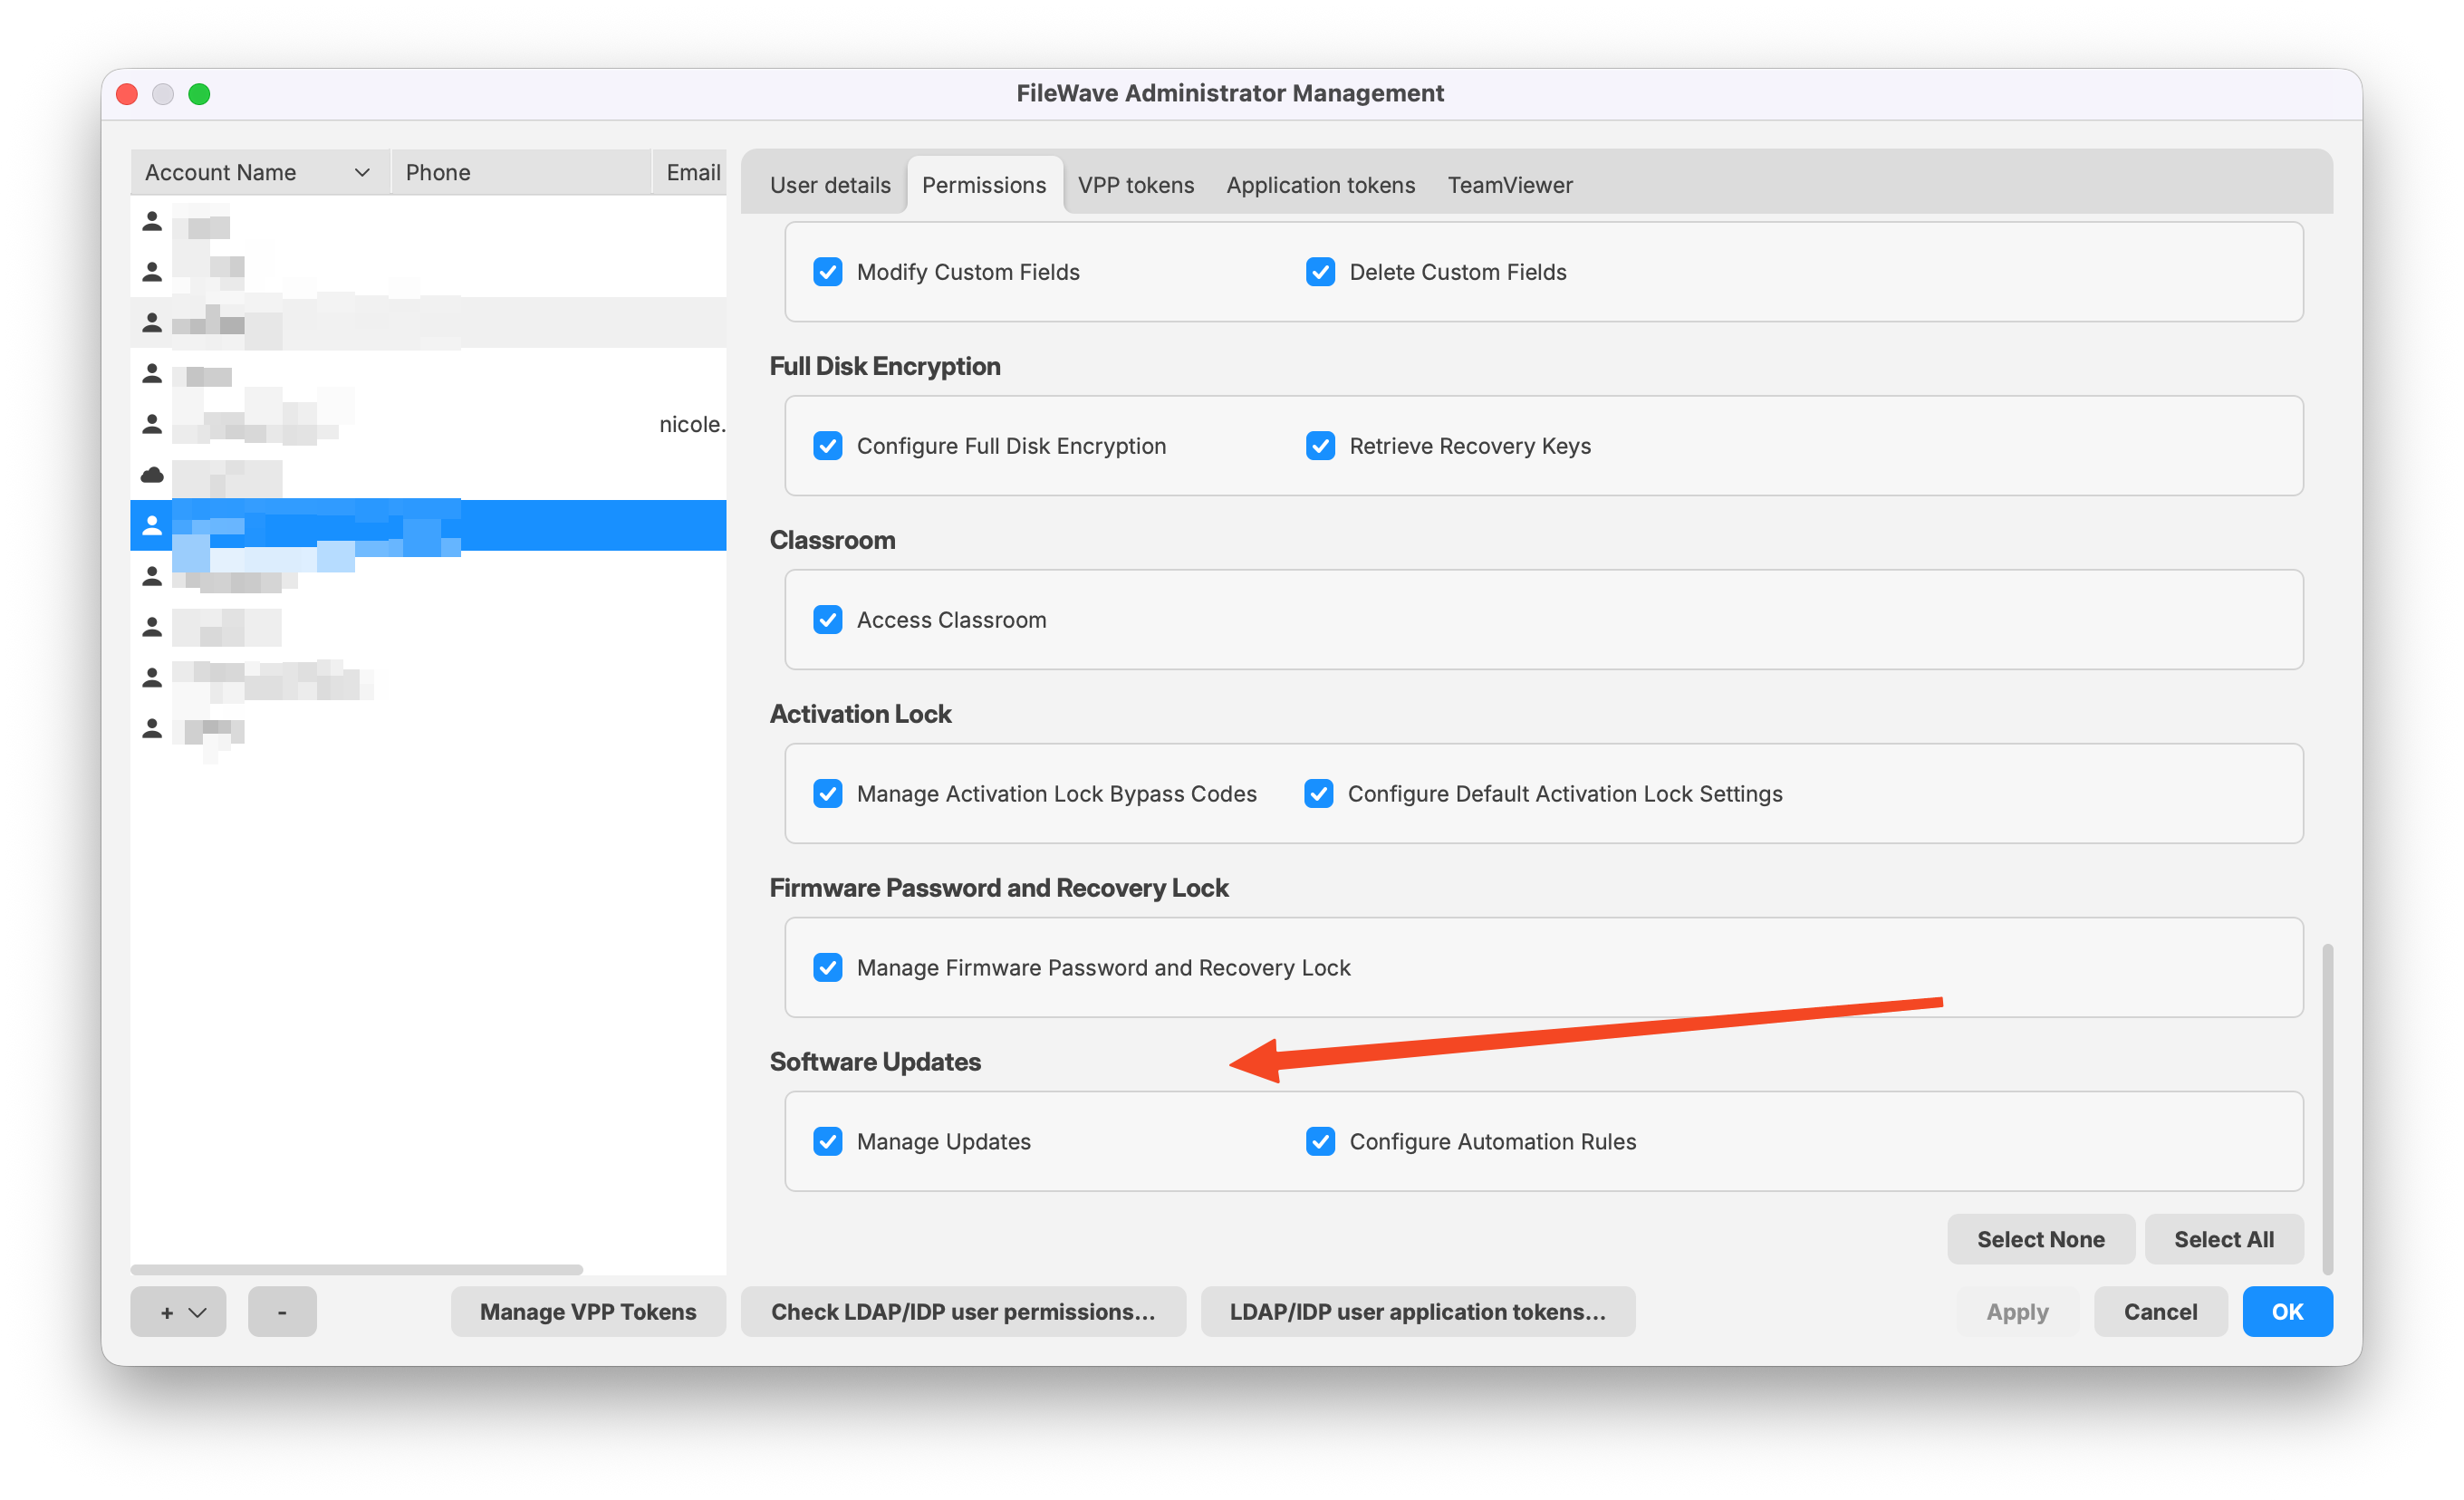
Only FileWave Administrators with necessary permissions may perform some or all of these actions, as set in:
Assistants -> Manage Administrators:
- Manage Updates
- Configure Automation Rules
Select Automation Rules in the Software Updates toolbar to view existing rules or create new ones:
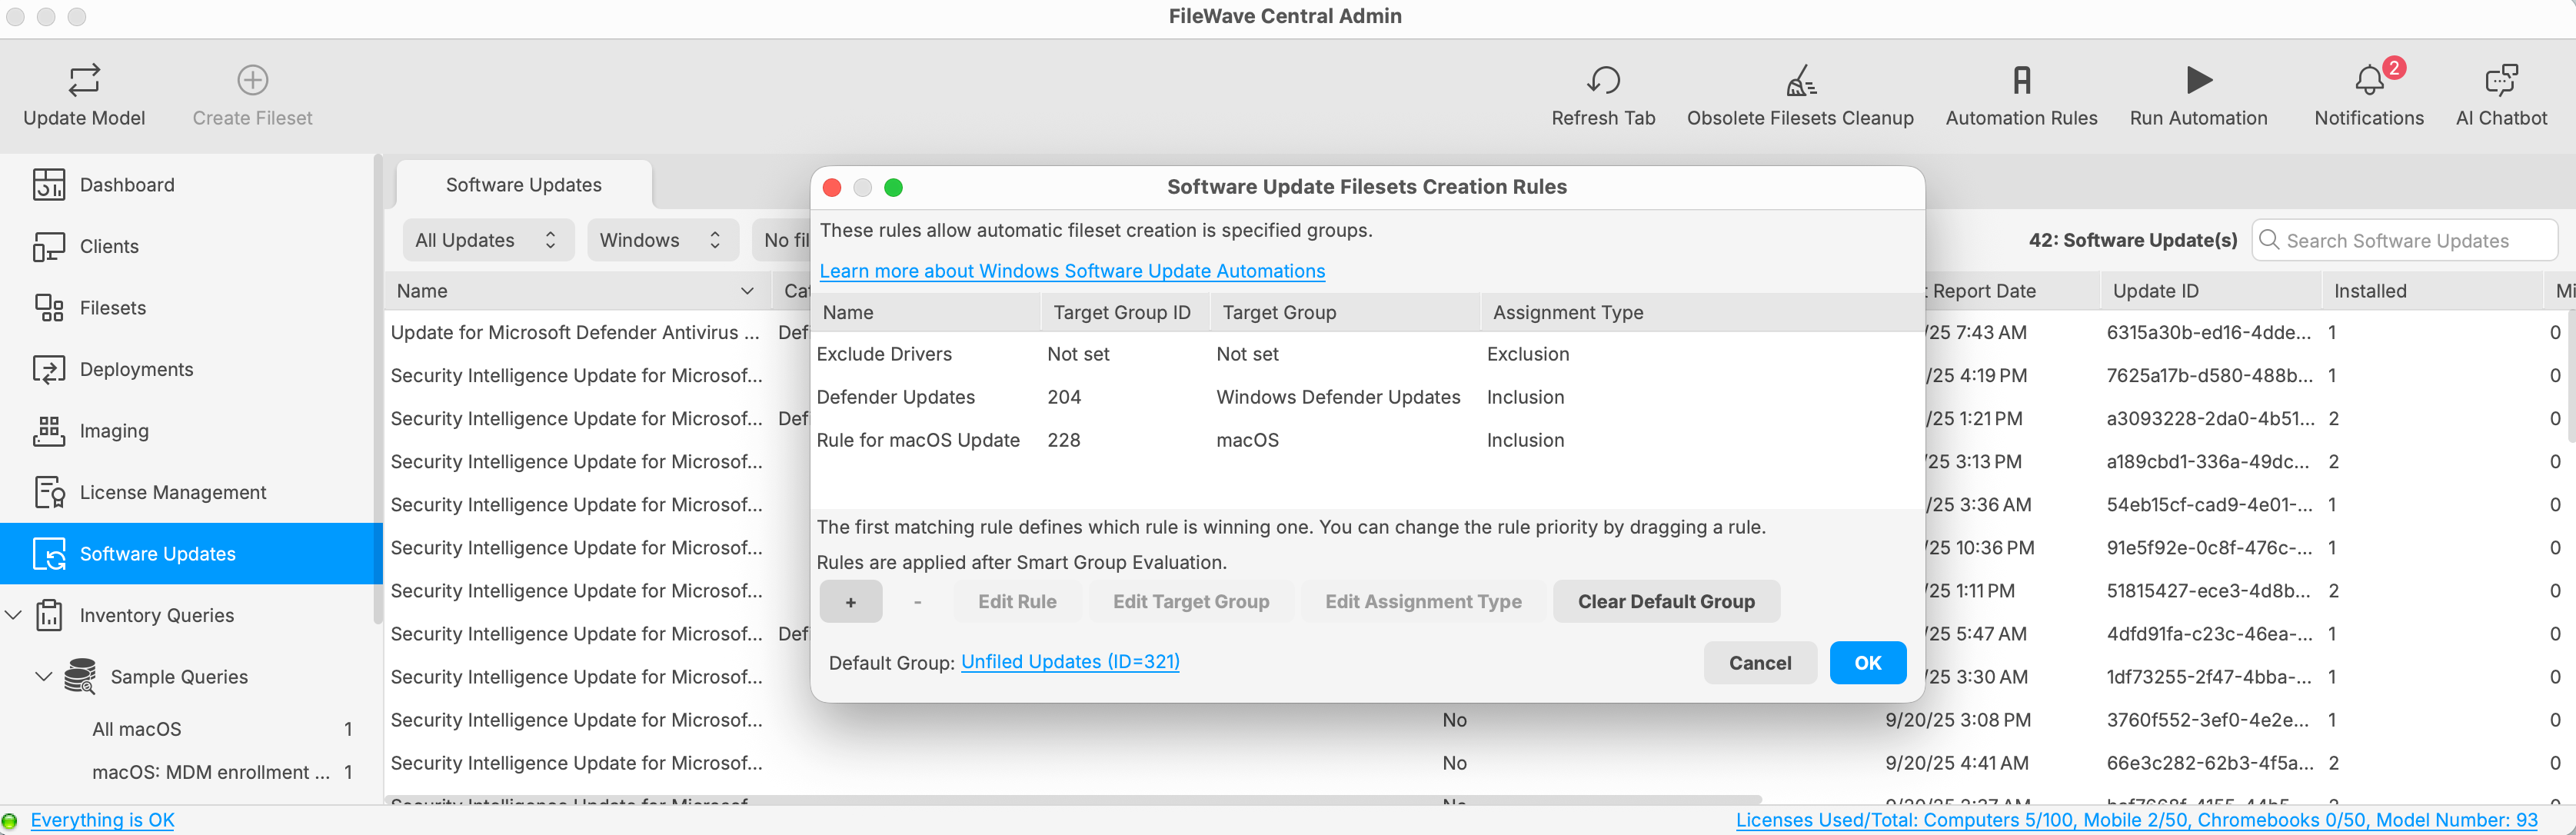
The example above has three rules: one exclusion rule, two inclusion rules, and a designated Default Group. Any updates marked as new that do not match the rules generate Filesets in the Default Group. This can help you identify new updates that were not handled by a specific rule.
If you do not set one, there is no Default Group.
Use the + and - buttons to add or remove rules. Select a rule to edit its target group or assignment type. If a Default Group is set, you can clear it.
If there is no Default Group, updates that do not match inclusion rules behave like exclusions: the 'Is New' flag stays set to 'Yes' and no Fileset is created.
Rules run from top to bottom. Exclusion rules prevent matching updates from being considered by later rules. The first matching inclusion rule generates a Fileset and sets the 'Is New' flag to 'No', so later rules no longer process that update. Only one Fileset is generated for each included update during a Run Automation pass.
Drag rules up or down to change the order.
Place exclusion rules at the top of the list to prevent Filesets from being created for updates that meet the exclusion criteria.
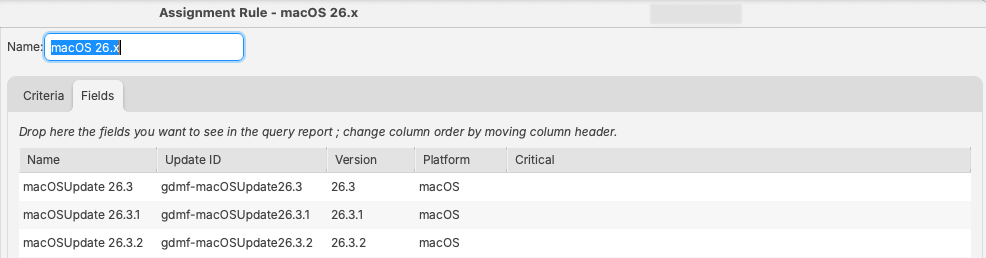
The rules view works like Reports (formerly Inventory Queries). Give each rule a clear name, then add criteria components to define which updates it should match:

The Fields tab lists updates caught by the rule definition:
Validate Automation Rules in FileWave 16.4
FileWave 16.4 improves rule creation and previewing so administrators can test policy intent before generating Filesets.
- Platform and category suggestions: When defining rule criteria, use the suggested values based on Software Update data known to the Server. Suggestions reduce spelling and category mismatches.
- Policy-to-update preview: Preview a Software Update Policy to see which reported updates match its criteria.
- Update-to-policy preview: From an update, review which existing policy Filesets already cover it before creating another Fileset or rule.
- Windows requested-update scope: Restrict the Windows auto-install preview to updates currently requested by managed devices when you want to test criteria against the environment’s current deployment requirements.
A preview does not create Filesets or run Automation Rules. Review exclusions, rule order, target Fileset Groups, and the Default Group before selecting Run Automation.
- Define or edit the rule criteria and use the platform/category suggestions where applicable.
- Open the preview and confirm that the expected updates match.
- For Windows, limit the preview to currently requested updates when validating against active device demand.
- Check whether existing policy Filesets already cover the updates.
- Correct the rule order or criteria before running Automation.
Example
Consider the following rules:
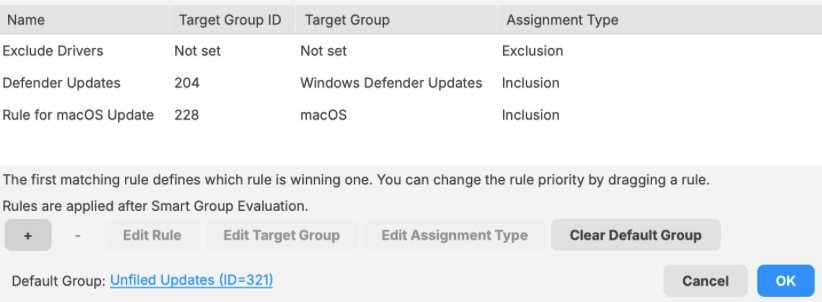
These rules run in the following order:
| Rule | Description | New |
| 1: Exclude Drivers | The criteria of this rule are set to ignore all Windows drivers. | Updates remain as 'New'. |
| 2: Defender Updates | This rule targets Windows Defender updates and places them in a similarly named Fileset Group for testing and assignment. | Updates altered to 'Not New' |
| 3: Rule for macOS Update | This rule adds all macOS updates to a Fileset Group named 'macOS'. | |
|
4: Default Group
|
Any updates that are still marked as new and do not match the rules above will have Filesets created in this group, 'Unfiled Updates'. This highlights updates that were new but did not match any rule criteria. |
Exclusion Example
As described above, excluded updates remain marked as new. Consider the following three rules:
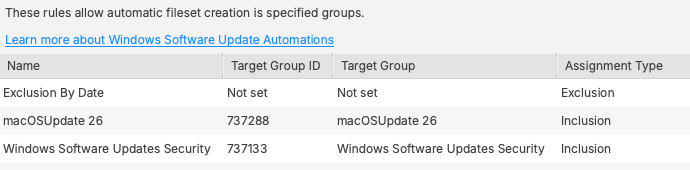
The macOSUpdate 26 rule includes all macOS 26 updates. The Windows Software Updates Security rule includes updates with the category 'Security Updates'.
The exclusion rule affects both of those later rules:
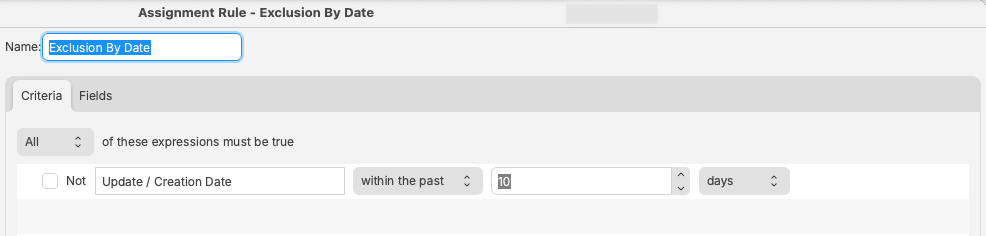
Only new updates older than 10 days are processed. Newer updates are ignored and remain marked as new. As time passes, those updates come into scope for the later rules and Filesets are generated.
This gives you a testing grace period, so brand-new updates are not processed even if you run Automation Rules.
Updates can be manually generated into a test Fileset Group.
Manual Fileset creation from the Software Update view also sets the 'Is New' flag as 'No'. Updates left untouched will remain as new and come into scope after the defined period of time.
Devices associated with the test group should receive the updates. After testing is approved, you can consider those updates for broader deployment.
For each approved update, manually reset the 'Is New' flag to 'Yes'. When the update comes into scope by date, Automation Rules can generate Filesets in the groups targeted by each rule. If an update is not approved, leave it set to 'No' so it is not included when the date scope is reached.
This method lets you pre-assign both test and production update groups, reducing follow-up manual work.
No comments to display
No comments to display