
Client Monitor (16.0+)
What
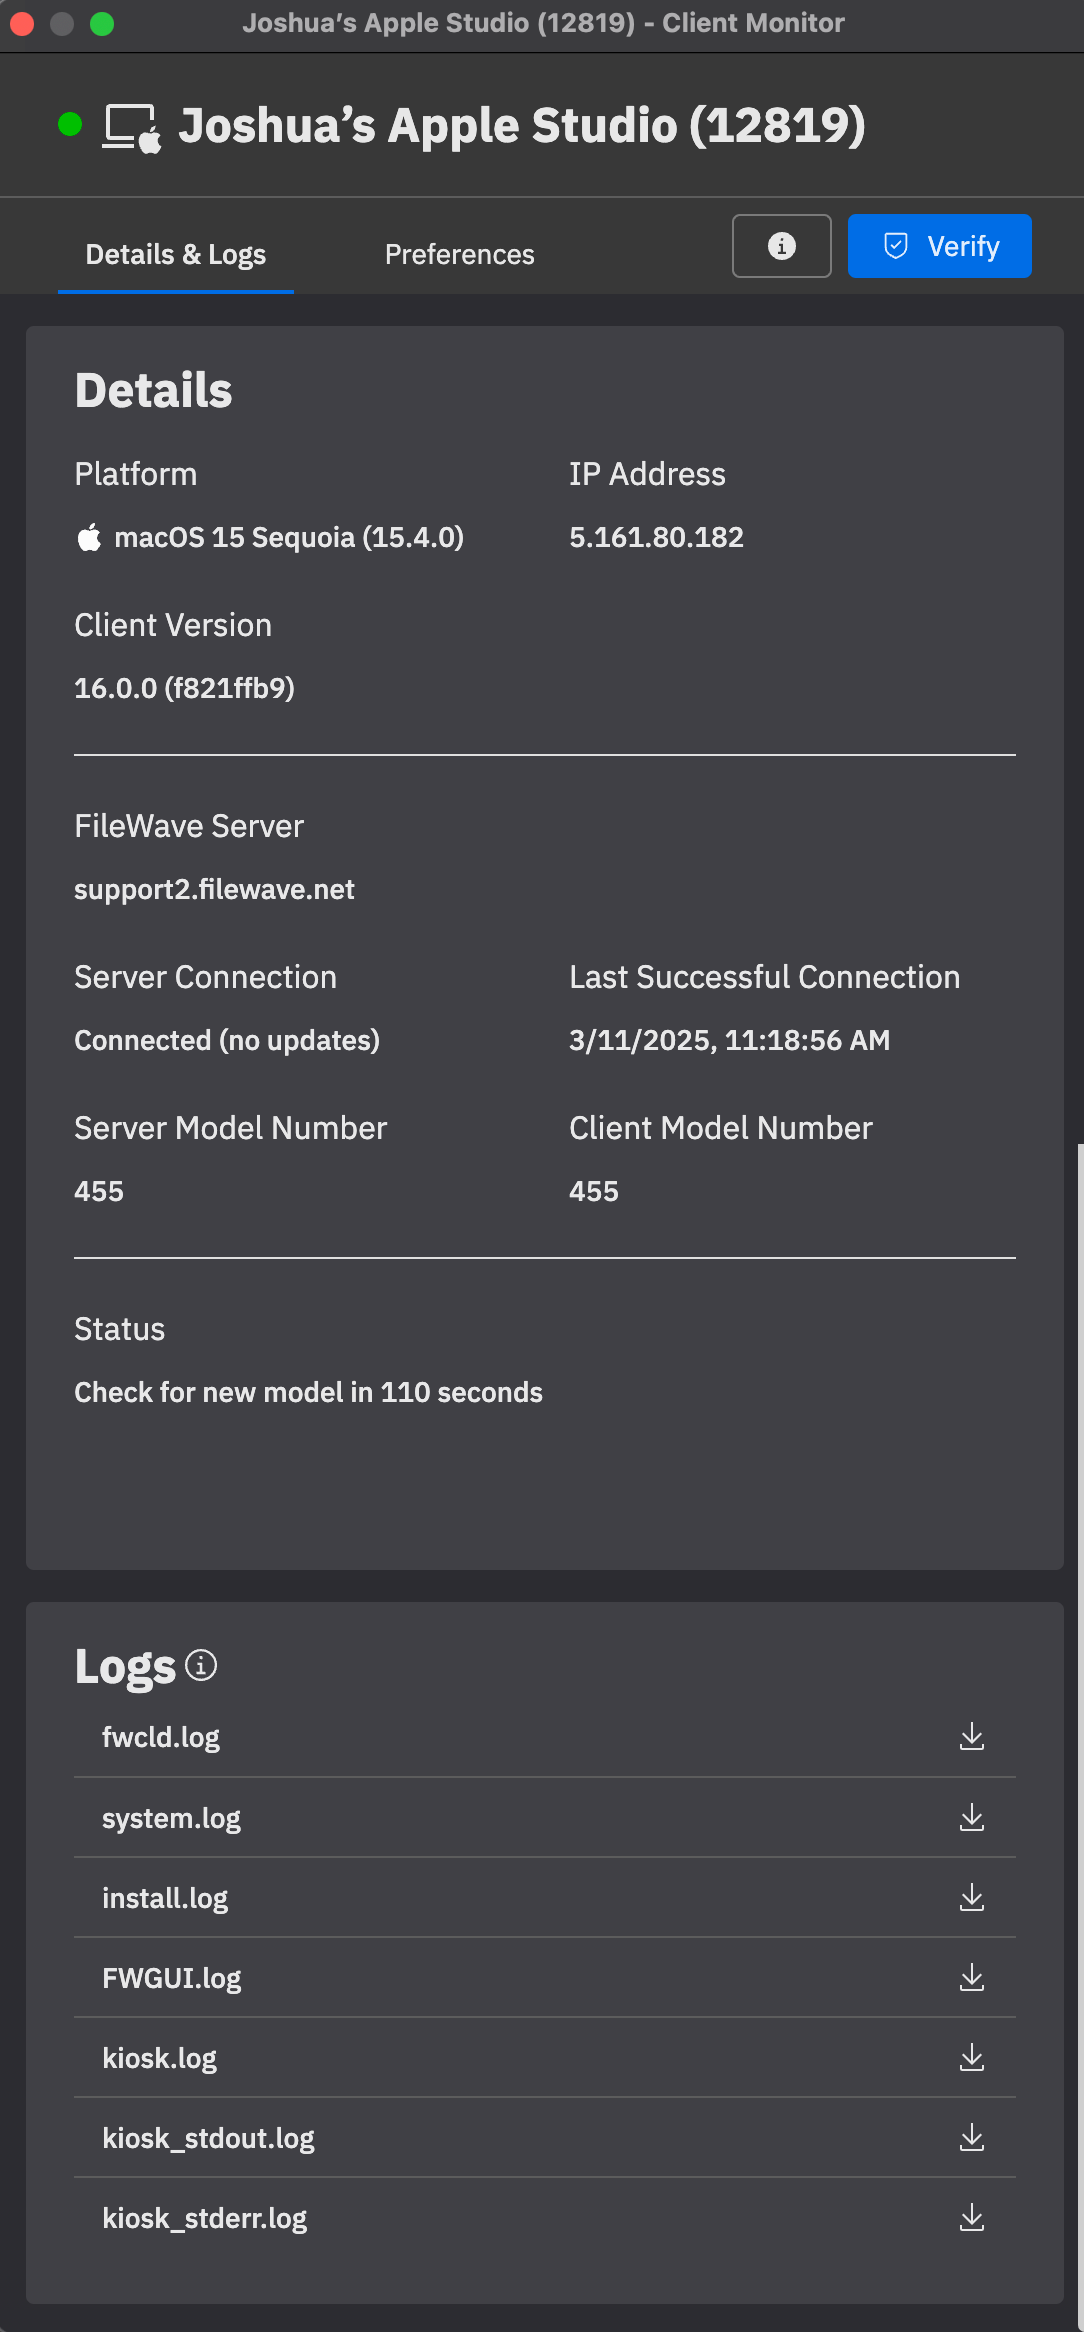
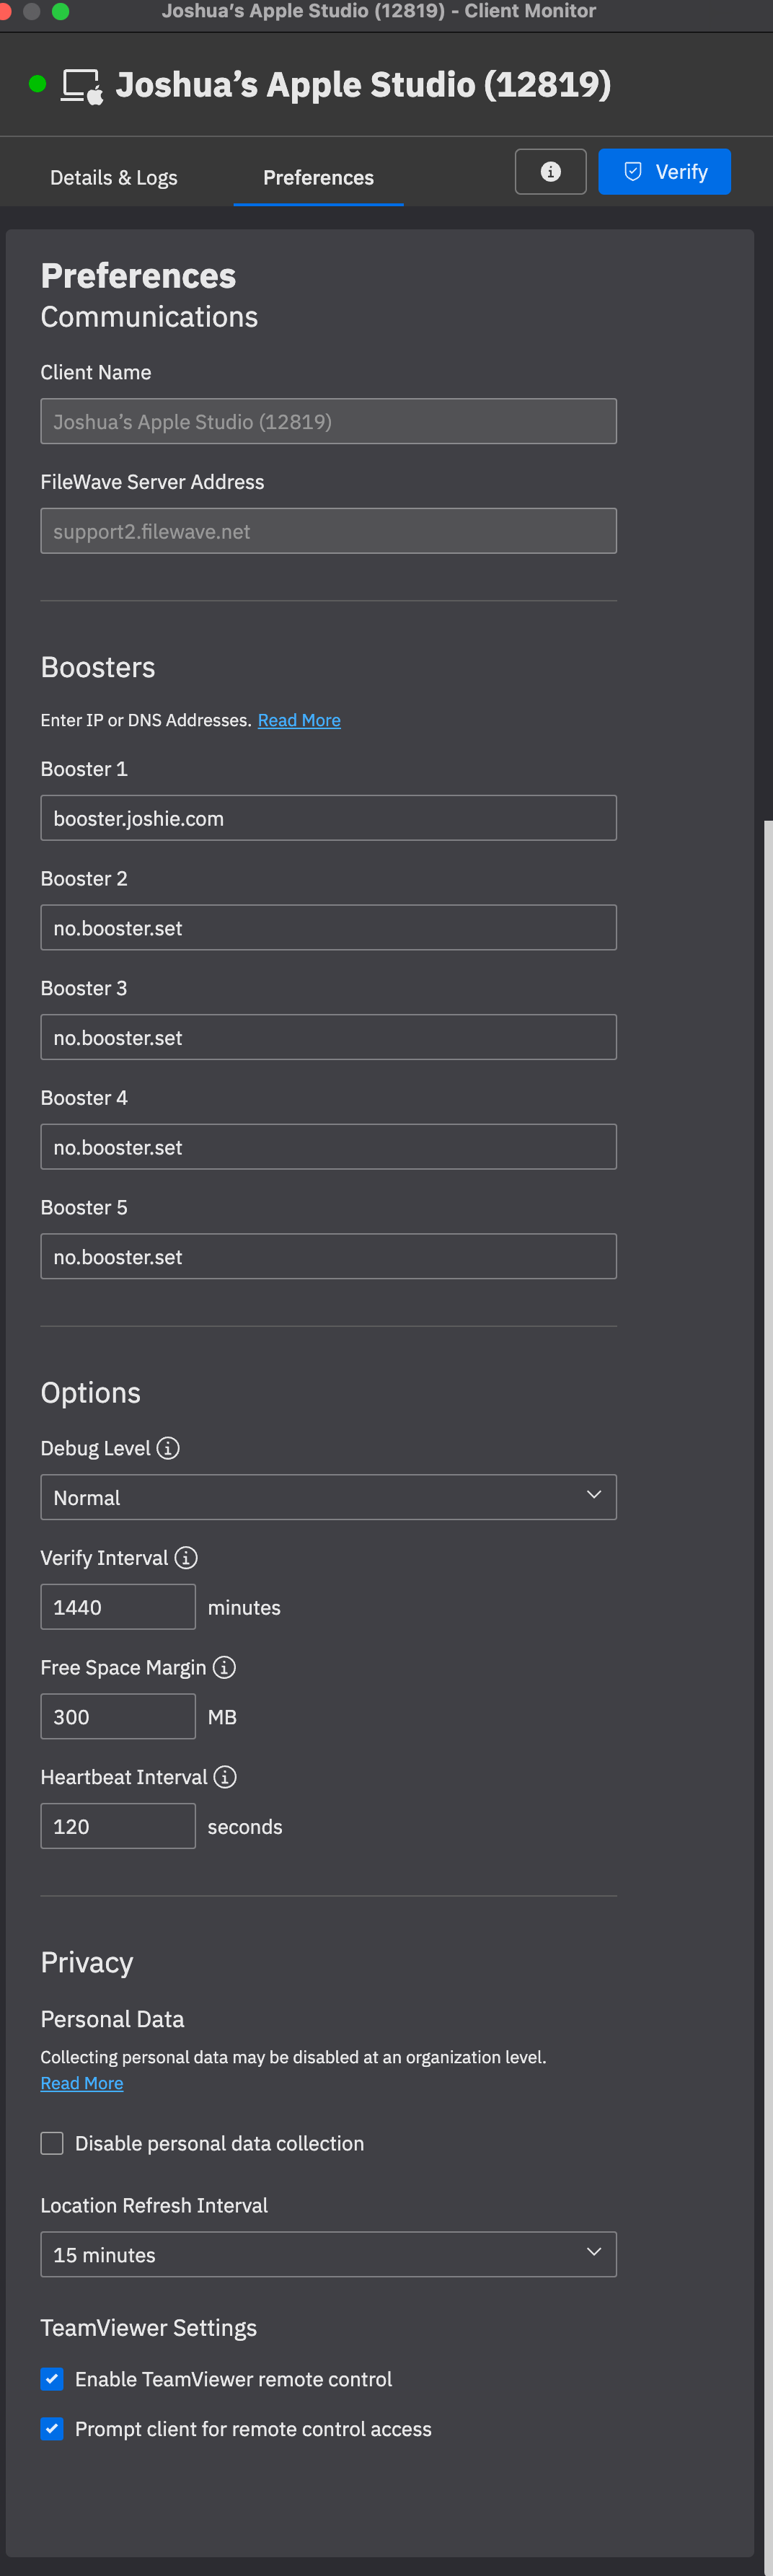
Client Monitor shows live FileWave Client connectivity, status, model information, logs, and selected client settings. FileWave 16.0 introduced the current Central and Anywhere experience, using the server-mediated connection to reach supported clients across network boundaries. The current view combines connection health, model state, activity, and downloadable logs in one place, while Preferences exposes the settings an authorized administrator can modify.
FileWave 16.0 and later: The current Client Monitor does not use the legacy Client Preferences password when connecting to FileWave Clients running 16.0 or later.
When/Why
Use the Client Monitor to monitor and troubleshoot device connectivity, whether on local networks or remote environments. The enhancements in FileWave 16.0 improve:
-
NAT Compatibility – Visibility into devices across remote networks without additional configuration.
-
Security – Strengthened authentication and encryption for safer device management.
-
User Interface – A modernized layout for easier navigation and usability.
-
Troubleshooting – Detailed logs and insights for faster issue resolution.
Legacy targets: FileWave Central installations still include the standalone Client Monitor for macOS and Windows clients earlier than 16.0. It also remains the monitoring path for a FileWave IVS used for Windows Imaging in the documented 16.0 workflow.
How
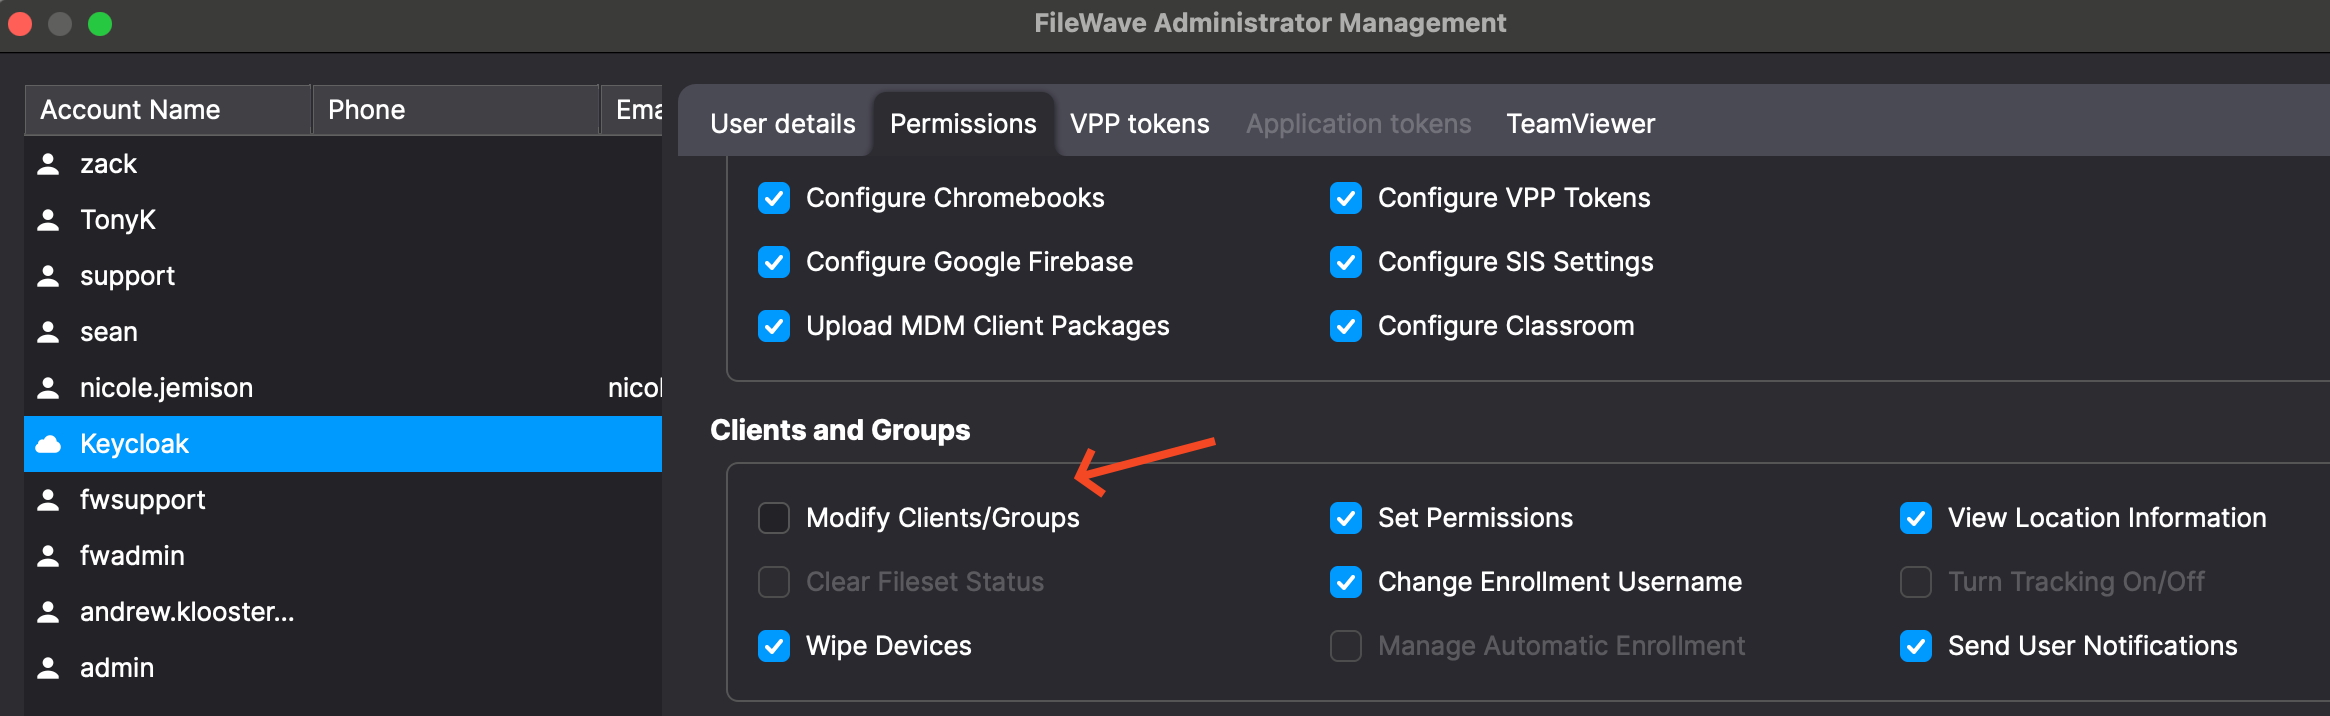
The Modify Clients/Groups administrator permission controls whether Client Monitor can change client settings. Without it, an administrator can monitor the client but cannot save settings changes.
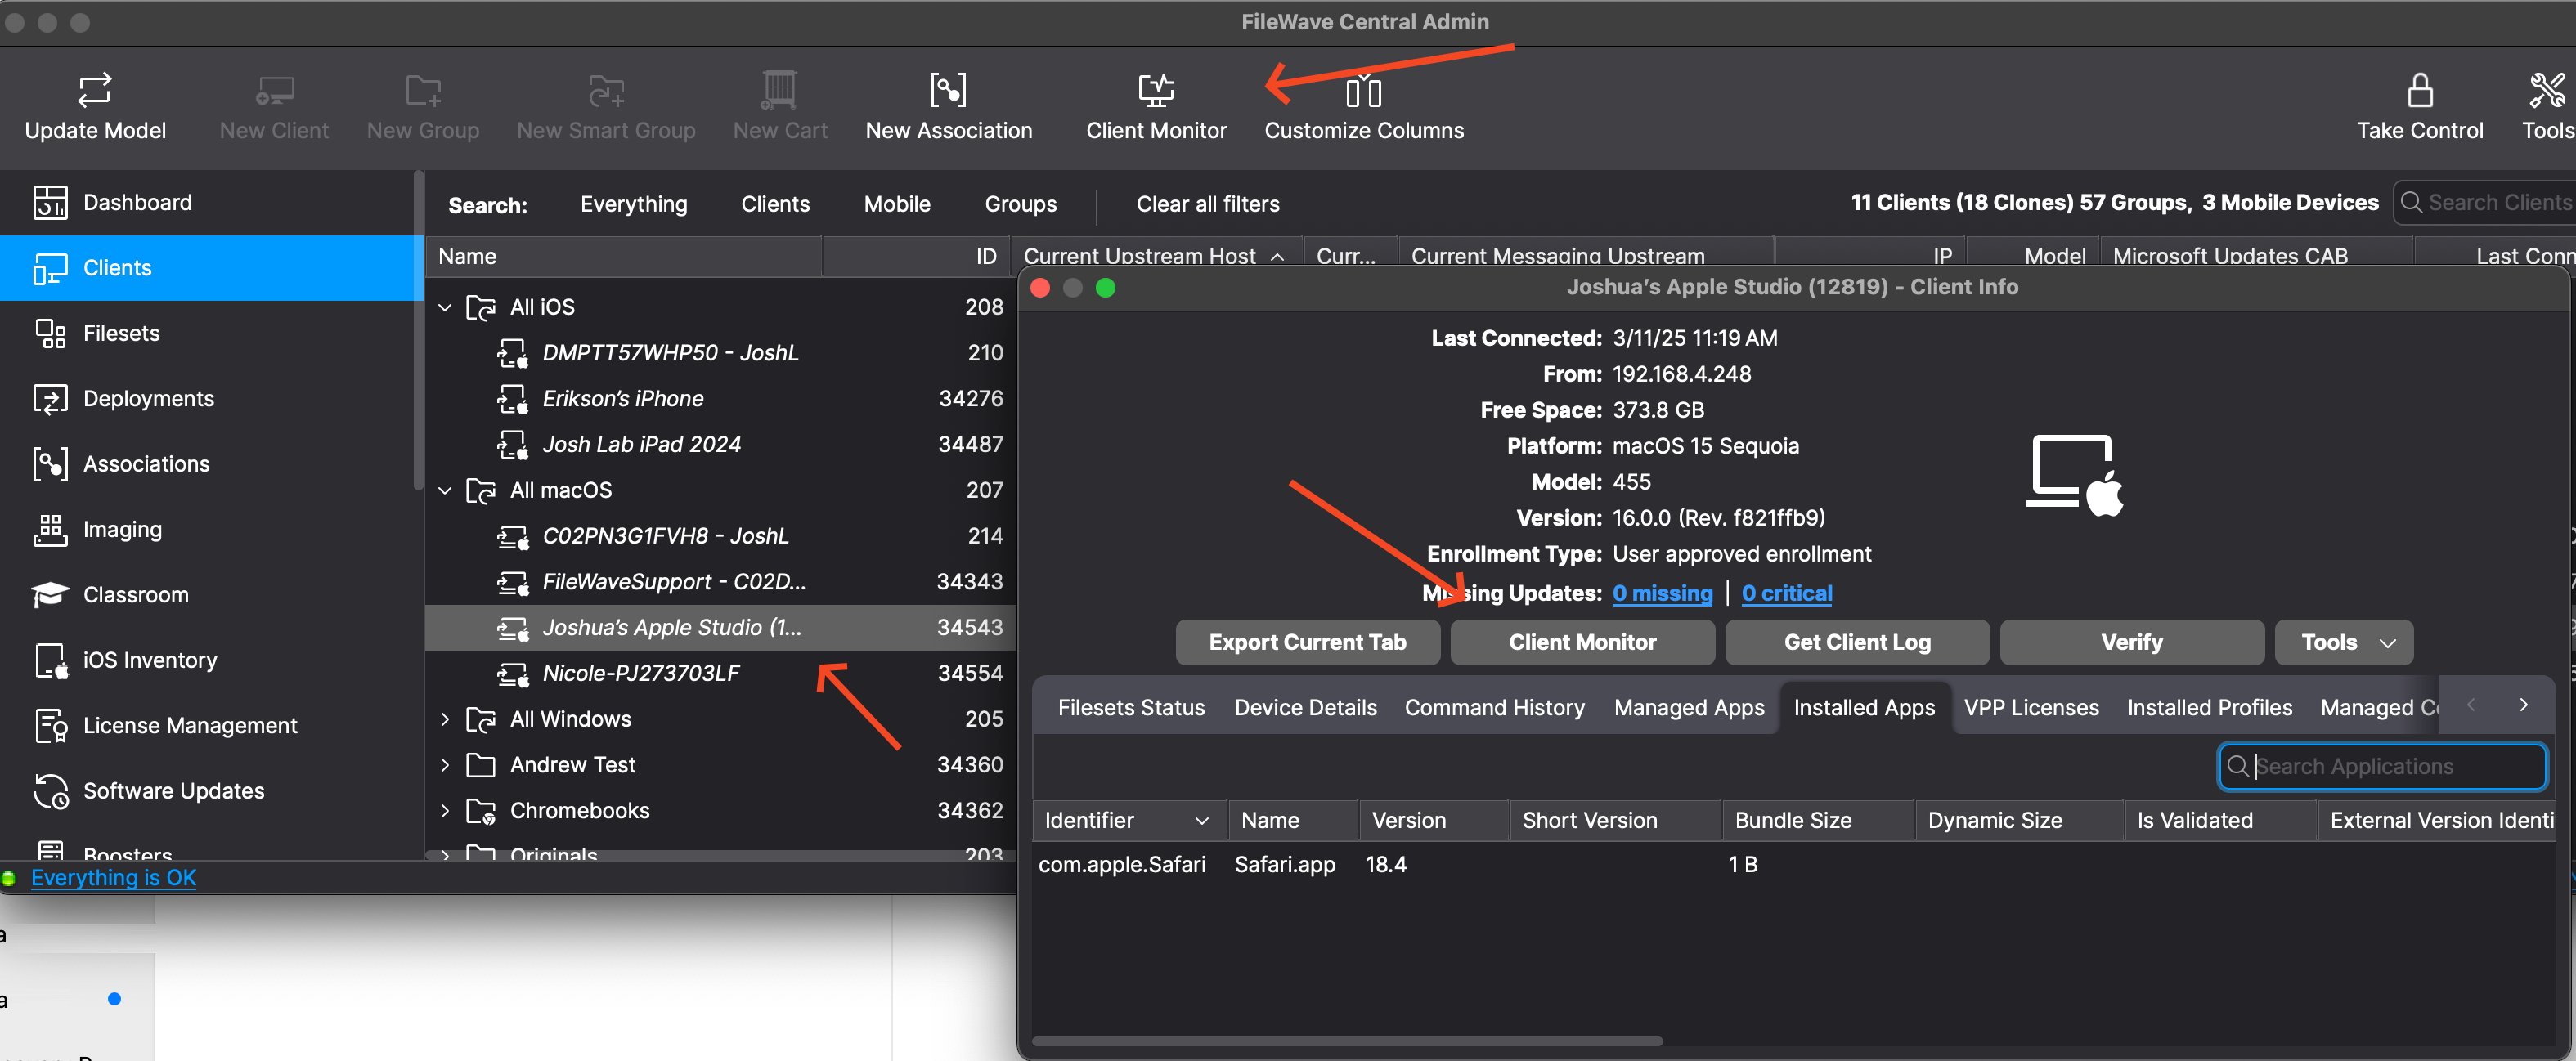
Open Client Monitor from either FileWave Central or FileWave Anywhere. In Central, use the Client Monitor toolbar button or open it from Client Info.
The current Client Monitor cannot connect to macOS or Windows clients earlier than 16.0. Use the standalone Client Monitor installed with FileWave Central for those older clients.
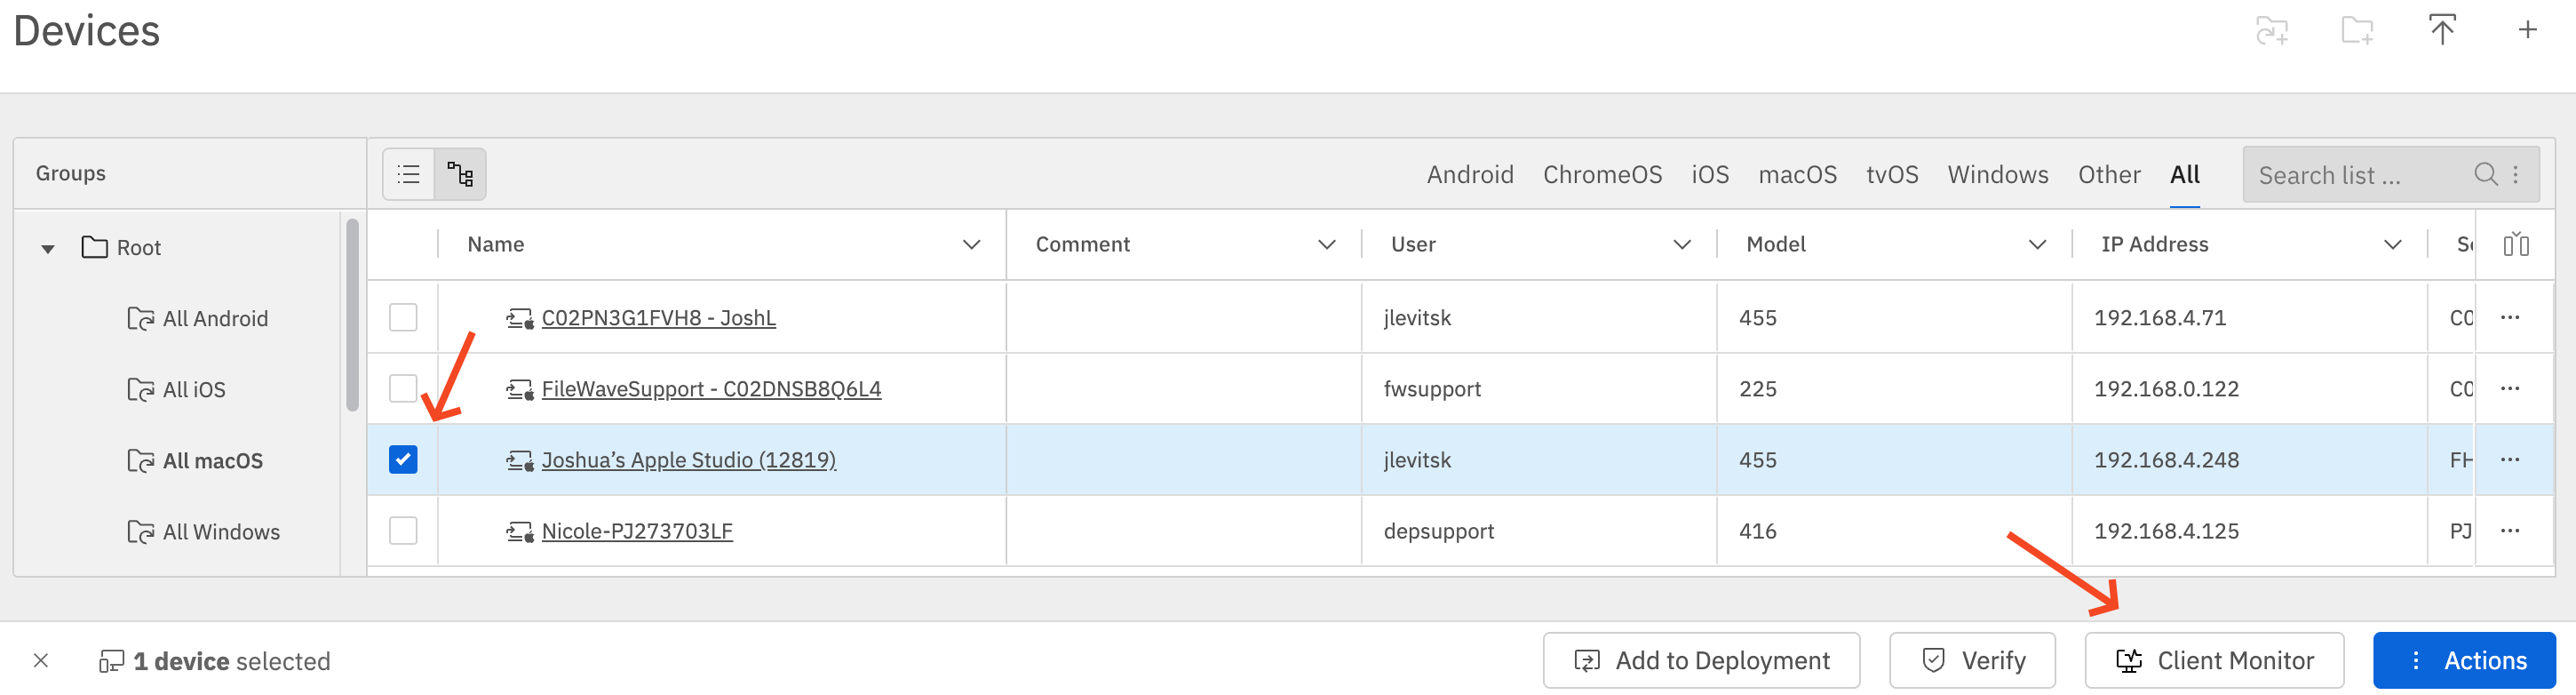
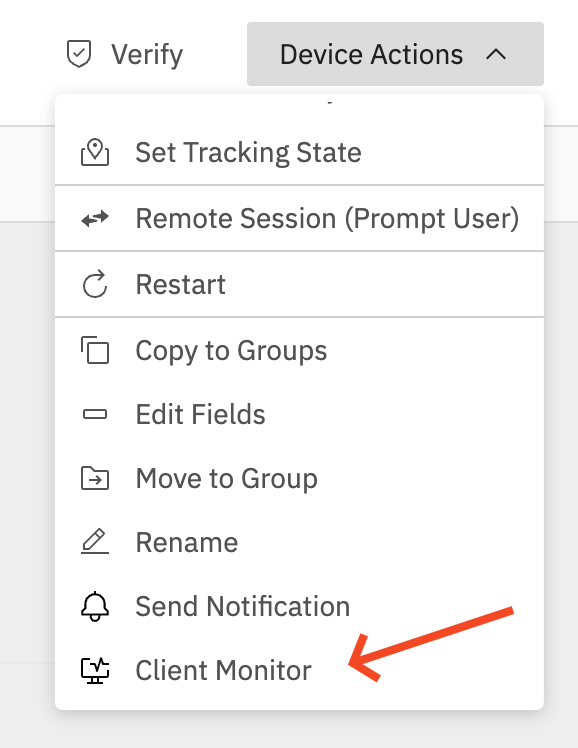 In FileWave Anywhere you can select a client and then pick the "Client Monitor" button. In FileWave Anywhere you can also use the Device Actions menu when viewing a device to launch it. Both methods provide quick access to the Client Monitor.
Client Monitor supports up to 50 devices in one monitoring session. For broader fleet checks, use inventory and reporting rather than opening simultaneous live sessions.
The Client Monitor has two main tabs—let’s take a closer look below.
Details & LogsThis tab provides real-time information about how the FileWave Client is performing on macOS or Windows devices. One of the biggest improvements in the new Client Monitor is its use of a NATS connection, allowing you to monitor devices even if they are on a different network. This eliminates the need to manually enter an IP address and removes the limitation of only monitoring devices you can directly connect to within your local network.
Key features in this tab:
|
|
Preferences
This tab provides the client settings that the current administrator is allowed to change. We’ve streamlined this section to make adjustments more intuitive and effective.
Key settings include:
|
|
No comments to display
No comments to display